
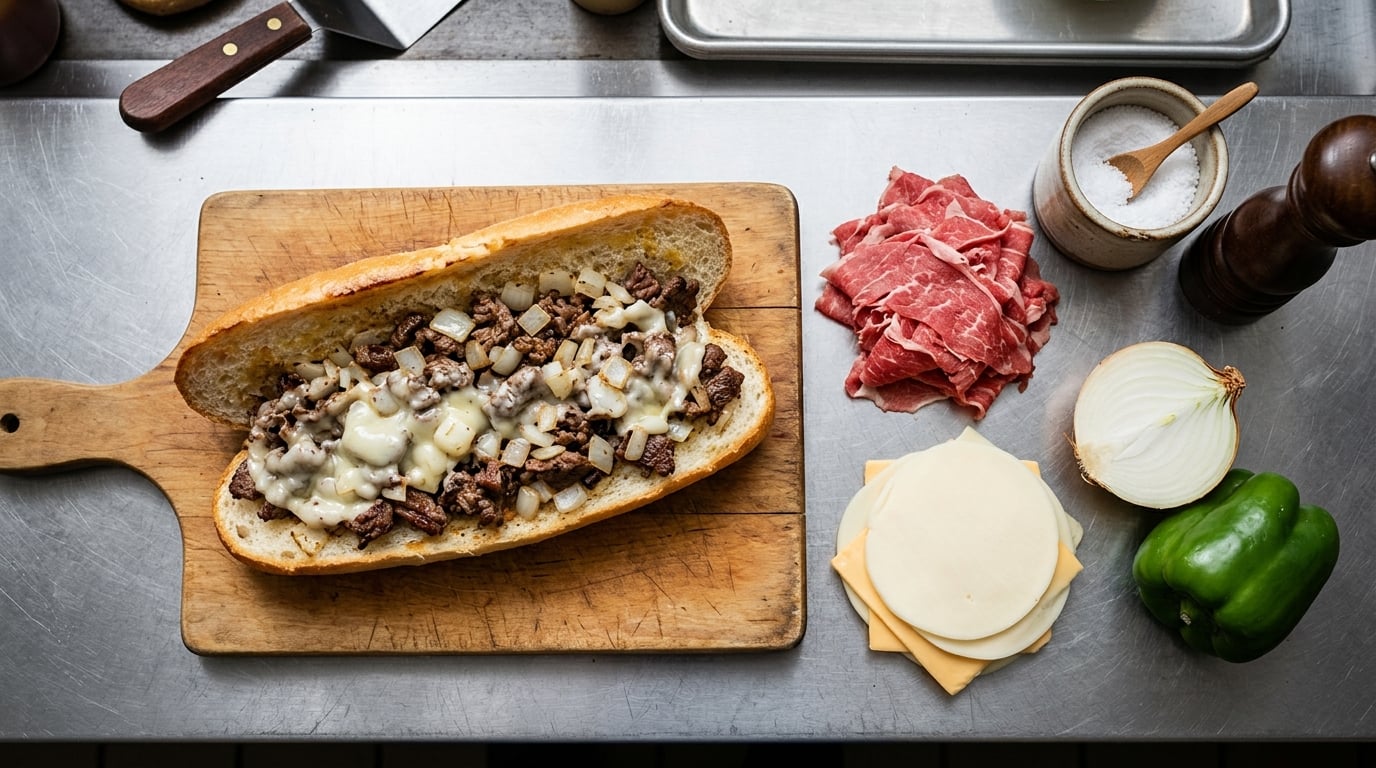
A Philly cheesesteak at home is paper-thin shaved beef seared on a very hot griddle with chopped onions, buried under melted provolone, and slid into a soft, un-toasted hoagie roll. Thirty minutes start to finish, and the only genuinely hard part is getting the beef thin enough before it ever meets heat.
Most home attempts fail for the same handful of reasons: the beef is cut too thick, the pan is not hot enough, the cook salted too early, or somebody toasted the roll. Those are all fixable. What is harder to fix is the slicing, so start there, and decide in advance how much beef you need.
The good news is that a home griddle does not have to be a flat top. A cast iron skillet or a heavy stainless pan gets you the same result if you let it get properly hot and you do not crowd it.
Table of Contents
What You Need to Make a Philly Cheesesteak at Home
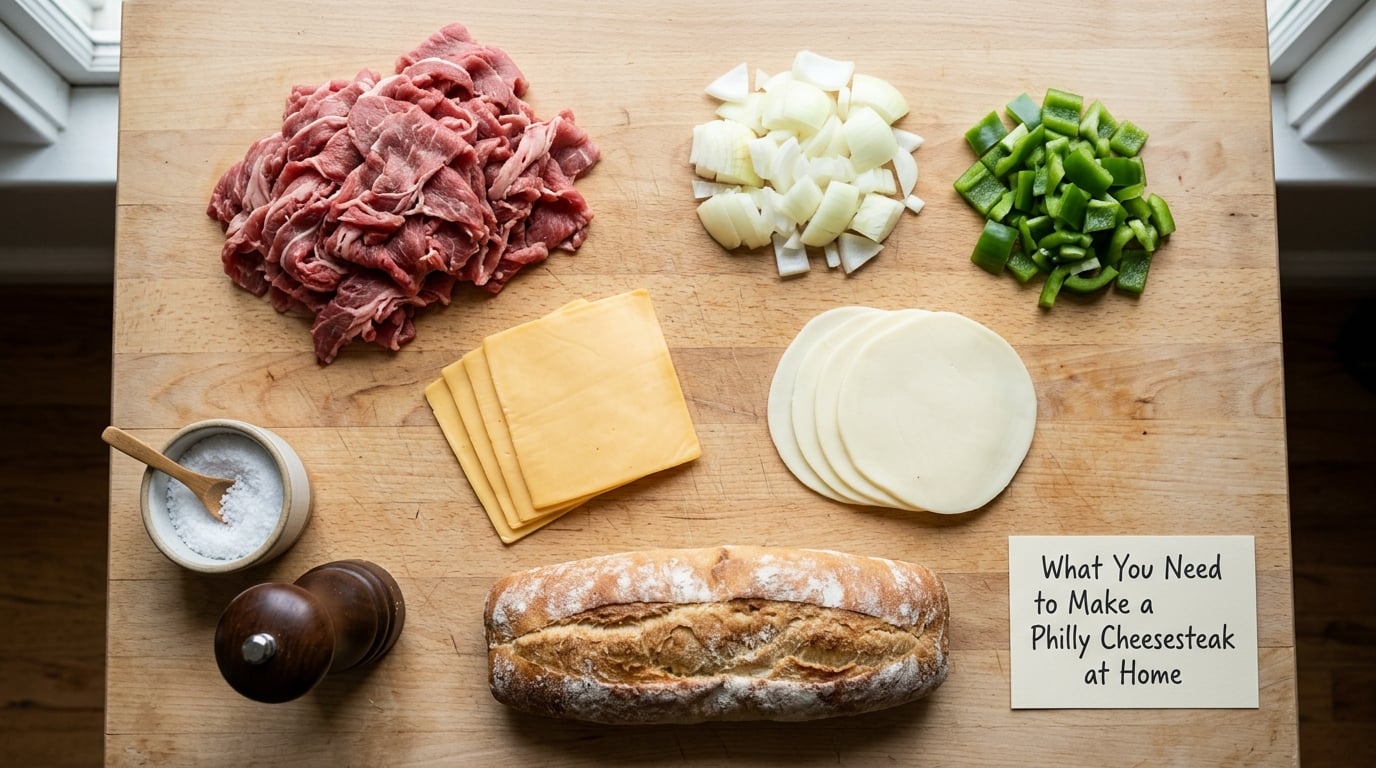
For four sandwiches you want about 24 ounces of beef. Shop counters figure it closer to 5 to 6 ounces of raw ribeye per sandwich, since a little shrinkage happens on the griddle. A 2 pound steak covers four generously or six moderately.
Here is the short shopping list, grouped the way a shop counter would group it.
Beef
Ribeye is the classic choice, ideally the eye of the rib or a boneless ribeye steak. Sirloin is what a lot of Philadelphia shops actually use, and it is cheaper, leaner and easier to slice. Skirt steak and top round both work. Whatever you pick, buy it as a whole piece, not pre-chopped.
Onion and peppers
One medium white onion, diced small. Green pepper is optional and, in a real Philly shop, not traditional. Mushrooms, lettuce, tomato and bacon are variations, not the baseline.
Cheese
Provolone is the most common. American cheese, particularly Cooper Sharp, is the other classic because it melts smooth instead of breaking into strings. Cheez Whiz shows up in a lot of Philadelphia shops too. Two slices per sandwich is normal, and three is not a mistake.
Bread
An 8 to 10 inch round or long Italian roll, sometimes called a hoagie roll. Amoroso is the canonical brand. A long sub roll or a Vietnamese bahn mi roll both stand in fine.
Fat and seasoning
Beef tallow or a neutral oil for the griddle, kosher salt, and coarse black pepper. That is the whole seasoning list. Ask a Philly native and you will get the same answer: salt and pepper, and nothing else. Optional additions are a small splash of Worcestershire sauce and a pinch of garlic powder, both of which most regulars would call a deviation.
Tools
A sharp chef’s knife, a cutting board, two metal spatulas (one wide, one narrow or offset), a griddle or heavy cast iron skillet, tongs, and a digital thermometer if you want to check the meat.
What actually makes it taste like Philly
| Decision | What a real shop does | What home cooks get wrong | Verdict |
|---|---|---|---|
| Beef cut | Ribeye or sirloin, whole piece, hand-sliced | Pre-ground beef or thick-cut steak | Ribeye or sirloin, always hand-sliced |
| Slice thickness | Deli thin, close to translucent at the edges | Quarter inch, which turns chewy | Paper thin, the whole game |
| Cook method | Fast chop-cook on a ripping-hot flat top | Low and slow, or a crowded pan | Hot surface, small batches |
| Cheese | Provolone, American or Cheez Whiz, melted on the meat | Cheese added to the bread | Melt it on the pile |
| Bread | Un-toasted so it drinks up the drippings | Toasted until crisp | Un-toasted, or warmed only |
| Seasoning | Salt and pepper, added late | Salting the raw beef hours ahead | Salt at the end, lightly |
Three ways to get the beef thin enough
Ranked by how thin the result is. A deli slicer produces the real thing, a request like that takes thirty seconds and most grocery meat counters will do it. Freezing the steak for 30 minutes and slicing it with a sharp knife against the grain is the practical home route, and cold beef genuinely cuts thinner. Buying a pre-shaved steak pack from the grocery case skips the hardest step entirely and is what most weeknight cooks should do; it is slightly less flavorful because the cut is usually less well marbled, but it is a cheesesteak.
Step-by-Step: From Cold Beef to a Finished Sandwich
Step 1: Choose and Prep the Beef
Trim off any large chunks of silver skin and hard outer fat, then lay the beef flat and slice it across the grain. The grain runs in one direction; if you turn the meat over, it flips. Thin slices are what let the beef cook quickly and drink up the juices from the pile.
If you froze it first, give it 15 to 20 minutes to firm up but not freeze solid. The texture should be firm and slightly tacky to the touch. Wipe the slices dry with paper towels, because surface water is the enemy of browning.
Step 2: Make the Chopped Meat Mixture
Stack the slices and run the knife through them repeatedly, chopping crosswise, until the beef is a fine mince with pieces no larger than a small pea. This is the step people skip and the reason home cheesesteaks taste wrong. Long ribbons chew for a week; a loose mince reads as one cohesive filling.
Keep the pile loose and do not squeeze it into a ball. Density is what steams instead of sears.
Step 3: Prep and Season the Toppings
Dice the onion into small pieces, roughly a quarter inch, and slice the pepper the same way if you are using it. Pat both dry. Wet onion releases water onto the griddle, and water is the other half of why home cheesesteaks turn gray and greasy rather than savory.
Step 4: Saute the Onions and Peppers
Heat a thin film of tallow or oil in the pan, add the onion and pepper, and toss constantly over medium-high heat. They are done in 3 to 4 minutes, when soft and lightly browned at the edges. Cook them until tender, not until they shrink into dark strands; a mahogany onion on a sandwich is bitter, and it is not what Philadelphia serves.
Push the vegetables to one side of the pan or scoop them onto a plate. You will add them back after the beef cooks.
Step 5: Chop-Cook the Beef on a Hot Griddle
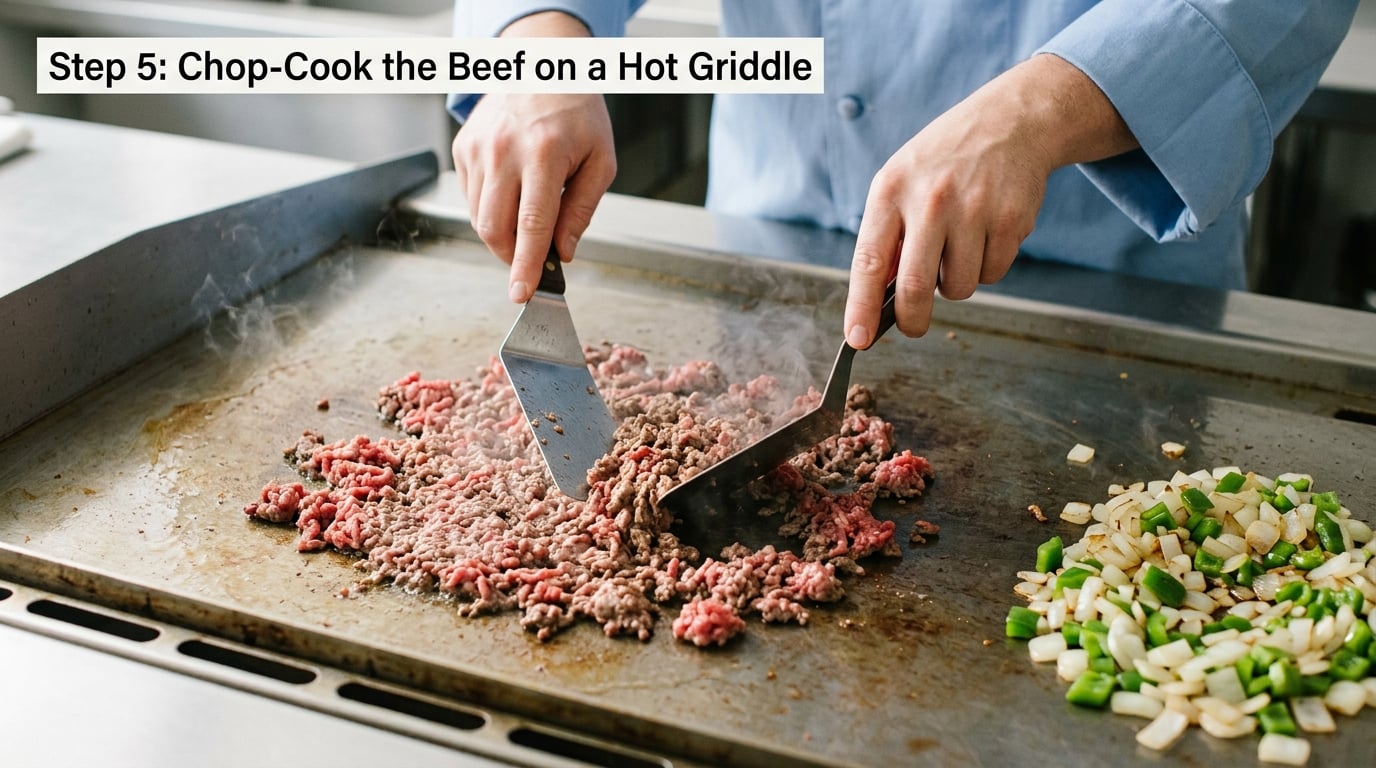
Turn the heat up and let the surface get properly hot. If you can flick a drop of water and it skitters and evaporates in a second, you are close. Add a little more fat, then spread the chopped beef in a thin, even layer and leave it alone for about 30 seconds so it sears.
Now break it up with two spatulas, chopping rather than stirring, and keep moving it. The beef is ready when the outside is browned and the interior is barely pink, usually 3 to 5 minutes depending on how hot your pan actually is. Look for a color change from red to brown and for the pan juices to run clear rather than pink.
Because this is thinly sliced whole beef, keep the USDA safe minimum internal temperature of 145°F (63°C) in mind. That temperature is easier to hit honestly on the intact slices before chopping than on the loose mince, so if you want a thermometer check, cook a couple of slices first, verify, then chop the rest. Pressed thin on a hot griddle, a quick sear is typical Philadelphia technique, and it is a judgment call you will get better at with a few sandwiches.
Step 6: Add Cheese and Melt It
Pile the chopped beef into a mound about the length of your roll, then lay two slices of cheese on top of the pile, not on the bread. Residual heat from the beef and the hot pan underneath will soften the edges and let the cheese drape over the meat within 30 to 60 seconds.
If the cheese is sitting stiff, splash a tablespoon of water onto the hot pan away from the meat, cover loosely for 20 seconds, and the steam will finish the job. Watch it, though, because steam collects condensation and a watery filling is worse than cheese that took ten extra seconds.
Scrape and toss the beef, cheese, and onions together right on the griddle. Season now with a light pinch of kosher salt and a decent amount of coarse black pepper. Salt at the end pulls less water out of the meat than salting it raw hours earlier, which is one of the biggest single differences between a good cheesesteak and a dry one.
Step 7: Toast the Roll and Assemble Your Philly Cheesesteak at Home
Cut the roll lengthwise and warm the cut faces briefly on the griddle. You are after a little crispness, not a toasted roll. A fully toasted roll has a crust that repels juice, and a cheesesteak lives or dies on the bread soaking up the drippings at the bottom of the pile.
Spoon the meat, cheese, and onion mixture into the center of the roll, then scoop up whatever is left on the griddle and put it in too. That last bit of fat and beef is the best part. Eat immediately, while the bread is soft and the cheese is still moving.
Assemble and serve without stacking. If you must hold sandwiches for a few minutes, lay them seam-side down on a rack over a tray so the bottom bread breathes instead of steaming, and keep the pile uncovered. A foil-wrapped cheesesteak sitting for fifteen minutes will give you a soft, wet roll and a wrapper full of condensation.
Common Mistakes That Ruin a Philly Cheesesteak at Home
Almost every disappointing cheesesteak traces to one of these. Each one has a specific fix rather than a general instruction to cook better.
The meat is chewy and tough. It was sliced too thick, salted too early, or the pan was too cool. Slice thinner, freeze first, and salt at the end. Thickness is the culprit nine times out of ten; a quarter inch of beef will never soften in the ninety seconds a griddle gives you.
The filling is wet and greasy. Too much beef in the pan at once, or vegetables added raw on top. Cook in batches so the meat touches the surface in a thin layer, and drain the finished filling on a rack or in a slotted spoon for ten seconds before it goes in the roll.
The cheese slides out in slices. It went in too early or it sat in the pan too long, so it went rubbery and released. Add it to the pile for the last 30 to 60 seconds, and pull the pile off the heat once the edges soften and drape.
The bread is soggy and tears. Usually two causes together: a fully toasted roll and a wet filling. Warm the cut face only, drain the meat, and serve right away. If you are packing it for a game-day crowd, hold the meat and cheese separate and build sandwiches to order.
It tastes flat. You under-salted. The single most useful trick, borrowed from the au jus tradition, is a small splash of Worcestershire sauce or a spoon of pan drippings stirred into the finished filling. It is a deviation from a strict Philly shop, and it fixes the most common home complaint about seasoning.
Long ribbons of beef instead of a fine mince. You sliced, but you did not chop. Take the pile and run the knife through it crosswise two or three more times before it hits the pan.
The whole thing came out gray and limp. The pan was not hot enough, or the beef sat in a mound and steamed in its own liquid. Get the surface properly hot before the beef goes down, and keep it moving with spatulas the entire time.
For make-ahead, cook the beef, onion, and cheese fully, cool it uncovered on a sheet pan, and refrigerate it. Use it within 3 to 4 days. Cooked cheesesteaks do freeze reasonably well if you freeze the filling on its own and hold the rolls separately; assemble and toast briefly from frozen rather than freezing an assembled sandwich, which turns the bread to cardboard.
Frequently Asked Questions
What is the best beef for a Philly cheesesteak?
Ribeye is the classic answer and its marbling keeps paper-thin slices juicy, but sirloin is what a lot of Philadelphia shops use day to day. Skirt steak and top round also work well. Whatever cut you choose, buy a whole piece and slice it thin yourself, because pre-ground beef and pre-packaged steak strips do not behave the same on a griddle. For four sandwiches, plan on about 24 ounces of raw beef.
Do I need to tenderize beef before making a cheesesteak?
No, and most Philadelphia shops do not do it either. The beef cooks in under a minute on a hot griddle, so a chemical tenderizer is unnecessary. What matters is cutting against the grain and slicing thin enough. If the meat still feels tough, the answer is thickness, not tenderizing. A brief soak in salt solution is not traditional and can leave the surface wet enough to steam instead of brown.
What cheese is best for a Philadelphia cheesesteak?
Provolone is the most common choice, and it gives a clean, mild flavor that does not fight the beef. American cheese, especially Cooper Sharp, is the other classic because it melts into a smooth sauce rather than forming strings. Cheez Whiz appears on many Philadelphia counters and is a genuinely good option. Use two slices per sandwich as a baseline, and do not be shy about a third.
Can I make a cheesesteak with frozen steak?
Yes, and frozen is actually the easiest way to slice beef thin at home. Freeze the steak uncovered for 30 minutes, or overnight if you are planning ahead, so it firms up without getting icy. Let it sit 15 to 20 minutes before cutting and slice across the grain with a sharp knife. Buying a pre-shaved steak pack is the same idea taken further, and it skips the slicing entirely.
Why does my cheesesteak meat turn out chewy?
Chewing is almost always a thickness problem. Beef sliced at a quarter inch or thicker cannot soften in the minute or two a griddle gives it, no matter how well you season it. Other contributors are salting the raw beef too early, which draws out moisture, and crowding the pan, which cooks the meat in its own steam. Slice thinner, salt at the end, and cook in batches on a properly hot surface.
How long can I store a Philly cheesesteak?
Refrigerate the cooked filling, cooled and uncovered at first, and use it within 3 to 4 days. Keep the rolls separate, because steam trapped against the bread is what makes it turn to mush. For longer storage, freeze the beef, onion, and cheese mixture on a sheet pan, then bag it; freeze the filling rather than the assembled sandwich and warm the roll separately. Reheat in a hot pan, not a microwave.
Conclusion
Four decisions carry almost all of the flavor. Slice the beef thin enough that you can nearly see light through it, chop that mince finely so there are no long ribbons, cook it in a thin layer on a properly hot surface without crowding, and add the cheese near the end so it melts onto the pile. Leave the roll un-toasted, salt late, and eat it in the next five minutes.
Once the slicing feels routine, this stops being a recipe and starts being a thirty-minute dinner.