
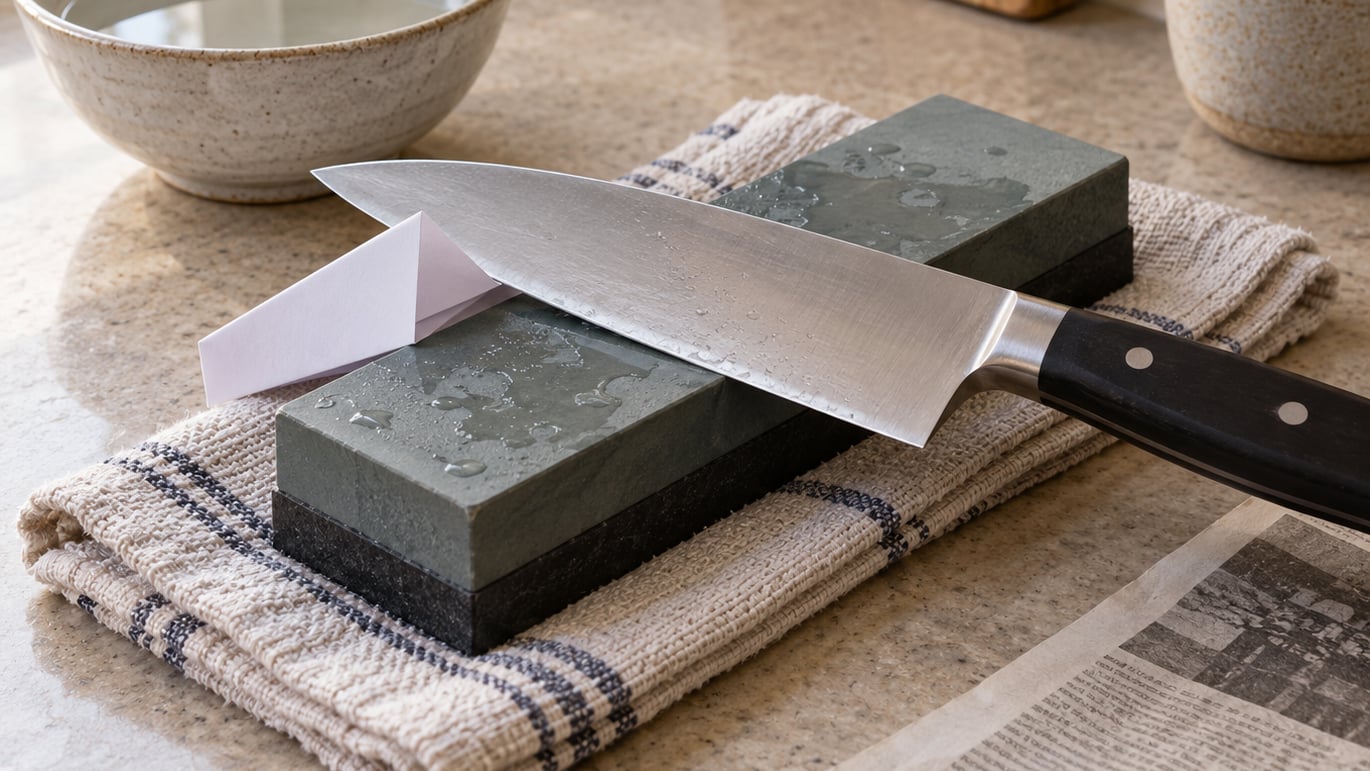
To sharpen a kitchen knife, soak a whetstone for 5-10 minutes, lay it on a damp towel, and hold the blade at roughly 15-20 degrees to the stone. Work heel to tip with even pressure until a burr forms on the opposite side, flip, repeat, then refine on the fine side. Budget about 20 minutes for the first attempt.
A dull knife is not just slow. It crushes tomatoes instead of slicing them, and it slips sideways on onion skin far more often than a sharp one does, which is how most kitchen cuts happen. Sharpening by hand is the method that keeps your steel intact, and the technique is easier than it looks once you stop worrying about it.
Two words get tangled early, so let us untangle them. Sharpening removes metal to rebuild the edge. Honing straightens an edge that has already bent out of line but removes almost no metal. You hone weekly, you sharpen when honing stops helping.
Table of Contents
What You Need
The one essential tool is a whetstone, or sharpening stone. A 1000 grit stone is the workhorse: coarse enough to fix a dull edge, fine enough to leave a usable one. A second stone around 3000-6000 grit takes the edge from sharp to properly keen.
Beyond the stone, you want a damp towel or a stone holder to stop the stone skating across the counter, a spray bottle or cup of water, and a paper towel for drying. A newspaper or an old phone book is the classic angle guide. Optional extras are a leather strop for the final polish, a marker for checking your angle, and a paper towel you are willing to sacrifice.
Set up before you start. Lay the damp towel on a counter, sit down, put a small bowl of water and a dry towel within reach, and expect the whole job to leave grey slurry on your hands. If you have an expensive knife you are nervous about, run the first session on a cheap one.
Step-by-Step: How to Sharpen a Kitchen Knife
How to Sharpen a Kitchen Knife: Set the Whetstone Angle
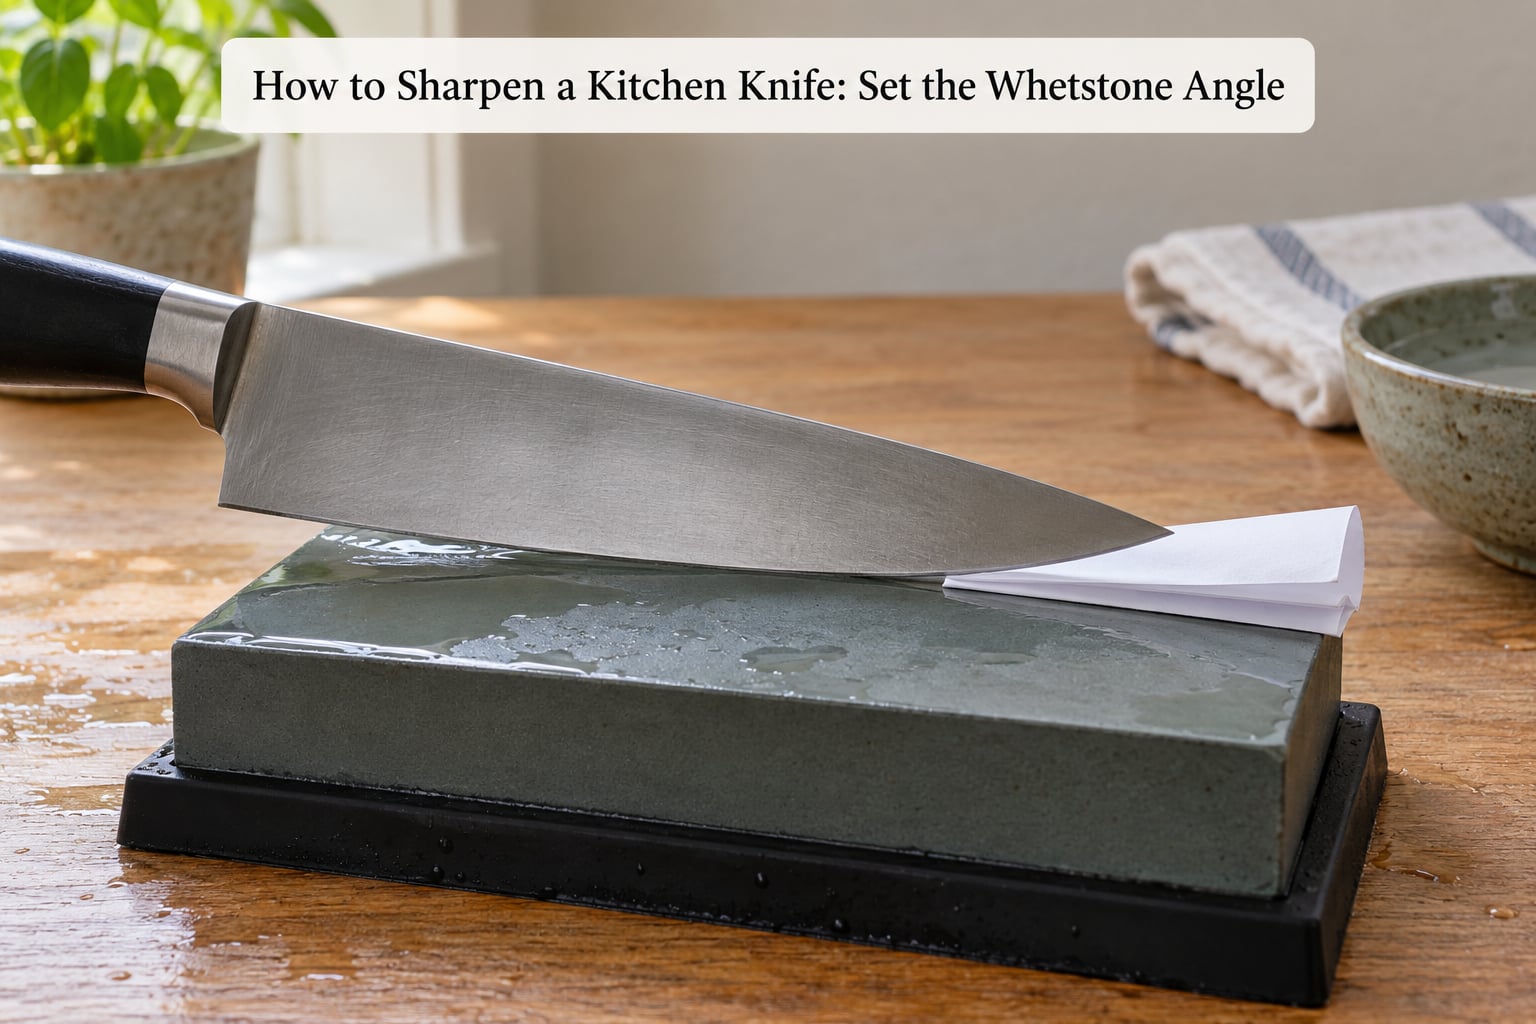
Soak the stone for 5-10 minutes until bubbles stop rising, or splash-and-go for about a minute if your stone is a modern glass or diamond type. Lay it on the damp towel, grip the spine of the knife with your index finger on the flat side, and rest the heel of the edge on the stone.
Now find the angle. About 15-20 degrees is the useful range for a European chef’s knife. A cheap trick that works far better than guessing: draw a marker line along the side of the blade parallel to the edge, then tilt the knife until the line reads as a single dark band from your viewpoint instead of two diverging ones. That angle is close enough for a first session.
Success check: the knife is not standing up like a roof, and not flat on its face. If you have a stone with finger grooves or a built-in angle guide, use it and skip the marker.
Coarsen the Edge on the Coarse Side
With the blade angled, draw it from heel to tip in a single smooth stroke, applying firm, even pressure across the whole length. Lift at the tip, return to the heel, repeat. Alternate long strokes, which run the full edge, with shorter strokes over the middle to catch the sections long passes miss.
Work one side only for now. Keep the pressure moderate rather than hard, because hard pressure gouges the stone and can drive the edge faster than you can see it happening. You are aiming for a flat, even bevel, not for the fastest possible metal removal.
Success check: after roughly 10-15 strokes per inch of edge, the face of the blade has gone visibly matte and slightly frosted. That frosted area is your new bevel.
Flip Sides and Keep the Same Angle
Turn the knife over without changing the angle your hands remember. Most beginners get a lovely bevel on one side and a shallow one on the other, and the result is an edge that feels sharp straight on and dull at an angle.
Count your strokes. Matching the number you put on the first side is simpler than any technique and it keeps the two faces symmetrical. If the blade is still not centered, one extra pair of strokes on the lighter side fixes it.
Success check: with the knife raised to the light, the two faces should show similar frosted bands of the same width. Or press the edge gently into a thumbnail with the knife lying flat on a counter: it should bite evenly rather than rocking.
Raise a Burr Along the Full Edge
A burr, or wire edge, is the thin lip of metal that folds over the opposite side as you grind. You cannot skip it, and you cannot skip past it either. Run a fingernail lightly along the edge of the side you have not yet sharpened and you will feel a faint, sandy ridge. That is the burr.
Keep going until the ridge runs the full length, from heel to tip, with no smooth gap anywhere. Concentrate extra strokes on any section that still feels bare, usually the last inch near the tip or the first inch near the bolster. Aim for a light, even burr, not a chunky wire.
Success check: lift the knife under a light and run your thumb along the opposite side from heel to tip. Every part should feel equally rough.
Refine the Edge on the Fine Side
Move to the finer stone, or flip a combination stone to its 3000-6000 grit face, and repeat the same routine: a few strokes per inch on one side, a matching count on the other, a light burr again. Fine stones do not remove much metal, so a handful of careful strokes is plenty.
The payoff is the apex, the point where the two bevels meet. A broad, rounded apex cuts poorly and feels dull. A sharp apex feels noticeably lighter on food. If you own a leather strop, a dozen passes per side on it with a little compound smooths the burr away and polishes the edge further.
Success check: the edge should look bright rather than frosted when you catch it at an angle, and the burr should be much finer than the one you had on the coarse stone.
Hone, Rinse, and Test the Knife
Deburr with a few light passes on a ceramic or steel honing rod held vertically against a board, always leading with the edge, one side then the other. This cleans up the wire edge without touching the geometry.
Rinse the blade and the stone, dry both properly, and put the knife away. Stone care matters: a water stone left soaked overnight softens and dishes, and leaving grey slurry on the surface of a fine stone is the fastest way to lose it.
Test the way pros do. Slide a sheet of newspaper or printout paper along the edge; a keen blade bites in and cuts a clean strip with almost no downward force. A softer kitchen test is a ripe tomato or a sprig of parsley, which should slice cleanly instead of being pushed aside. Ignore the fingernail test, which measures your thumb more than the knife.
Common Mistakes and How to Fix Them
Pressing too hard. Force bakes steel straight and can roll the edge. Use medium, steady pressure and let the grit do the work. If the stone is grooving, you are leaning too far forward.
Losing the angle halfway down the blade. This is the number one beginner struggle, and it shows up as a sharp middle section with dull ends. Widen your grip, put your index finger down on the flat, and slow down until the frosted band runs the whole length.
Skipping the tip and the heel. Long strokes fade out where the blade thins. Finish every pass with two or three short strokes at the tip and at the heel.
Switching sides too early. You cannot grind the two faces into balance if you are guessing. Count strokes, keep them even, and only move on once the burr is complete.
Using the wrong motion. Short, fast, scribbling strokes heat the blade and produce a rounded apex. Use long, slow, even strokes and lift between them.
Treating a honing rod as a sharpening stone. A steel or ceramic rod straightens an edge; it does not restore one that has been ground down to bare metal. If the paper test fails immediately after five minutes of rod work, the knife needs a stone.
Two more worth naming. Pull-through sharpeners push a V into the edge, which leaves it fragile rather than sharp, and electric sharpeners work by the same aggressive logic, so both remove a lot more steel than a stone does. And never put a good knife in the dishwasher, where heat and detergent strip the edge and pit the blade.
What to Do With Serrated, Single-Bevel, or Specialty Knives
Serrated blades cannot be sharpened on a flat stone. Their teeth are set alternately left and right, and a whetstone would grind the points off and leave a useless saw. Buy a knife-specific serrated sharpener, which works the teeth in their channels with a shaped carbide or diamond surface.
Single-bevel knives, most Japanese nakiri and many gyuto, are sharpened on one face only. The straight bevel is the cutting edge, and the back is a smooth curve that must be blended in with a ceramic or diamond rod. Running them across a stone like a European chef’s knife ruins them in a few sessions.
Send a knife out for professional work when the tip or heel is chipped, when the blade is bent, when it is a single-bevel Japanese knife you just bought, or when the edge has been lost to a metal dish rack. A bladesmith or a good knife shop can restore a damaged edge that a home stone cannot, and the cost is far less than replacing a good blade.
Left-handed sharpeners are the same method mirrored. There is no need to fight your handedness, though a second stone set placed on the left side of the board is easier than mentally flipping everything.
Frequently Asked Questions
How often should I sharpen a kitchen knife?
For a knife you use daily, hone once a week and sharpen roughly once a month. If you only cook on weekends, a full sharpening every two or three months is plenty. You do not need a schedule though: run the paper test. If the blade still cuts paper cleanly, the edge is fine and honing alone will keep it there.
Should I use a whetstone or a honing rod?
Use both, at different times. The honing rod is maintenance, straightening an edge that has gone slightly out of line and removing almost no steel. The whetstone does the real work, grinding away metal to rebuild a new apex when the edge has been lost. Hone weekly, sharpen only when the paper test tells you to.
Can I sharpen a serrated kitchen knife at home?
Not on a whetstone. Serrated teeth are set alternately left and right, and a flat stone grinds the points away and leaves an unusable saw. A knife-specific serrated sharpener has a shaped diamond or carbide surface that fits between the teeth and works each one. Simpler still, most home cooks get good results from a serrated honing rod used regularly.
What angle should a kitchen knife be sharpened to?
About 15-20 degrees works for most European kitchen knives, and 15 degrees gives a finer, more slicing edge while 20 degrees holds up longer against bone and hard produce. Japanese single-bevel knives use roughly 15 degrees on the front face only. Above 25 degrees you get a durable but noticeably less sharp edge.
How do I know when my kitchen knife is sharp?
The paper test is the most reliable: slide a sheet of newspaper along the edge and a sharp blade bites in and cuts a clean strip with almost no downward force. In the kitchen, a ripe tomato should slice without being pushed aside, and a sprig of parsley should shear cleanly. The fingernail test is unreliable and not worth learning.
Conclusion
Start with the part that decides whether the rest works: the angle. If you only remember one thing about how to sharpen a kitchen knife, remember that. Get the knife sitting at roughly 15-20 degrees on a wet, stabilized stone, and everything after that is just light, even, slow strokes. Match your stroke counts on both sides, feel for the burr along the full edge, refine on the fine side, and finish with a few honing passes.
Then verify it before you put the knife down. A strip of paper or a ripe tomato tells you the truth in about ten seconds, and if the cut is not clean you have not finished yet. That check is worth more than any amount of guesswork, and it is the habit that keeps a knife sharp for years rather than months.