
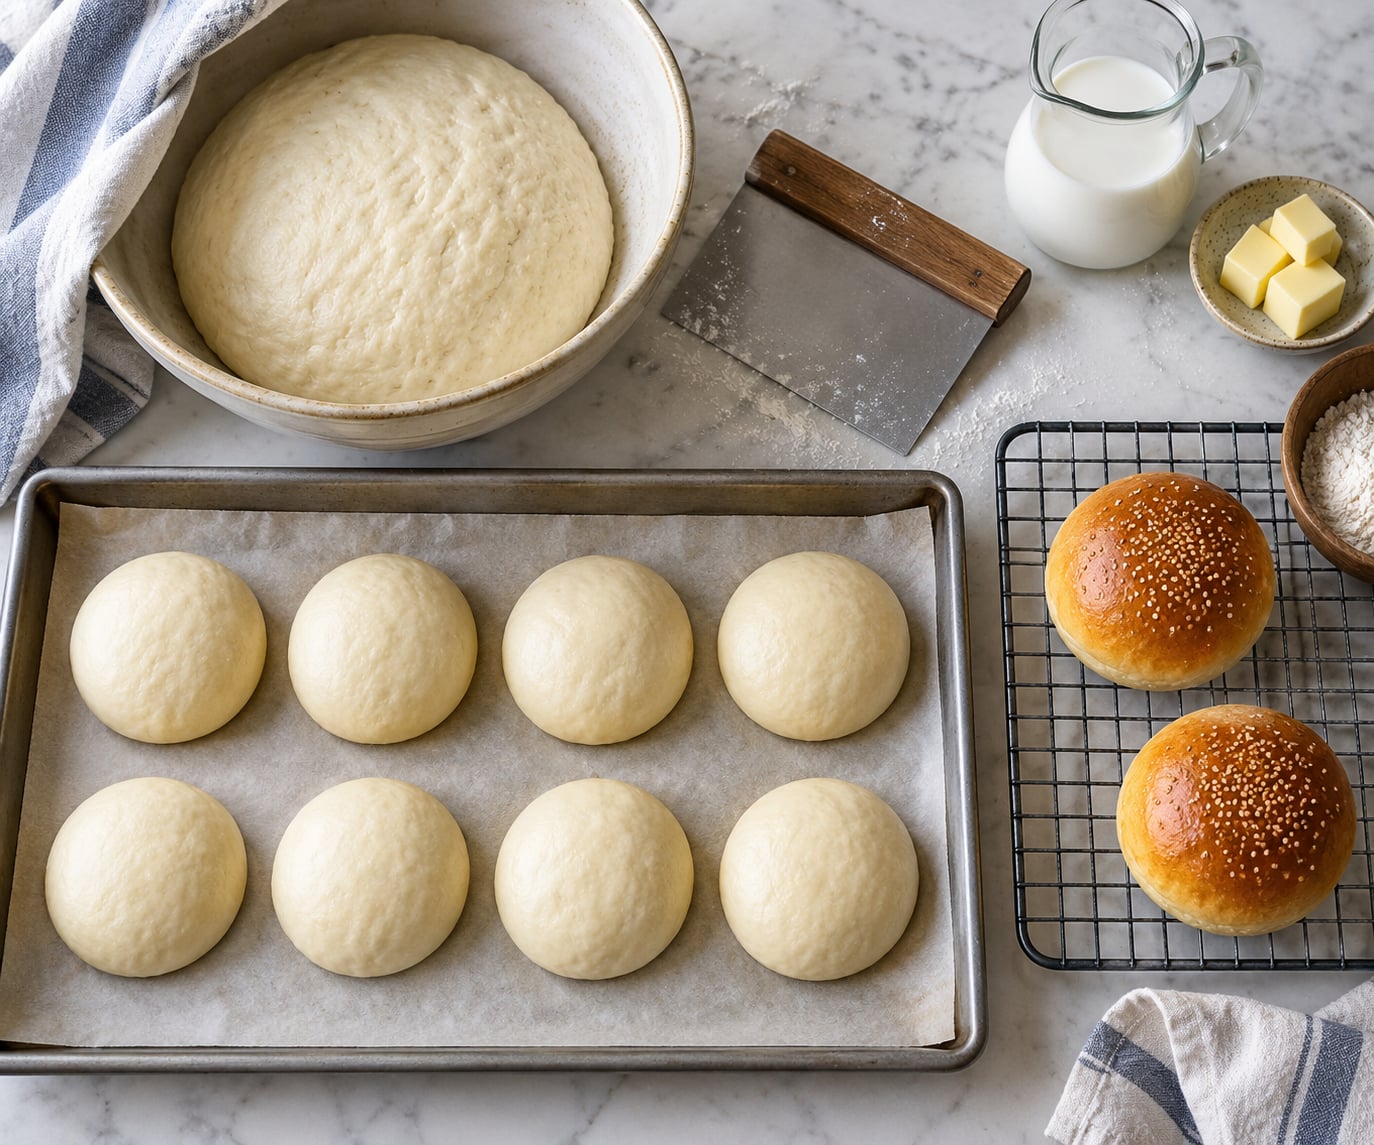
How to make homemade hamburger buns is mostly a matter of patience, not skill. You mix a soft enriched dough, let it rise twice, shape eight rounds, and bake them until the centers read 200°F (93°C) — about three hours start to finish, with only 35 minutes of actual work. The buns come out soft in the middle, sturdy enough for a drippy burger, and far better than anything in a plastic bag.
Store-bought buns tend to be either squishy and sweet or rock-hard after two days. Homemade ones give you control over the size, the flour, and how much butter goes in, and they freeze well for a cookout a month away. This method uses no stand mixer, though one makes the kneading easier.
I bake these whenever the weather turns warm enough to grill. My rule is to make the dough the evening before and let it do the slow rise in the fridge while I sleep, so the buns come out of the oven right around the time the burgers are done.
Table of Contents
What You Need to Make Homemade Hamburger Buns
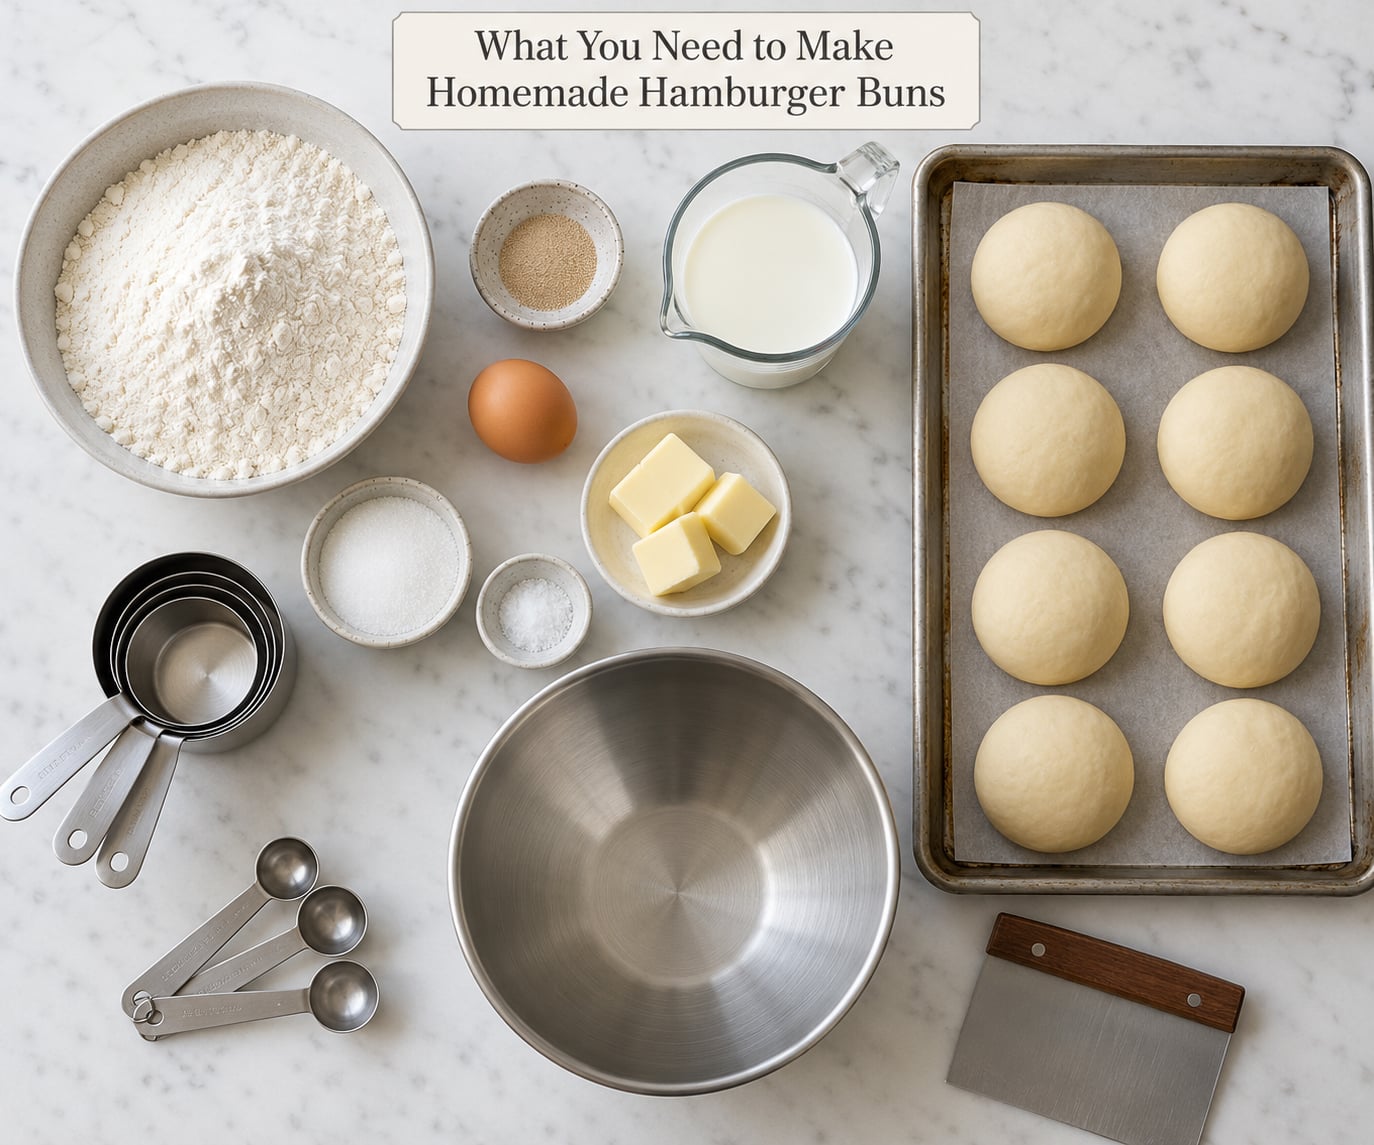
This recipe makes eight buns. The ingredient amounts are for the full batch, and every measurement is given by weight as well as volume because flour varies a lot between bags — a cup of bread flour can swing by 20 grams depending on how tightly it is packed, and that difference changes how much liquid the dough needs.
Ingredients
- 3 1/2 cups (440 g) bread flour or all-purpose flour — see the note on flour below
- 2 1/4 teaspoons (7 g) instant yeast — or 2 1/4 teaspoons active dry yeast, which needs activating first
- 1/4 cup (50 g) granulated sugar
- 1 teaspoon kosher salt — use 1 1/2 teaspoons table salt if that is what you have
- 3/4 cup (180 ml) whole milk, warmed to 100-110°F (38-43°C)
- 2 large eggs, room temperature
- 4 tablespoons (60 g) unsalted butter, softened to room temperature, plus 2 tablespoons more for brushing
- 1 teaspoon vanilla extract
- 1 egg yolk mixed with 1 tablespoon of water, for the wash
- 1 tablespoon sesame seeds, or everything bagel seasoning, or nothing at all
Nothing here is unusual. The butter, egg, and milk are what turn a plain dinner roll into something that tastes like it came from a bakery, and the sugar feeds the yeast early on while leaving enough behind for browning.
Tools
A baking sheet, parchment paper or a silicone mat, a large mixing bowl, a dough scraper, a bench scraper or knife for dividing, and a wire cooling rack. A kitchen scale is worth having: weighing the flour is the single easiest way to sidestep the dense-bun problem that trips up most first attempts. A stand mixer with a dough hook works, but your hands do the job just as well in about ten minutes.
An instant-read thermometer is optional, and it answers a question that color alone leaves open. Push the tip into the center of a bun straight out of the oven and read the temperature. Under 200°F (93°C) means the crumb is still setting and gummy; at or above it, the starch has finished gelatinizing and the interior will stay tender as it cools.
Step-by-Step: Mixing, Rising, Shaping and Baking
The whole process splits into four parts, and each one has a cue that tells you it worked. Total time runs about three hours at room temperature. Hands-on time is roughly 35 minutes. Yield is eight buns about 3.5 inches (9 cm) across, and the difficulty is genuinely beginner. Learn the cues and you will make these without looking at a recipe.
How to Make Homemade Hamburger Buns: Mix the Dough
Start with the yeast. If you are using active dry yeast, stir it into the warm milk with a teaspoon of the sugar and wait five to ten minutes. The mixture should foam and smell yeasty. If it sits flat and quiet, your yeast is dead and the dough will never rise — start over with a fresh packet rather than baking a brick.
Instant yeast skips that step. Stir it straight into the flour with the rest of the dry ingredients and push on.
Whisk the flour, remaining sugar, and salt in a large bowl. Make a well in the center and pour in the milk with the eggs, vanilla, and softened butter. Mix with a sturdy spoon or your hand until no dry pockets remain, then turn the dough out onto a floured surface.
Knead for 8 to 10 minutes by hand. The dough will start ragged and sticky and gradually turn smooth and elastic. It should feel tacky — a little sticky is right, a wet sticky mess is too much. If it clings to everything, work in another tablespoon or two of flour. Experienced bakers often hold back a quarter cup from the start for exactly this reason.
The window pane test tells you when to stop: pull off a small piece and stretch it between your fingers. When it thins enough to let light through without tearing, the gluten has developed enough structure to trap gas and give you a light crumb. That takes practice to see, but the dough texture is the more reliable signal.
Whatever you do not knead now, you cannot fix later. Under-kneaded dough tears instead of stretching, bakes dense, and leaves that gritty crumb nobody wants in a burger bun.
How to Make Homemade Hamburger Buns: Let the Dough Rise
Put the dough in a lightly oiled bowl, cover it with plastic wrap or a damp towel, and leave it somewhere warm for 60 to 90 minutes. Aim for a room temperature between 75 and 80°F (24-27°C). A turned-off oven with the light on makes a serviceable proofing box, and the inside of a warm cupboard works too.
You are looking for the dough to roughly double in size and look puffy, with a domed top and a few bubbles at the edges where it meets the bowl. A slow rise with visible bubbles along the sides is the sign of healthy fermentation. Before shaping, you can flip it out and look for a network of small air pockets underneath — a good sign of structure.
If you are not sure, press a floured finger about half an inch into the dough. The dent springs back slowly and leaves a slight mark: keep going. The dent stays put or the dough deflates: the dough is under-proofed or over-proofed, and either way it needs more time or a shorter second rise.
Cold kitchens slow everything down. Below about 65°F (18°C) the yeast barely works and a two-hour rise might take three, so put the bowl somewhere warmer or let it go overnight in the fridge. Above 85°F (29°C) the dough can over-proof while you are making dinner, which gives you flat, tough buns. Adjust for your kitchen rather than trusting the clock on the label.
A slow overnight rise in the refrigerator is worth doing on purpose. The cold ferment develops more flavor and lets you schedule the bake around dinner instead of around the clock.
How to Make Homemade Hamburger Buns: Shape and Proof the Buns
Turn the dough onto a lightly floured surface and press it into a low, wide disk, roughly 8 inches (20 cm) across. Using a bench scraper, divide it into eight equal wedges. Weighing each piece as you go keeps the batch consistent, and evenly sized buns are the difference between a uniform bake and two pale ones next to three dark ones.
Pre-shape each wedge into a loose round without tearing the surface. Cup your hand over the dough and rotate it against the counter in small circles, letting the surface tighten as it moves. Then tuck the edges underneath and pinch the seam closed, seam side down. You are chasing a taut skin, which is what keeps a bun from spreading and tearing in the oven.
Arrange the rounds on a parchment-lined baking sheet with about 1.5 inches (4 cm) between them. A spacing pattern of two, one, two, one, two leaves room to rise and lets air move so they brown evenly. A bun pan with indentations is not necessary — a flat sheet gives you rounder tops, and a crowded sheet gives you flat sides.
Cover loosely and let the shaped buns rise 30 to 45 minutes, until they look swollen and puffy and have roughly doubled in height. A gentle poke should spring back. Do not let them double completely at this stage; over-proofed buns spread, bake flat, and tear open at the sides. A short second rise and a hot oven give you the lift instead.
Handle the dough gently through all of this. You are keeping the gas bubbles that formed during the first rise, and pressing hard or poking repeatedly deflates them.
How to Make Homemade Hamburger Buns: Bake and Cool
Heat the oven to 375°F (190°C) and place the sheet on a center rack. Bake for 12 to 16 minutes depending on size. Set a timer for the halfway mark and brush the tops with the egg yolk wash, then scatter on sesame seeds or whatever topping you chose. The egg wash gives you that bakery shine and a golden, slightly crisp shell that seals in moisture. Applying it early is how you end up with burnt seeds and pale buns.
Buns are done when the tops are deep golden brown and the bottoms sound hollow when you tap them. Check the center with the thermometer and aim for at least 200°F (93°C). Pull them a shade lighter than you want, since they darken as they cool and carry over on the sheet.
If your crust runs dry and hard, a shallow dish of boiling water on the oven floor for the first ten minutes gives you steam and a softer, shinier crust. Keep it away from the elements and use a dish rated for oven heat.
Let the buns sit on the sheet for five minutes. Moving them straight to a rack tears the bottoms, since the crumb is still fragile. Then move them to the wire rack and let them cool completely, 45 minutes to an hour, before slicing or freezing. Cutting warm buns gives you a gummy interior that has not finished setting.
While they are still warm, brush the tops with the extra softened butter and drape a clean kitchen towel over the rack. The steam trapped under the towel softens the crust, which is the fix for the crunchy-shell complaint I hear most often. It makes a noticeable difference between a bun that eats soft all the way through and one that is soft only in the middle.
If you want a crunch instead of a soft shell, skip the butter and the towel, and let the buns cool uncovered on the rack until fully dry.
Common Mistakes and How to Fix Them
Most disappointing buns come down to four things: how the flour was measured, how the dough was kneaded, how it was allowed to rise, or how long it baked. Here is what each failure looks like and what corrects it.
Buns come out dense and heavy
This is the most common complaint by far. The usual causes are flour scooped straight from the bag into the measuring cup, insufficient kneading, or a dough that barely rose. Weigh your flour with a kitchen scale and use the gram weight rather than the cup volume. Knead until the dough passes the window pane test, and give the first rise its full 60 to 90 minutes even when you think it looks ready.
Dense buns also come from stiff dough. If your dough fights you and cracks at the edges instead of stretching, add milk a tablespoon at a time. A hydration of about 60% is where enriched bun dough sits, and dry dough is the reason a batch cracks at the seams while baking.
Buns are dry, crumbly, or too tough
Bake them less, not more. A bun that hits 210°F (99°C) loses moisture and turns into a golf ball, and the difference between a good crumb and a dry one is often just three minutes. Pull them at the color you like and trust the 200°F (93°C) reading.
Under-proofed dough gives the same symptom for a different reason: it never developed enough gas to stretch the gluten, so the crumb tears instead of tearing cleanly. A dough that did not double before shaping needs a longer second rise, not more oven time.
Buns spread flat and merge together
You over-proofed them. The second rise should be a puffy swell, not a full double. Also give them more space on the sheet — crowded buns touch before they finish baking, and the touching sides stay pale. Handle the dough gently during shaping, since a torn surface releases gas and spreads flat.
Buns come out pale with raw patches
Two different problems look similar. Pale tops with pale bottoms mean the oven is running cool, so verify the temperature with an oven thermometer and add a few minutes. Pale tops with browning underneath point to an overcrowded pan blocking the heat.
Buns that split open along a random seam were sealed too tight during shaping. Pinch the seam gently to close it rather than wrenching it, or leave a small loose edge for the oven spring to escape.
Buns are lopsided
Uneven portions. Divide the dough with a scale instead of eyeballing wedges, and make sure the baking sheet is not warped, since a bent sheet curves the dough as it rises. Uneven baking also comes from a hot spot, so rotate the sheet halfway if your oven runs front-heavy.
Tips for consistent, soft buns
Room temperature ingredients mix more smoothly and give you a more even rise, so take the milk, eggs, and butter out of the fridge 30 minutes ahead. Salt up to 1.5 percent of the flour weight is fine for flavor, but heavy salting at the start can tighten the dough and slow it down.
Bread flour has more protein, which gives you a chewier, sturdier bun that handles a thick, juicy patty. All-purpose flour gives a softer, lighter crumb and is more forgiving for beginners. Both work, and mixing half of each is a good middle ground. Skip cake flour, which has too little protein for structure.
For a sturdy bun that will not fall apart under a messy burger, use bread flour and do not over-proof. For more ideas on stacking a sandwich so the filling stays where you put it, read how to make an overstuffed sandwich hold together.
Buns stay soft at room temperature in a cloth or paper bag for one to two days. A sealed plastic bag traps condensation and makes the crust soggy by day two. For longer storage, freeze them fully cooled in a single layer on a tray first, then move them to an airtight container or freezer bag where they keep for up to three months.
Reheat straight from frozen: wrap each bun in a damp paper towel, then foil, and warm in a 350°F (175°C) oven for about 10 minutes, or microwave for 20 to 30 seconds. The damp towel is the key; without it, reheated bread goes hard and leathery. A quick 10-second cut side down in a dry pan also brings back a fresh-baked crust.
Frequently Asked Questions
Can I use active dry yeast instead of instant yeast?
Yes, and the amount is the same. Active dry yeast needs activating first: stir it into the warm milk with a teaspoon of sugar and wait 5 to 10 minutes until the mixture foams. If it sits flat, the yeast is dead and the dough will not rise. Instant yeast can go straight into the flour, which saves you the waiting step and tends to work a little faster.
Can I make hamburger buns ahead of time?
Yes, in three ways. Mix and knead the dough, then refrigerate it covered for up to two days and let it come to room temperature before shaping. Shape the buns and refrigerate them for a few hours, then let them finish their second rise before baking. Or bake the full batch, cool completely, and freeze. Never refrigerate unbaked shaped buns overnight, since they over-proof and collapse.
Can I make hamburger buns without milk or butter?
You can. Swap the milk for an equal volume of water plus a tablespoon of milk powder, or use water alone and expect a slightly less rich crumb. For butter, use a neutral oil in the same weight, or leave it out entirely. Removing both makes the crumb a little tighter and the crust darker, so shorten the bake by a minute or two and pull the buns while they still look pale gold.
How can I tell when the buns have proofed enough?
Look, then test. The dough should look puffy with a domed top, and roughly double in volume during the first rise. Press a floured finger about half an inch in: a dent that springs back slowly means it is ready. A dent that stays means it needs more time. A dent that pops straight back means the dough is already over-proofed, so shape it and shorten the second rise.
Can I freeze homemade hamburger buns?
Yes, and they freeze better than most store-bought buns. Cool them completely on a wire rack first, since warm buns trapped in a container will steam and go soggy. Freeze them in a single layer on a baking tray, then transfer to an airtight container or freezer bag. They keep for up to three months. Reheat from frozen with a damp paper towel and they come back soft.
How should I reheat hamburger buns so they do not become hard?
Add moisture. Wrap each bun in a damp paper towel, then in foil, and warm it in a 350°F (175°C) oven for about 10 minutes. The microwave takes 20 to 30 seconds and works fine with the damp towel, though the crust will stay soft rather than crisp. For a fresh-baked texture, sear the cut side in a dry pan for 10 seconds after warming.
Conclusion: Make the Dough the Night Before or Bake a Fresh Batch
Eight soft buns come from an enriched yeast dough, two rises, and a 375°F (190°C) oven. Weigh the flour, knead until the dough feels smooth and only slightly tacky, and wait for the ball to double before you shape anything. Bake until the centers read 200°F (93°C) and cool them fully on a rack, and the rest is just burgers.
Start tonight. Mix the dough, cover it, and let it rise slowly in the refrigerator while you sleep. By the time the grill is hot, you will be cutting warm buns for the first batch.