
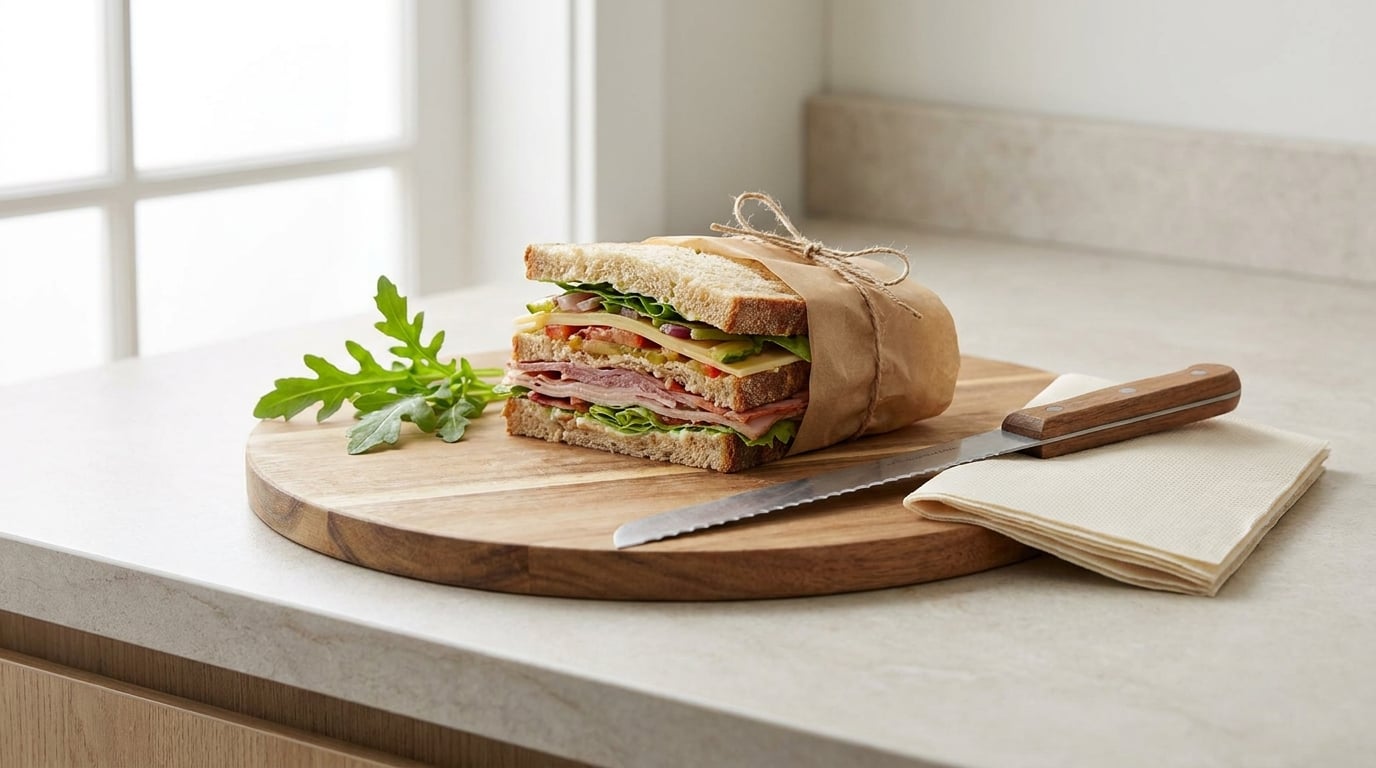
To make an overstuffed sandwich hold together, you need four things working together: bread stiff enough not to bend, wet fillings dried down, a barrier layer that grips instead of slides, and a tight wrap that compresses the whole stack before you cut it. The order you stack the ingredients matters as much as the ingredients themselves. Get those right and a tall sub or triple-decker club survives the trip from cutting board to lunchbox.
The whole job takes about 20 minutes of active work, most of it slicing and patting things dry, plus 10 minutes of rest time nobody skips. It is not difficult, it is just fussy in a specific way. People usually blame the filling volume, and then wonder why their fix didn’t work.
Table of Contents
- What You Need
- Step-by-Step: How to Make an Overstuffed Sandwich Hold Together
- Common Mistakes
- Frequently Asked Questions
- What is the best bread for an overstuffed sandwich?
- How do I keep tomatoes and other wet fillings from making the sandwich soggy?
- Should I wrap an overstuffed sandwich before cutting it?
- Does an overstuffed sandwich need to be refrigerated before serving?
- How do I cut a tall sandwich without making the fillings fall out?
- What can I use instead of plastic wrap to hold a sandwich together?
- Conclusion
What You Need
Start with bread that has a crust and a dense crumb. A thick-cut sourdough, a sturdy sandwich loaf, a toasted ciabatta, or a hoagie roll all work. Soft white sandwich bread is the weakest option here, because it folds before it can support the load.
For fillings, pick a mix of textures rather than piling on the same thing. Two or three proteins, one cheese, and two vegetables is plenty. You also want something with grip in the middle, and something to absorb moisture.
- Bread: sourdough, dense sandwich loaf, ciabatta, focaccia, a hoagie or hero roll, or a sturdy whole wheat loaf. Cut thick, at least 3/4 inch per slice.
- Support layer: sliced cheese, a tortilla or flatbread cut to size, lettuce leaves, or a thin sheet of parchment or deli paper.
- Moisture control: paper towels, a salad spinner, a colander, or a fine mesh strainer for draining pickles and tomatoes.
- Holding material: parchment paper, deli paper, plastic wrap, or a reusable beeswax wrap. A rubber band or a strip of kitchen twine helps on tall stacks.
- Tools: a serrated bread knife, a wide serrated knife for cutting, a cutting board with a damp towel under it, and toothpicks or cocktail picks for triple-deckers.
Scale the support layer to the sandwich. A club needs a full cheese slice across the entire surface. A hoagie can get a single strip of provolone laid down the center, or a whole lettuce leaf folded flat.
One safety note, since deli meat and cut vegetables are involved. If you are cooking proteins specifically for this sandwich, cook poultry to 165°F, ground meat to 160°F, and whole cuts of beef, pork and fish to 145°F, measured at the thickest part. Refrigerate any sandwich you are not eating within two hours, or within one hour if it is above 90°F outside.
Step-by-Step: How to Make an Overstuffed Sandwich Hold Together
1. Choose Bread with Enough Structure
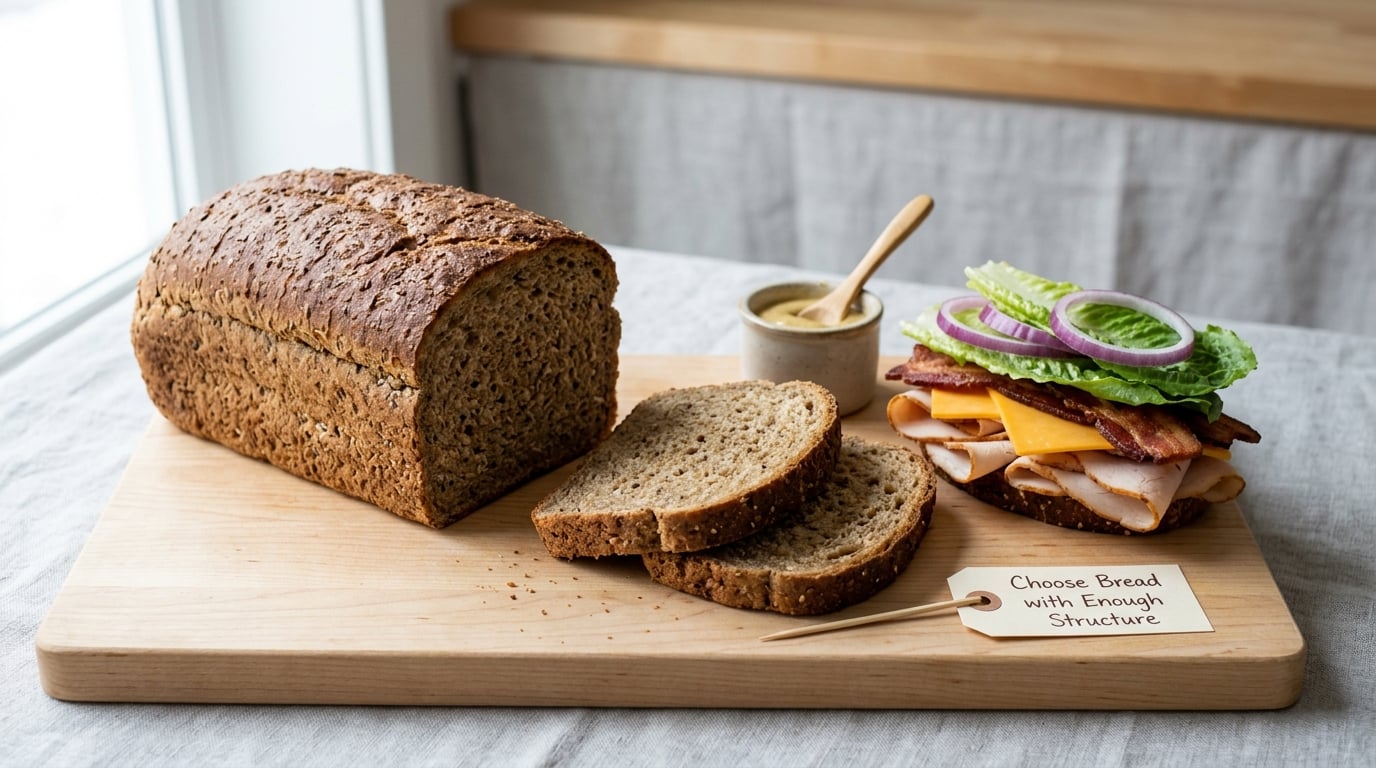
Bread is the load-bearing element, and most collapsed sandwiches failed here. Pick something that already feels substantial in your hand before you pile anything on it.
The quick load test is simple. Hold a slice in one hand and press down on the center with about the weight you plan to load onto it. If it bends into a curve or the bottom edge tears, it is too thin or too soft for that amount of filling. Either add a second slice or move down to a denser loaf.
Cutting thick helps more than people expect. A 3/4 inch slice holds considerably more than a standard 1/2 inch slice before it gives. Toasting adds structure too, and a light toast also seals the surface so moisture from the fillings takes longer to soak through.
How to tell it worked: the slice holds a firm flat plane under load, with no visible bow at the center or splitting along the bottom edge.
2. Remove or Control Wet Ingredients
Tomatoes, cucumbers, pickles, deli meat, and sauces all release water or oil under pressure, and that moisture is what turns a tall sandwich into a slump. Cut them first, then deal with the liquid before assembly.
Slice tomatoes and pat them dry on paper towels, pressing gently rather than scrubbing. Salting the slices first and letting them sit for five minutes on a towel draws out extra water that would otherwise migrate into the bread.
Drain pickles and peppers in a colander, then lay them on a towel. Dry cured or roasted meats the same way if the slices look glossy. Shredded lettuce is the exception, since blotting it dries out the leaves and they stop clinging to everything else, so leave that one alone.
For sauces, apply them lightly and only to surfaces that will be pressed against something solid. A thin coat on the bread does more structural work than a heavy pour in the middle of the stack.
How to tell it worked: your fingertips come away from a tomato slice or a slice of meat noticeably drier than they went on.
3. Add Filling Support
A support layer is the piece most home cooks skip. It is a thin, relatively flat sheet that spans the sandwich and creates friction between two slippery layers, so nothing slides sideways when you bite.
A slice of cheese does this best on a club or a thick sandwich, laid so its corners sit inside the bread. A single large lettuce leaf, frisée or baby spinach, works well and adds a crinkle that resists compression. For a very tall stack, a tortilla or flatbread cut to size adds real body without much flavor.
Parchment or deli paper is the zero-flavor option. Lay a sheet across the sandwich just below where the pressure will be greatest, and it acts as a slip plane that keeps wet layers from reaching the bottom bread. It also helps when you later want to lift a whole section out cleanly.
How to tell it worked: you can press the completed stack with your palm and the layers below the support do not shift or bulge sideways.
4. Layer Fillings in the Right Order
Build from the bottom up, and put your dry, spreadable ingredients directly against the bread. Heavier and wetter items go in the center, where the weight of everything above presses them into place instead of pushing them out.
A reliable order is: spread on the bottom slice, then a cheese or lettuce support layer, then a protein, then a vegetable or two, then a second protein if you have one, then your remaining cheese or support, and the top slice last. The wet items end up sandwiched in the middle with a dry layer on either side.
For deli meat, fold or drape the slices rather than laying them flat. A fold creates loops and air pockets, and those pockets grab whatever is next to them. Flat stacked slices slide off each other and off the bread.
Alternate textures. A layer of bacon or crisp chopped lettuce in the upper third adds structure that the fillings above it can push against, rather than adding weight they have to support.
How to tell it worked: every layer reaches roughly the same footprint, so the sandwich has straight sides and a flat top rather than a lopsided tower.
5. Wrap and Rest the Sandwich
This is the step that changes the most, and it takes under a minute. Wrapping squeezes the whole stack into a single compressed unit, and the compression is what friction is made of.
Set the sandwich on a sheet of parchment or deli paper, bring the sides up over the filling, then roll it snugly along the long axis. Wrap a second sheet around the middle and the two ends so the middle is double thickness. On a triple-decker, add toothpicks through all layers near the corners first so the stack cannot slide apart inside the wrap.
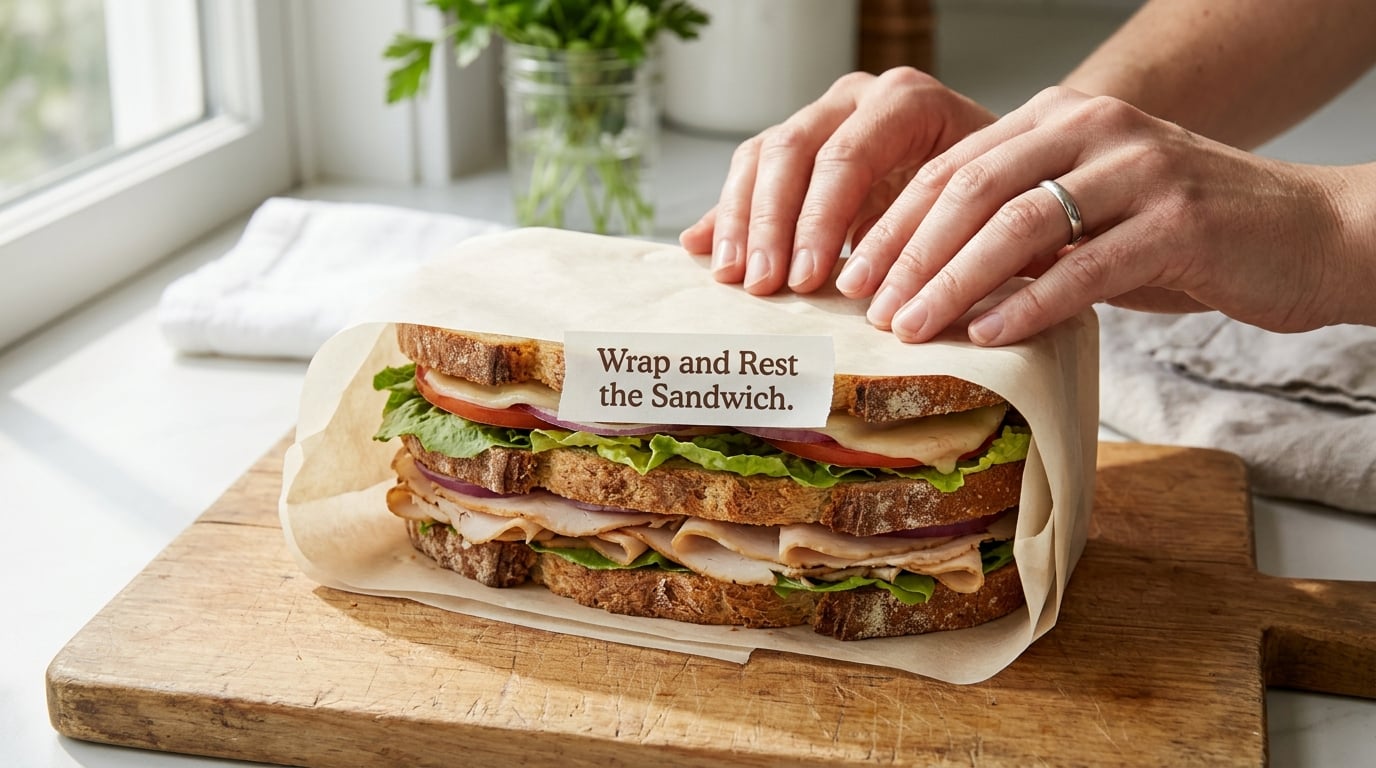
Press gently along the length with your palm. You are looking for about a quarter inch of give, not a squash. Then leave it for 5 to 10 minutes so the layers settle into contact with each other.
Chilling for 20 or 30 minutes firms up the fillings and the spread, which makes slicing clean. Cold does something to bread texture, though, so for a toasted or crunchy sandwich, rest it at room temperature instead.
How to tell it worked: the wrapped sandwich holds its shape on a plate without any layer bulging at the ends, and it does not spring back when you set it down.
6. Cut and Serve Without Pulling It Apart
Cutting a tall sandwich is where most of the damage happens, because a straight downward push compresses the filling and shoots it out the far side. A sawing motion does not.
Put your cutting board on a damp folded towel so it does not slide. Use a long serrated knife and cut with a gentle back-and-forth saw, letting the blade do the work over about ten seconds rather than pressing down. A sharp straight edge compresses more.
Cut the sandwich in half on the diagonal. Two reasons: the triangular halves are far more stable when set on a plate, and the longer face gives you a wider bite edge, so you are less likely to need a whole corner of filling in one go.
For serving, leave the toothpicks in for anything triple-decker or on a plate. If you are eating it handheld, cup your hand around the bottom of the sandwich and press the bottom slice upward into the filling. Squeezing the middle pushes everything out the bottom, which is the single most common way a sub loses its contents.
How to tell it worked: the cut face shows distinct layers, the filling stays within the outline of the bread, and the halves sit upright on the plate without leaning.
Common Mistakes
The bottom slice goes soggy. You had wet ingredients or heavy sauce sitting directly on bread with nothing between them. Fix it with a cheese slice, a lettuce leaf, or a sheet of parchment at the bottom, and pat the wet items dry before they go in.
Fillings slide out of the back on the first bite. The filling stack was even until the bite, then gravity did the rest. Fix it with more dry weight in the upper layers, less sauce in the center, and a tighter wrap before cutting.
Contents fall out the bottom while eating a wrapped sub. You squeezed the middle instead of supporting the bottom. Fix it with a grip from underneath, a second wrap around the middle of the sandwich, and a slower first bite from a corner rather than the center.
Toothpicks are not holding a tall club together. They went in only through the top layer, or too close to the middle. Fix it with four picks near the four corners, driven all the way down through every layer, removed just before you eat.
The sandwich is soggy in the middle before you even cut it. It was assembled too early and the juice had time to migrate. Fix it with assembly as close to serving time as you can manage, or with a thicker barrier layer between the wet and dry sections.
It collapses into a pile on the plate. It was cut with a downward press instead of a sawing motion, or it was cut before it had settled. Fix it with a serrated knife, a firm board, and a 5 to 10 minute rest.
The bread tore while you assembled it. You overfilled it for the bread you chose. Fix it by scaling down the filling volume or moving to a thicker, denser slice. There is no wrapping technique that rescues bread that is already overloaded.
One last habit that helps more than the rest: assemble the sandwich over the wrapper, not on the board and then transfer it. Every transfer is an opportunity for a layer to shift, and you will do three of them in a row if you build it elsewhere.
Frequently Asked Questions
What is the best bread for an overstuffed sandwich?
Thick-cut sourdough, a dense sandwich loaf, toasted ciabatta, and a hoagie or hero roll all work well because they have a crust and a tight crumb. The key is thickness: aim for at least 3/4 inch per slice so it does not bend under load. Soft white sandwich bread is the weakest choice for a tall build. A quick test is to press the slice with the weight you plan to load onto it. If it bows or tears at the bottom edge, add a second slice or pick a denser loaf.
How do I keep tomatoes and other wet fillings from making the sandwich soggy?
Slice the tomato, salt the slices, leave them on a paper towel for five minutes, then pat them dry before they go in. Drain pickles and peppers in a colander and blot them. For deli meat, lay glossy slices on a towel first. Then put a barrier between the wet layer and the bread: a slice of cheese, a whole lettuce leaf, or a sheet of parchment. Mayonnaise and other spreads go on the bread lightly rather than poured into the middle of the stack.
Should I wrap an overstuffed sandwich before cutting it?
Yes, and this is the step people skip. Wrapping compresses the layers into one unit, and compression is what creates friction between them. Roll the sandwich snugly in parchment or deli paper, add a second sheet around the middle and ends for tall builds, and press gently along the length. Wait 5 to 10 minutes before cutting so the layers settle. Without that compression and settling time, a tall sandwich will shift the moment the knife goes through.
Does an overstuffed sandwich need to be refrigerated before serving?
Only if you are serving it more than about two hours after assembly, or if it contains perishable deli meat, cut vegetables, or dairy. Chilling firms up the filling and makes slicing much cleaner, so a 20 to 30 minute chill helps even a sandwich you are about to eat. Skip it for a sandwich meant to be eaten crisp, since cold bread loses its texture. If a sandwich has sat out past two hours, or one hour in hot weather above 90u0026deg;F, throw it out rather than refrigerating it.
How do I cut a tall sandwich without making the fillings fall out?
Use a long serrated knife on a cutting board set on a damp towel so it cannot slide. Cut with a gentle back-and-forth saw over about ten seconds instead of pressing straight down, since downward pressure compresses the filling and pushes it out the far side. Cut on the diagonal, which gives you a wider bite edge and two more stable triangles. If it is a triple-decker, keep the toothpicks in until you are about to eat.
What can I use instead of plastic wrap to hold a sandwich together?
Parchment paper and deli paper both work well, and beeswax wraps are a good reusable option that takes a warm damp cloth to soften before folding. A layer of parchment just under the top slice also functions as a slip plane, so the fillings slide against it rather than tearing the bread as you bite. For extra compression on a tall sandwich, add a second sheet around the middle and secure it with a rubber band or a strip of kitchen twine.
Conclusion
If a sandwich falls apart, the fix is almost never more filling management at the end. Work backwards from assembly: use bread thick and dense enough for the weight you are putting on it, dry every wet ingredient before it goes in, add one support layer between the wet section and the bread, build the stack with the heavy stuff in the middle, then wrap it tightly and let it rest five to ten minutes before you cut on the diagonal.
Those five moves, in that order, solve most overstuffed sandwich failures. Once you have done them a couple of times it stops being a technique and just becomes how you build a sandwich.