
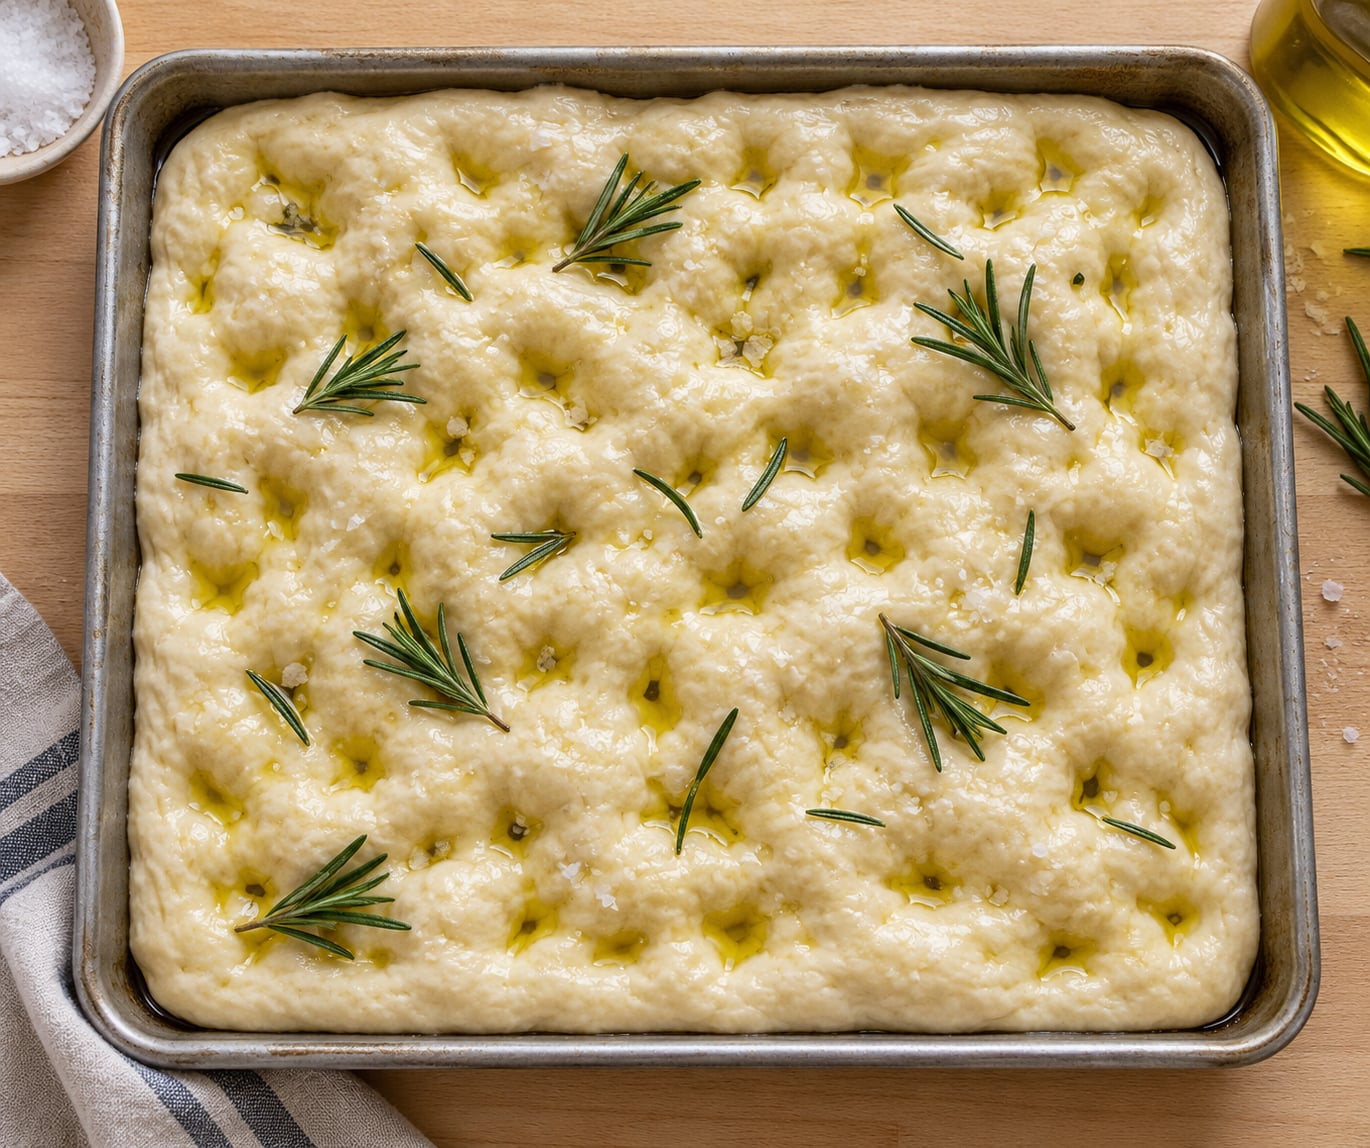
To make focaccia bread at home, mix a stiff, wet dough of flour, water, yeast, salt, and olive oil, let it rise until doubled and full of bubbles, then dimple it with oiled fingers and bake it hot until the top is deeply golden. There is no kneading, no shaping, and no special equipment.
It is genuinely one of the easiest breads a beginner can tackle, because the dough is forgiving and the shaping step is basically optional. Most of the work is waiting.
Budget about 4 hours for a same-day loaf, most of it unattended, or start the dough at night and bake the next day for a deeper flavor. A 9 x 13 inch pan gives you a thick, bakery-style slab; a rimmed baking sheet gives you a thinner, crisper one.
What You Need
Five ingredients do the work. Weighing them on a kitchen scale matters more here than in almost any other bread, because this is a high-hydration dough and a cup of flour can swing the water ratio by a surprising margin.
Ingredients
- Bread flour, 500 g (about 4 cups, spooned and leveled)
- Water, 400 g (1 and 2/3 cups, room temperature)
- Instant yeast, 3 g (about 1 teaspoon)
- Fine sea salt, 10 g (about 1 and 1/2 teaspoons)
- Extra virgin olive oil, 40 g (about 3 tablespoons) for the dough, plus more for the pan, the top, and dipping
- Flaky sea salt and fresh rosemary sprigs for the top, both optional
That water-to-flour ratio is 80 percent hydration, which is the sweet spot for focaccia. It sounds like a lot of water, and the dough really will be too sticky to handle comfortably, but that stickiness is the open, holey crumb you are after.
If you only have all-purpose flour, use it. It will still work, and most people cannot tell the difference on a dimpled, oiled focaccia. Bread flour gives you a chewier crumb and better structure, which is why bakers reach for it.
Equipment
A large mixing bowl, a 9 x 13 inch metal pan, a rubber spatula, and your fingers. That is the whole list. Parchment paper is optional, though it makes a very sticky dough easier to lift into the pan.
A digital thermometer is worth having if you bake often. It turns doneness from a guess into a reading.
Scaling for other pans
| Pan | Flour | Water | Bake time at 450 F (230 C) |
|---|---|---|---|
| 9 x 13 inch metal pan | 500 g (4 cups) | 400 g (1 and 2/3 cups) | 22 to 26 minutes |
| Rimmed baking sheet, 18 x 13 inch | 500 g (4 cups) | 400 g (1 and 2/3 cups) | 14 to 18 minutes |
| Cast iron skillet, 12 inch | 450 g (3 and 1/2 cups) | 360 g (1 and 1/2 cups) | 20 to 24 minutes |
| Two 9 x 13 inch pans | 700 g (5 and 1/2 cups) | 560 g (2 and 1/3 cups) | 22 to 26 minutes |
Heavier pans give you a crisper bottom. A thin rimmed sheet bakes faster because the dough spreads thinner, so check it early.
Step-by-Step
Seven stages, and only two of them ask anything of you. The same-day route runs about 4 hours: 20 minutes of mixing, a 90-minute bulk rise at room temperature, a short pan rest, then a 25-minute bake. The overnight route is identical except the bulk rise happens cold in the fridge for 8 to 14 hours, and the result is noticeably tangier with more complex flavor.
How to Make Focaccia Bread at Home: Activate the Yeast and Mix the Dough
Instant yeast goes straight into the flour, no proofing step needed. Active dry yeast needs a little warm water and a few minutes to wake up before it meets the flour, otherwise it can leave dead spots in the dough.
For active dry yeast, stir 3 g into about 50 g of the water warmed to 95 to 105 F (35 to 40 C). If a foam appears after five minutes, it is alive. If the water is much hotter than that, you have killed it.
Whisk the yeast into the flour with the salt, add the remaining water and the 3 tablespoons of olive oil, and stir with a spatula until no dry flour is left. A shaggy, sticky, slightly lumpy mass is exactly right. Do not add more flour to clean up the bowl.
The temperature cue is simple: the dough should feel close to cool, not cold and not warm. Cool means the yeast is working slowly and the gluten has time to develop. That is where flavor comes from.
Knead and Develop the Dough
You can skip kneading entirely. Folding the dough in the bowl four or five times over the first 90 minutes builds the same gluten network without ever making the dough tough.
Each fold: wet a hand, lift one side of the dough, stretch it up, and lay it back over the rest. Turn the bowl a quarter and repeat. By the third round the dough starts to look smoother and holds a ball shape instead of slumping.
If you prefer to knead, 5 minutes of slaps and folds in the bowl is plenty. You are looking for a smooth, elastic, slightly tacky dough that springs back when you poke it. Resist adding flour; the dough stays sticky.
Bulk Ferment Until Airy
Cover the bowl and let it rise until the dough has roughly doubled and the surface is domed and covered in bubbles, 90 minutes to 2 hours in a 75 F (24 C) kitchen. A cool kitchen stretches that toward 3 hours, and a warm one can do it in under an hour.
Watch the dough, not the timer. Poke it with a floured finger and press straight down. If the dent fills back in completely, it needs more time. If it springs back slowly and leaves a shallow dent, it is ready.
For the overnight option, put the covered bowl straight in the fridge and walk away. Cold fermentation slows the yeast dramatically, which develops more acid and a deeper, slightly tangy crumb. Pull it out 2 to 3 hours before you want to bake so it can warm up and finish rising.
Fold, Rest, and Prepare the Pan
Do one final fold right before shaping. It redistributes the gas and evens out the dough so it bakes flat instead of lopsided.
Pour 2 tablespoons of olive oil into your pan and spread it up the sides with your fingers or a paper towel. Coat the base and the corners generously. That oil fries the bottom into a crisp, lacy crust, and the dough will slide out cleanly because of it.
Tip the dough into the pan and gently stretch it toward the corners with oiled fingertips. Do not stretch it thin or press it flat; a slight unevenness is fine. Cover and rest 30 to 60 minutes, or about 2 hours if it came out of the fridge. It is ready when it fills the pan and jiggles when you shake the handle.
Dimple and Top the Focaccia
Dip your fingertips in olive oil and press straight down into the dough about half an inch, spacing the dimples roughly an inch apart. Work from one end to the other, leaving the outer rim mostly alone so the edges can rise and crisp.
Dimples are not decoration. They let trapped gas escape so the focaccia bakes flat and even instead of ballooning, and the indentations give oil and salt more surface to cling to, which is where the flavor concentrates. This is the step beginners rush, and it is the one that most changes the crumb.
Press rosemary leaves into the dimples rather than laying them on top, or they scorch before the bread is done. Good alternatives: sliced garlic cooked in olive oil, cherry tomatoes halved, sliced olives, caramelized onions, anchovies, or thin slices of potato.
Finish with a drizzle of olive oil and a pinch of flaky sea salt, and go easy. Flaky salt is much saltier by volume than table salt, and a heavy hand is the most common reason focaccia tastes like jerky.
Bake Until Golden
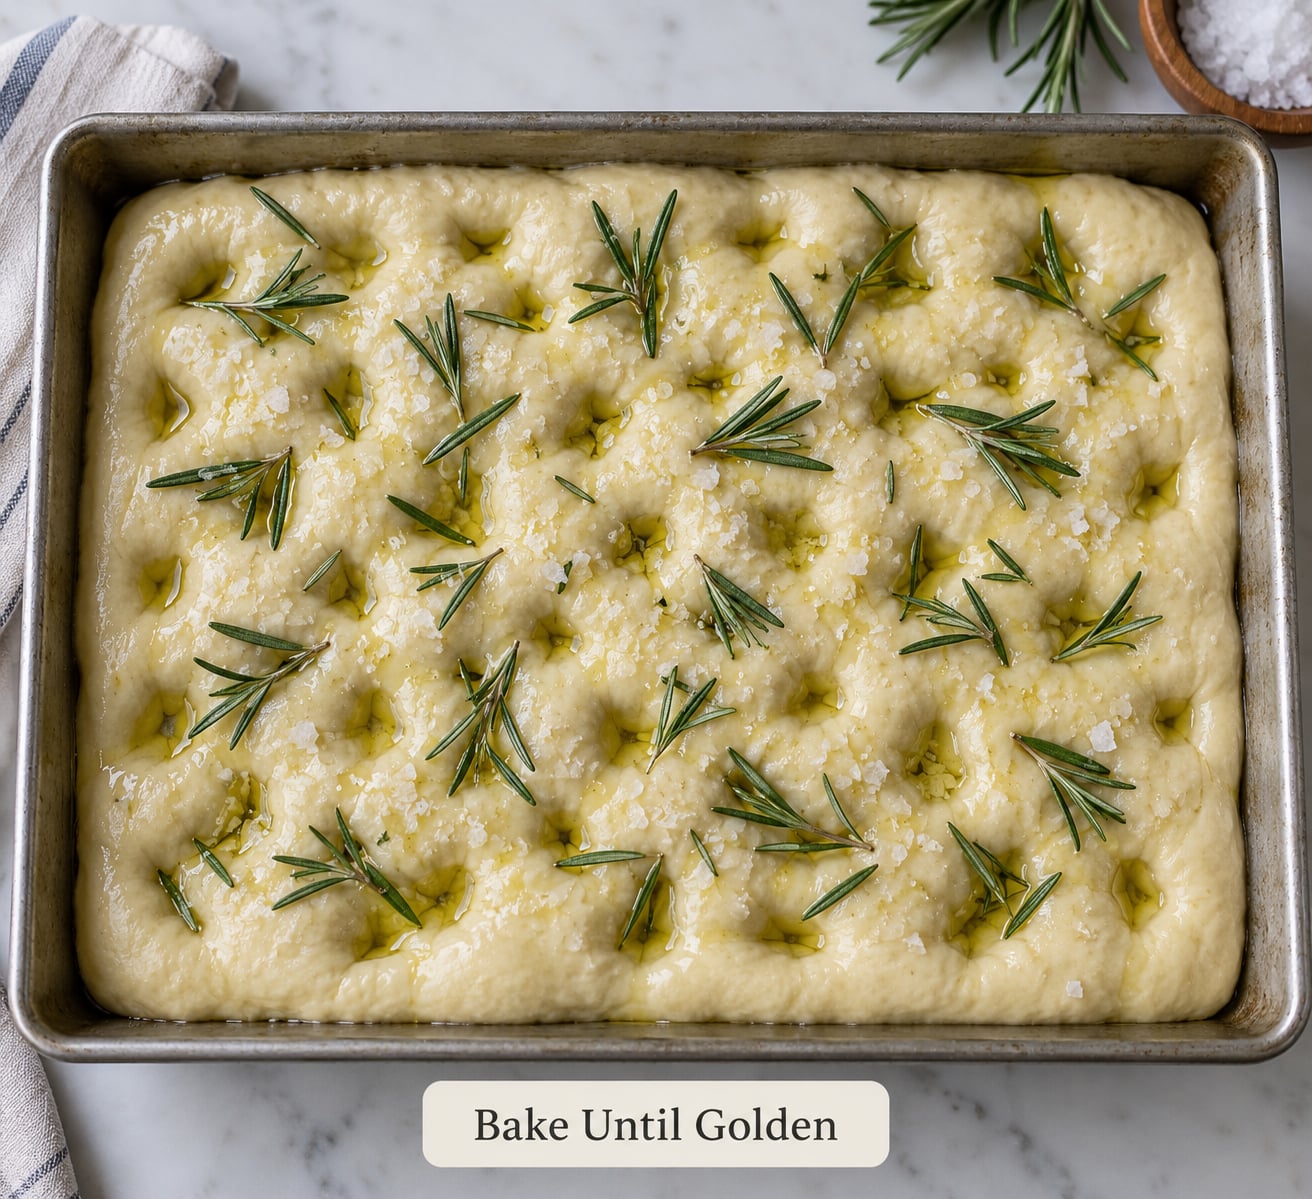
Heat the oven to 450 F (230 C) and put the empty pan in to preheat for at least 20 minutes. A screaming-hot pan is the single biggest factor in a crisp bottom.
Set the dough in the hot pan and bake 22 to 26 minutes for a 9 x 13 inch pan, less for a baking sheet. Rotate the pan once at the halfway mark if your oven runs hot in the back, which most do.
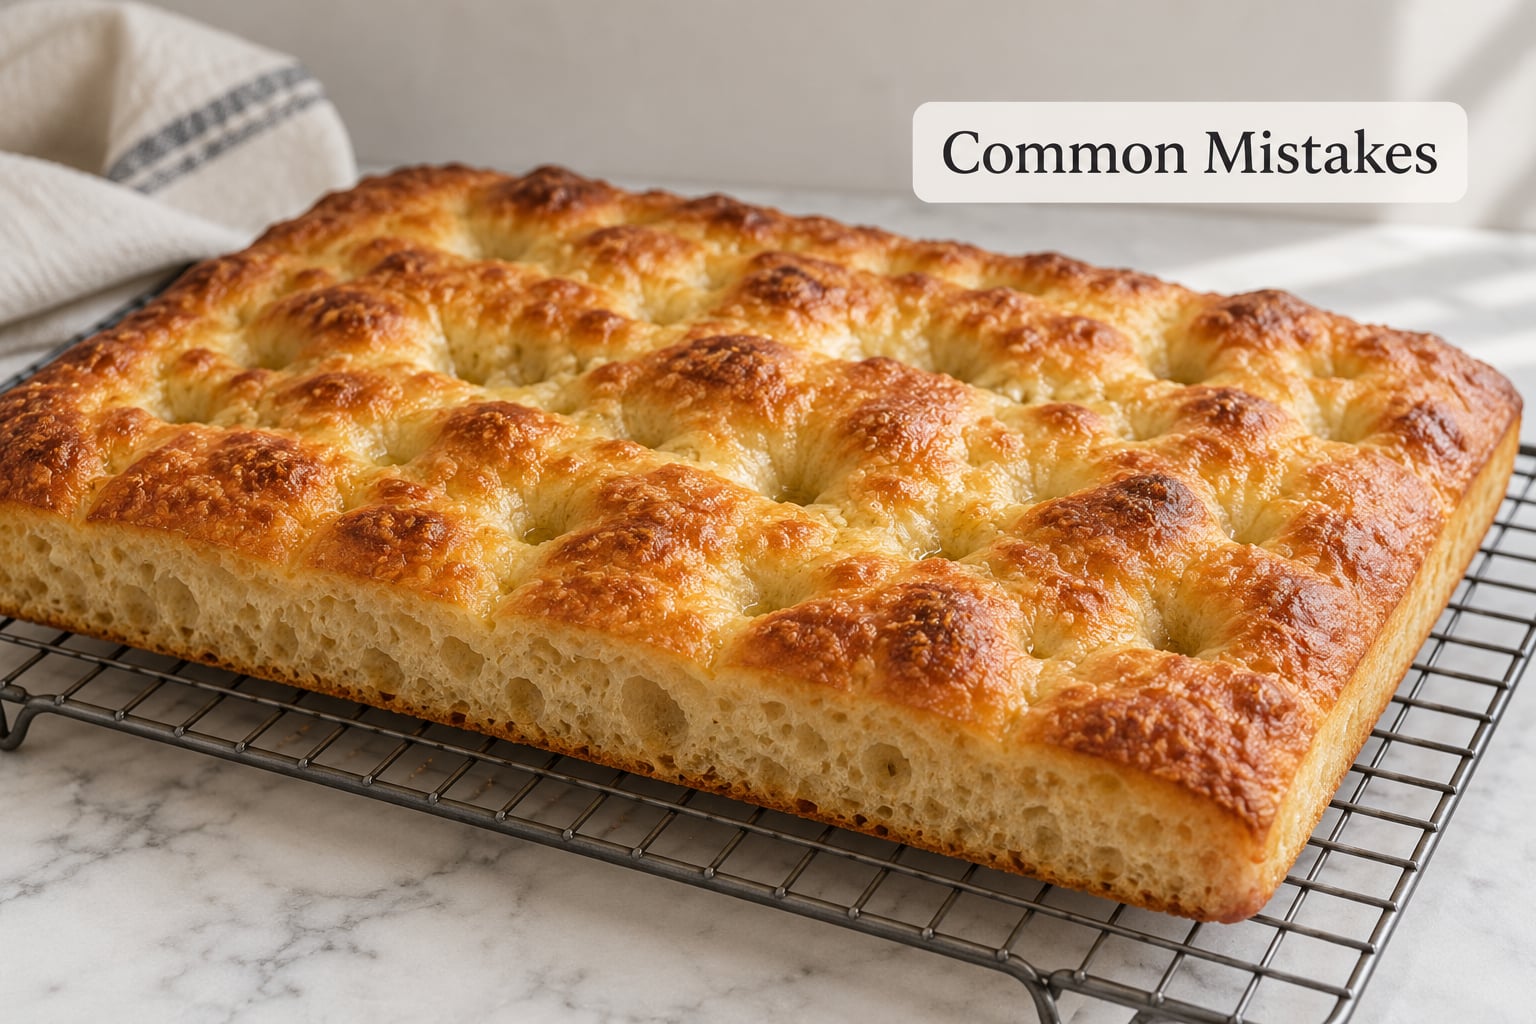
You want the top deeply golden, not pale, and the edges darker than the center. A quick broil for 1 to 2 minutes at the end takes care of any doubt. If you have a thermometer, the center should read 200 to 205 F (93 to 96 C).
Let it cool in the pan for 5 minutes before turning it out. Cutting it while hot tears the crumb, and a serrated knife is the wrong tool here.
Cool, Slice, and Store
Focaccia needs about 20 to 30 minutes out of the pan to finish setting. The crumb is still cooking as it cools, and slicing too early leaves you with a gummy, compressed middle.
A long serrated knife saws a tender crumb into shreds, and a heavy press squashes it. The cleanest method is no knife at all: pull the slices apart along the dimple lines with your hands once the loaf has cooled. If you do want to cut a thick slab cleanly, a bread knife with a long serrated blade will get closer than a straight edge.
Store it loosely covered at room temperature for 1 to 2 days. A paper bag or a clean towel works better than plastic, which softens the crust. If your kitchen runs humid and the crust goes soft overnight, a bread box is the fix; these bread boxes for keeping bread fresh longer do a better job of venting moisture than any sealed container. For longer, wrap slices individually and freeze; they keep 2 to 3 months and refresh beautifully.
To reheat, 5 minutes in a 400 F (205 C) oven or toaster oven brings back the crackle. A microwave works in 20 seconds but leaves the crust soft, so finish it in the oven if you have thirty seconds.
Cutting boards matter more than they sound. Focaccia is oily enough to soak into a cheap board, so serve it on one of these cutting boards for bread and charcuterie and the crumb stays clean.
Common Mistakes
Flat, dense focaccia
Usually under-proofed, or the yeast was dead. If the dough has not visibly doubled before shaping, give it more time. If your water was above 110 F (43 C), the yeast is gone and there is no fix but a new packet.
Dough too sticky to handle
This is normal at 80 percent hydration. The fix is oil, not flour. Oil your hands instead of dusting them, and remember that the dough should relax and spread as it proves. Bakers on baking forums lose good bakes by adding a handful of flour here and quietly undoing their hydration.
Rosemary and other herbs burn
They dry out and scorch in direct oven heat. Press them into the dimples so the dough cushions them, or add delicate herbs in the last 5 minutes of baking. A heavy blanket of cheese will brown fast for the same reason, so add it late if you want the top golden rather than dark.
Bottom is pale and chewy
Not enough oil in the pan, a pan that was not preheated, or a pan that is too thin. Generously oil the base, heat the pan with the oven, and use the heaviest pan you own. Cast iron is the best you can do here.
Dough spreads into a puddle
The bulk rise went too long, usually because the kitchen was warmer than you thought. Next time shorten it, and watch the poke test rather than the clock. Overproofed dough loses the gas that lifts it.
Uneven browning
Every oven has hot spots. Rotate the pan halfway through, and if the bottom is dark while the top stays pale, move the rack one level up. If the reverse, move it down.
Tips that fix most loaves
- Weigh the flour. Volume measuring is the number one source of a flat loaf.
- Aim for cool dough. Warm dough ferments fast and bakes flat.
- Use the pan size that matches the recipe, and preheat it.
- For a taller rise, let the bulk ferment cold overnight instead of doubling it on the counter.
- Salt the top lightly, always.
Frequently Asked Questions
Can I make focaccia without instant yeast?
Yes, and it is the same dough. Swap in about 4 g of active dry yeast, wake it in 50 g of water at 95 to 105 F for five minutes, then stir it into the flour. You can also use fresh yeast at about twice the instant amount, or a spoonful of active starter fed within the last six hours, in which case give the dough a longer rise and expect more tang.
Can I proof focaccia dough overnight in the refrigerator?
That is the best version of this recipe. Mix the dough, cover the bowl, and refrigerate it for 8 to 14 hours. The cold rise develops far more acid and a deeper flavor than a warm same-day proof, and it is far more forgiving about timing. Pull the dough out 2 to 3 hours before baking so it can come to room temperature and finish rising.
Do I have to use a baking sheet for focaccia?
No. A 9 x 13 inch metal pan gives you the thick, tall, dimpled style most people picture when they search how to make focaccia bread at home. A rimmed baking sheet gives a thinner, crunchier loaf that bakes in 14 to 18 minutes, and a cast iron skillet produces an excellent crust with a softer, cakier crumb. Scale the water with the flour for whichever pan you use, and preheat it in the oven.
What toppings work well on homemade focaccia?
Classic is rosemary, flaky salt, and plenty of olive oil. Beyond that, press halved cherry tomatoes and sliced olives into the dimples, or drizzle garlic cooked in olive oil over the top before baking. Caramelized onions, thin potato slices, anchovies, and chopped olives all work. Add cheese and fresh herbs late in the bake so they do not scorch.
Can I make focaccia bread gluten-free?
It is possible, but harder. Gluten is what traps gas in a high-hydration dough, so gluten-free flour blends need psyllium husk or chia to supply the structure and usually a longer rise plus xanthan gum for stretch. Expect a tighter, more cakelike crumb and less of the open bubble structure. A store-bought gluten-free pizza dough topped with oil and salt mimics focaccia better than starting from scratch.
Conclusion
Mix the dough tonight, let it rise somewhere cold, and trust the dough rather than the clock. Five things decide whether the loaf works: properly hydrated dough, a complete rise, a well-oiled hot pan, thorough dimpling, and a bake that goes a shade past golden.
Get those right and the rest is a short walk from the fridge to the oven. Start with the same-day version this week, then switch to the overnight rise once you know what a fully proofed dough looks like.