
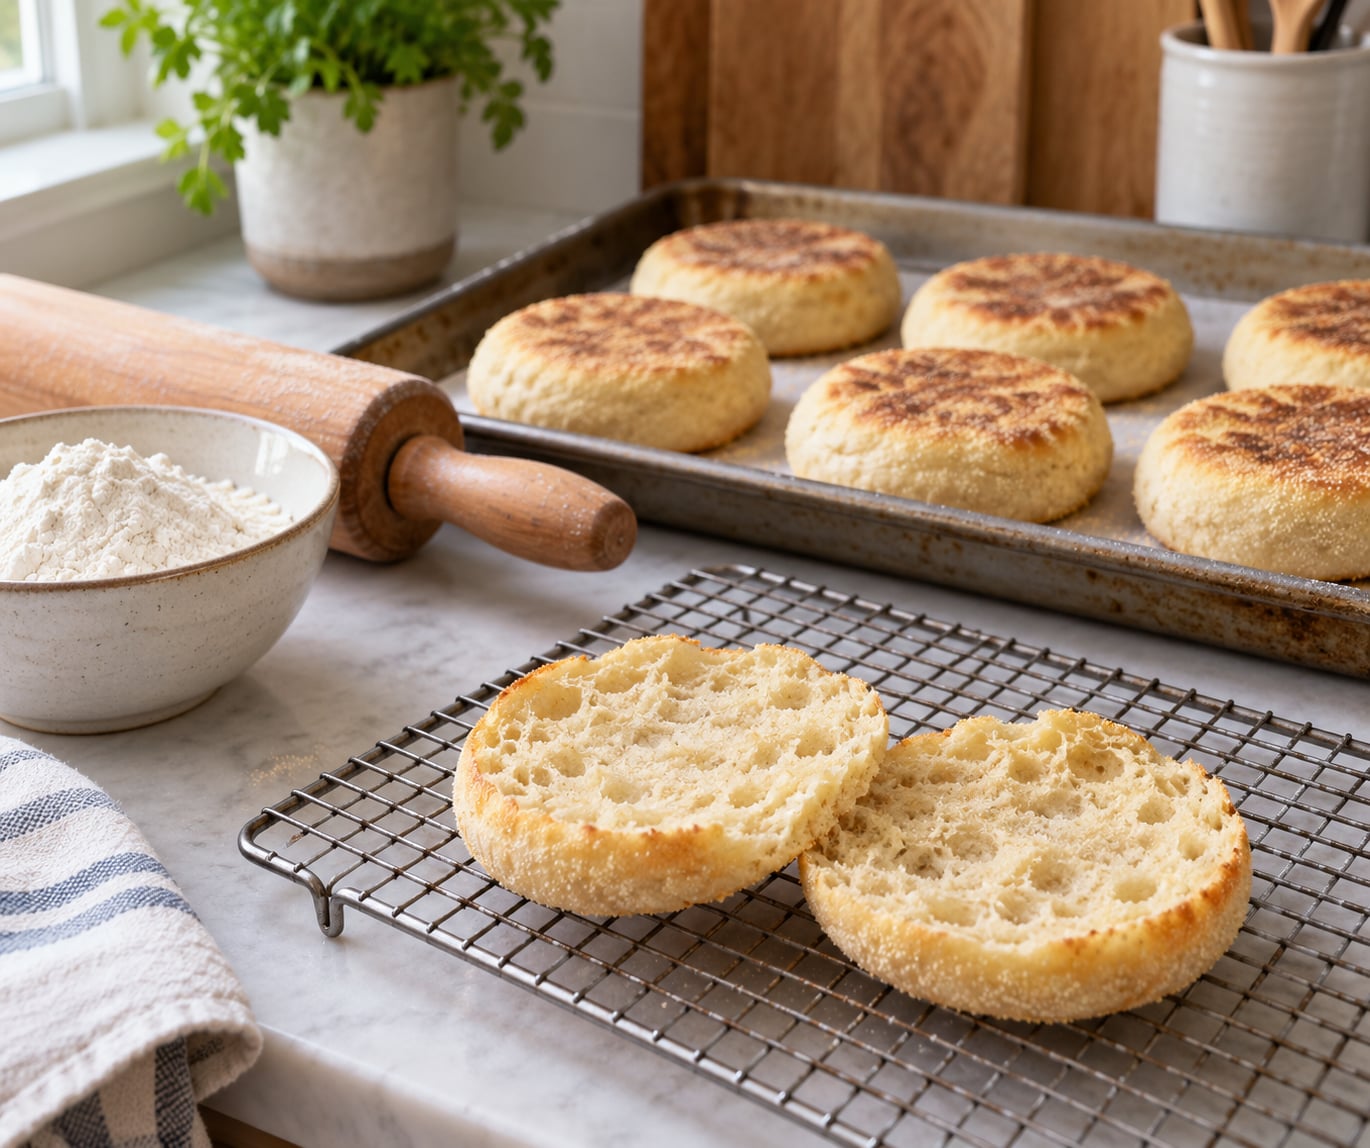
Learning how to make English muffins from scratch is mostly about dough consistency and two confident rises. Mix a stiff yeast dough, knead it until it is smooth and strong, let it double, then shape and proof it in a greased muffin pan until the tops nearly fill the cups before baking at high heat. Total time is about three hours hands-on and rising, and a stand mixer is completely optional.
What you end up with is not a small hamburger bun with a flat top. It is a round, craggy-edged bread with a crumb full of irregular holes, and that crumb is the whole reason English muffins exist. That matters most for breakfast sandwiches, where the split muffin is a sauce-catching surface. If you want that split to hold together through a commute, it is worth reading how to make a sandwich that stays fresh until lunch as well.
Table of Contents
- What You Need
- How to Make English Muffins from Scratch
- Step-by-Step
- 1. Activate the Yeast and Mix the Dough for English Muffins from Scratch
- 2. Knead Until the Dough Is Smooth and Strong
- 3. Let the Dough Rise Until Puffy
- 4. Shape the English Muffins Without Deflating the Dough
- 5. Proof the Shaped Muffins Until They Nearly Fill the Cups
- 6. Bake Until Golden Brown
- 7. Cool Before Splitting and Toasting
- Common Mistakes
- Frequently Asked Questions
- Conclusion
What You Need
English muffins are a lean, enriched dough. That means relatively little fat and no sugar beyond a small amount to feed the yeast, which is what produces a crumb that chews rather than crumbles. Most home bakers are surprised by how stiff the dough feels at first. It is supposed to feel like a soft biscuit dough, not a pizza dough.
For six muffins you need:
- 300 g (about 2.5 cups) bread flour, or all-purpose flour if that is all you have
- 2 teaspoons instant yeast, or 2 teaspoons active dry yeast
- 1 teaspoon fine salt
- 1 tablespoon sugar
- 120 ml (1/2 cup) warm whole milk, plus 60 ml (1/4 cup) warm water
- 1 tablespoon unsalted butter or neutral oil, softened, optional but recommended
- Cooking spray or butter and a little flour or fine cornmeal for the cups
Weigh the flour if you own a scale. Volume measurement is where most bad English muffin batches come from, because a cup of flour scooped straight into the bowl can be anywhere from 10 to 20 percent heavier than the same cup spooned in and leveled. Bread flour has more protein and produces a taller, chewier muffin with more open holes. All-purpose flour gives a slightly tighter, softer crumb and is more forgiving if your dough feels sticky when you knead it.
Instant yeast does not need waking up, though sprinkling it over warm liquid will speed things along. Active dry yeast should be stirred into the warm milk with the sugar and sat for five to ten minutes until foamy. If nothing happens in that window, the yeast is dead and the batch will not rise. Milk should feel warm rather than hot, somewhere between body temperature and a warm shower, roughly 105 to 115 F. Too hot kills the yeast outright.
Equipment
You need very little. A twelve-cup muffin pan, a large mixing bowl, a bench scraper or the side of a knife, a rolling pin, and a wire cooling rack. A bench scraper is worth the small effort of getting one because sticky dough clings to everything else.
A stand mixer with a dough hook is nice, not necessary. Ten minutes of hand kneading gets you the same gluten development, and for six muffins a mixer bowl is often more trouble than it is worth. A baking sheet also works in place of a muffin pan if you flatten each round a little and keep it from spreading too far, though the cups give you taller sides and more defined edges.
The yield is six muffins from this recipe. Double it and proof in a large covered bowl instead of trying to rush two batches in one kitchen session, because the second rise is the step people try to skip and it is the step that cannot be skipped.
How to Make English Muffins from Scratch
The full process has four movements: activate, knead, rise, shape, then rise again before baking. The two rises are doing the real work, and both of them are judged by what the dough looks and feels like rather than by the clock. A dough that has doubled in volume and feels full of air is ready, whether that took fifty minutes or two hours.
Shaping is where most batches go wrong, because handling risen dough too aggressively pushes the gas out. You press the rounds into the cups rather than dropping them in, and you keep your flouring minimal so the muffin surfaces stay craggy. Then they get a second rise in the pan, which is the step that turns a dense dinner roll into something with real texture.
Baking happens hot, around 400 F, until the tops are deep golden and the centers register about 200 F on an instant-read thermometer. Cool them completely on a rack before splitting. Cutting warm bread tears the crumb, and the torn crumb is exactly what you are trying to avoid.
Step-by-Step
1. Activate the Yeast and Mix the Dough for English Muffins from Scratch
Combine the warm milk, warm water, sugar, and yeast in a large bowl and stir. With active dry yeast, wait until the surface turns foamy before going further. Sprinkle the flour and salt over the liquid and stir with a sturdy spoon until no dry pockets remain.
The dough will look shaggy and slightly sticky at this stage. That is normal. Add the softened butter or oil if you are using it and mix it through with your hands, then turn the dough out onto a floured surface. One more minute of mixing by hand distributes the fat evenly, which is easier to do now than after the dough has started to develop gluten.
2. Knead Until the Dough Is Smooth and Strong
Knead by hand for eight to ten minutes, or until the dough feels smooth, tight, and slightly tacky rather than sticky. Push it away with the heel of your hand, fold it over, rotate a quarter turn, and repeat. Scrape any dough stuck to the counter back into the ball as you go.
You will know the gluten is developed when a small piece stretched thin no longer tears. Press a dab of dough flat on the counter, stretch it with your thumbs until you can almost see light through it, and let go. A clean windowpane with a few tiny holes means stop kneading. Ragged and hole-filled means another few minutes. In a stand mixer, this is about six minutes on low speed with the hook.
3. Let the Dough Rise Until Puffy
Put the dough in an oiled bowl, cover it with a damp towel or plastic wrap, and set it somewhere warm. At a typical room temperature of about 72 F this takes roughly one hour. Warmer kitchens run faster, cooler ones run slower, which is exactly why the clock is a poor guide here.
Judge it by volume and by feel. The dough should look noticeably domed, feel full of air when you poke it, and spring back slowly after your finger goes in. If the dent fills in immediately, it needs more time. When in doubt, wait fifteen more minutes. Yeast dough that has doubled once is forgiving; yeast dough that has tripled will taste sour and bake up flat.
4. Shape the English Muffins Without Deflating the Dough
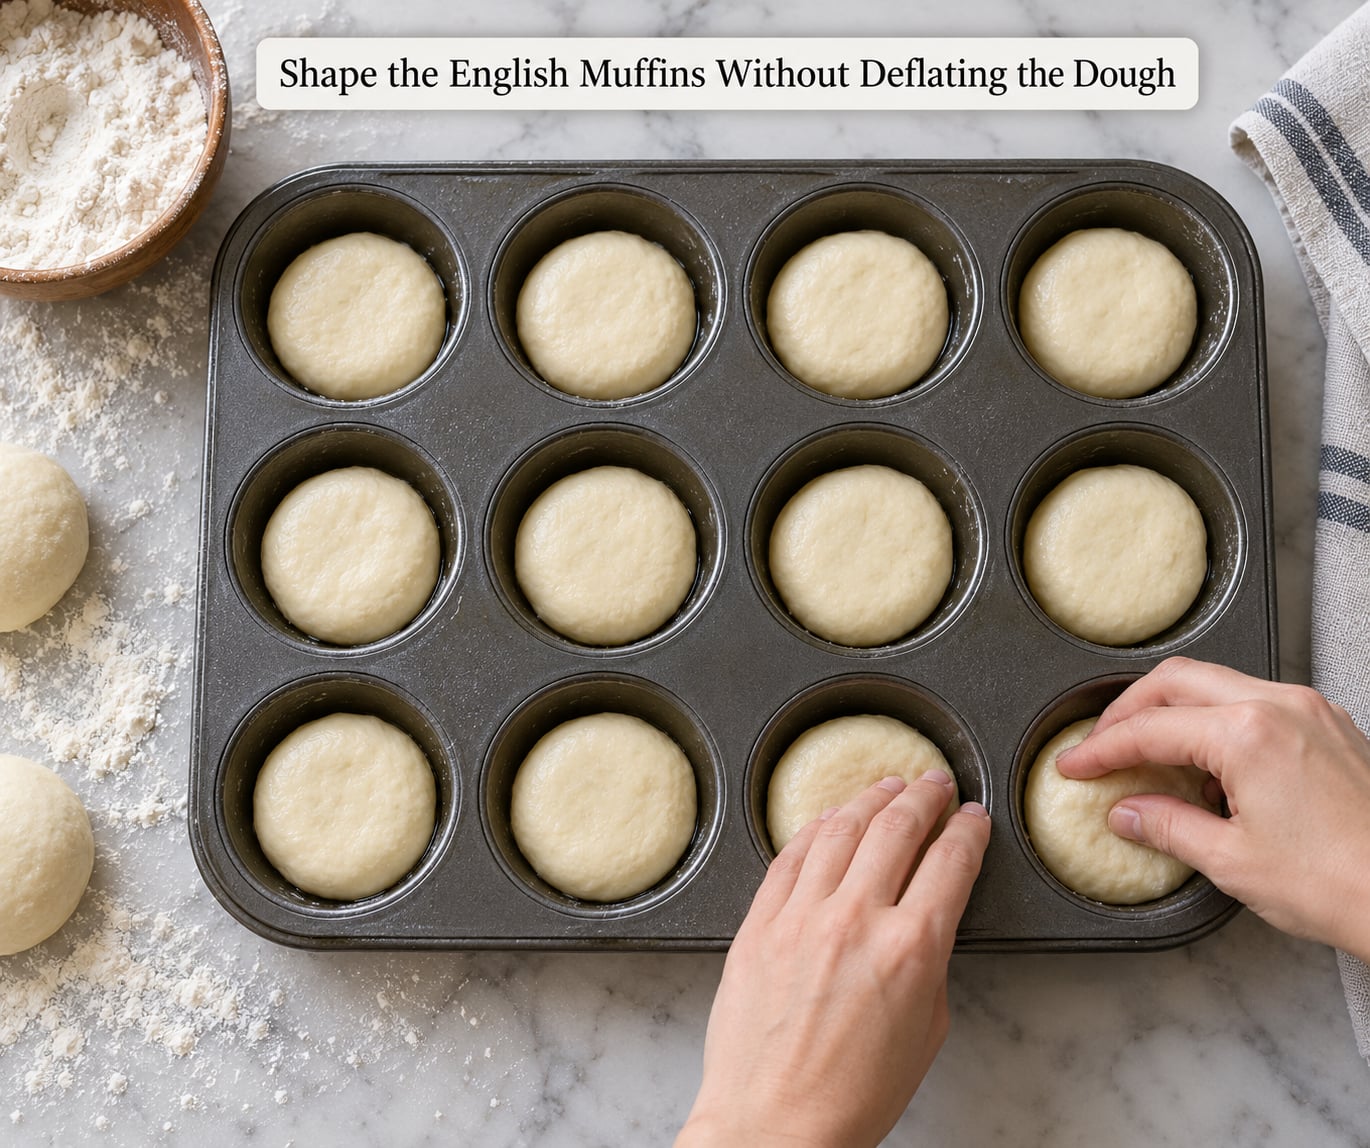
Turn the dough out onto a lightly floured surface and press it flat with your palms. Do not knead it. Use a bench scraper to cut it into six even pieces, then cup each piece in your palm and roll it into a loose ball. The balls will look rough. Rough is right, since a smooth surface is where the craggy edges come from.
Work one ball at a time and keep the rest under the towel. Press each ball into a greased cup with your fingertips, pushing gently down the sides so it reaches the bottom and stands about an inch and a half tall. Dusting the tops lightly with cornmeal or flour is optional, but it makes the muffin easier to lift out later.
5. Proof the Shaped Muffins Until They Nearly Fill the Cups
Cover the pan loosely so nothing touches the dough tops and put it back in the warm spot. Another forty-five to sixty minutes is typical. On a second rise the dough usually does not double, so judge it by height instead. The tops should be domed and roughly level with the rims of the cups.
Temperature is what changes the timing. On a cold stovetop or in a cool pantry this can stretch past two hours, and a warm oven with the light on will cut it to under thirty minutes. If the dough is domed and jiggly before baking, you have the right amount of gas. If it has filled the cups completely and started to dome above the rim, the structure is already stretched past what it can hold.
6. Bake Until Golden Brown
Heat the oven to 400 F and bake on the middle rack for 14 to 18 minutes. Put the pan in as soon as the oven is fully preheated, because a cold oven delays the rise a second time and the muffins spread instead of climbing.
They are done when the tops are deep golden and sound hollow when you tap the crown, and the center reads about 200 F on an instant-read thermometer. The thermometer is the honest answer for anyone whose oven runs cool or hot. If yours browns in twelve minutes but the middle is still gummy, tent the tops with foil and give it another four minutes rather than browning them further.
7. Cool Before Splitting and Toasting
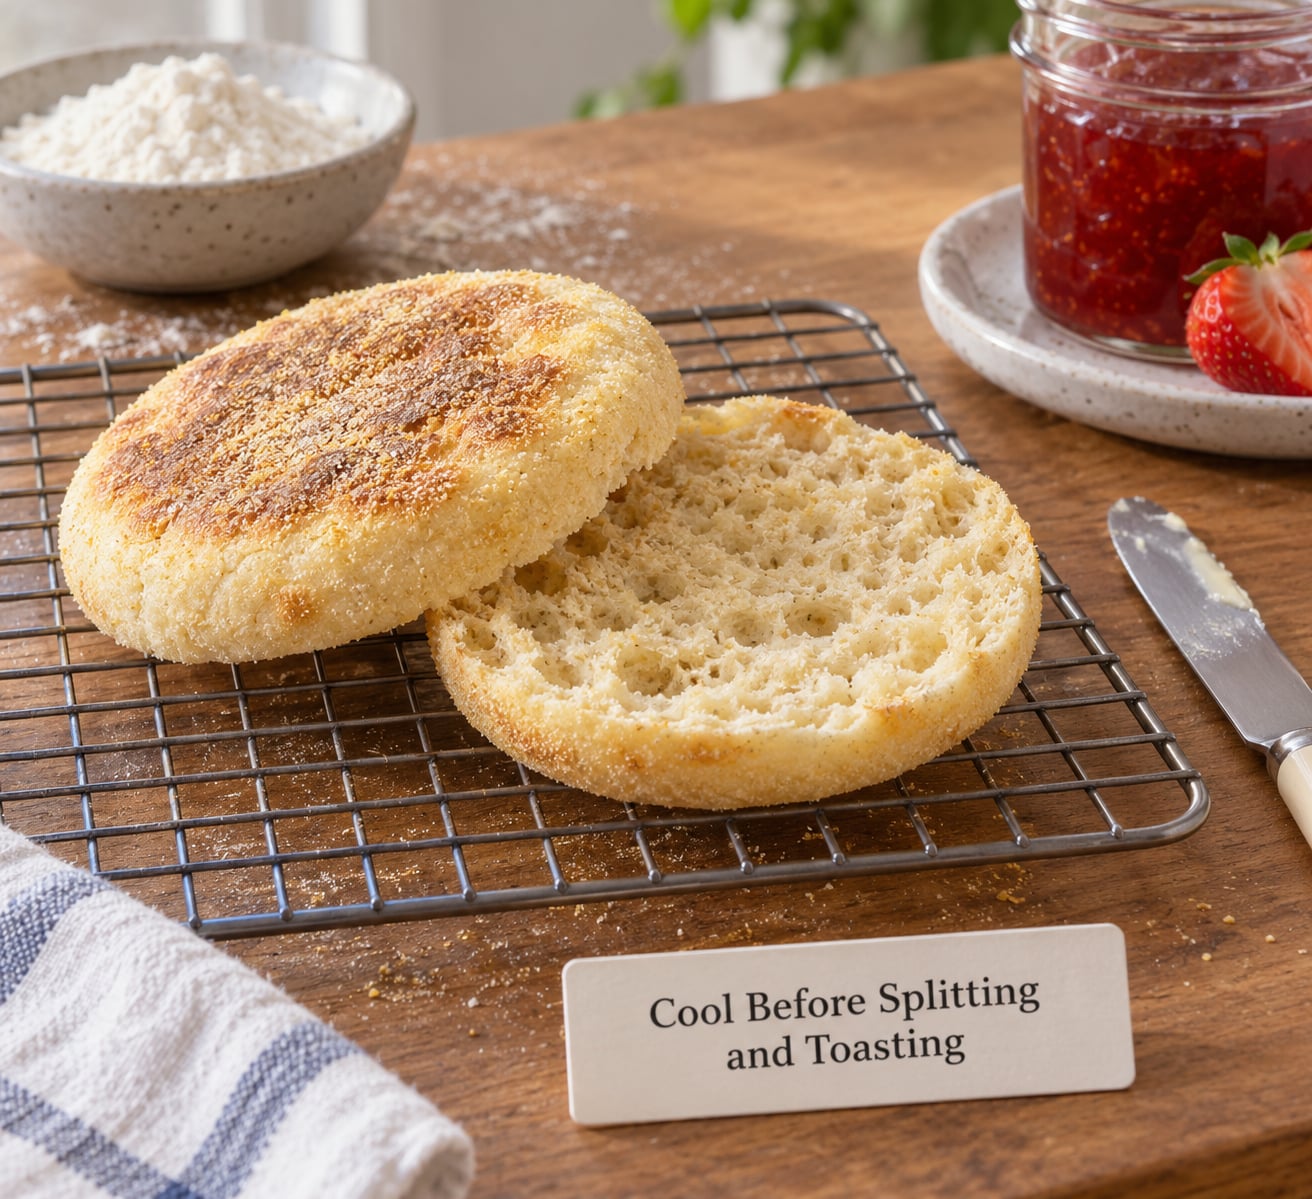
Move the muffins to a wire rack and let them cool completely, about 45 minutes. Steam trapped in a muffin softens the crumb as it condenses, so cutting too early gives you a gummy crumb no matter how well the bake went.
Split them with a serrated knife, sawing gently rather than pressing down. Cutting straight through flattens the interior, so if you have a fork, prick a line around the waist, pull the halves apart, and then lift out any stragglers clinging to the crust. Toast the cut sides briefly in a dry pan or under the broiler for a minute, then butter, jam, honey butter, or a fried egg. English muffins also freeze beautifully after splitting, which makes them a good candidate for breakfast sandwiches made ahead and frozen.
Common Mistakes
Muffins come out flat and dense. Almost always underproofed, or the dough got degassed during shaping. Give the first rise more time than feels reasonable, and handle the risen dough with the flats of your hands rather than squeezing it.
Muffins spread into puddles. The dough was too soft or the fat was too cool to blend in. Fully soften the butter, or use oil, and add a couple of minutes of kneading. Very wet all-purpose dough can also benefit from another tablespoon or two of flour at the kneading stage.
They tear instead of splitting cleanly. That is almost always cutting too early or pressing too hard. Cool them fully and use a serrated knife with a light sawing motion. To keep a split muffin from pulling apart inside a sandwich, check how the layers stack in how to keep an overstuffed sandwich together.
Tops are pale, bottoms are dark. Your oven runs hot or the pan sits too close to the element. Move the pan to the middle rack, drop the temperature by 25 F, and tent with foil if browning happens before the center sets.
Muffins taste sour or gummy inside. One of the two rises went too long. Check the dough at 30-minute intervals after the first rise and stop at double. For the second rise, take the pan out of the heat as soon as the tops dome.
A few habits fix most of these at once. Spoon flour into the measuring cup and level it rather than scooping. Use fresh yeast, since old dry yeast loses potency silently. Keep the dough at a stable temperature rather than alternating between a cold counter and a hot stove. Flour the muffin cups lightly before the dough goes in. And let everything cool before cutting anything.
Frequently Asked Questions
Do I need a stand mixer to make English muffins from scratch?
No. Hand kneading takes eight to ten minutes and develops gluten just as well as a dough hook. The only reason to reach for a mixer is a very wet or high-hydration dough that is hard to handle on a counter. With a lean dough like this one, a bowl, a spoon, and your hands are genuinely all you need.
Can I make English muffins without a muffin pan?
Yes, though the shape changes. Bake on a parchment-lined baking sheet with the rounds spaced well apart, pressing them to about an inch and a half tall. They will spread into wider, flatter rounds with less of a side wall. A muffin pan gives you height and vertical edges, which is what makes the split look like a bakery muffin.
How long should English muffin dough rise before baking?
Plan on about one hour for the first rise and 45 to 60 minutes for the second at a typical room temperature, but use the dough as the clock. The first rise is done when the dough has doubled and springs back slowly from a poke. The second is done when the tops dome to roughly the rim of the cup. Warm kitchens speed both up and cool ones slow them down.
Can I make English muffins ahead of time?
Mix, knead, and shape them a day ahead, then refrigerate the pan covered overnight. Cold dough proofs very slowly, so take it out two to three hours before baking and let it come to room temperature before checking whether it has risen. The overnight rest also gives the dough a deeper, slightly tangy flavor that same-day muffins do not have.
How do I keep English muffins from drying out?
Cool them completely on a wire rack, then store them airtight at room temperature for two to three days. A paper towel inside the container absorbs condensation that would otherwise soften the crust, while the airtight seal keeps the crumb from drying out. Skip the refrigerator, which stales bread faster than it prevents spoilage.
Can I freeze homemade English muffins?
Yes, and they reheat well. Cool them fully, split each one, and freeze the halves in a single layer on a tray before moving them into a freezer bag or container so they do not stick together. Thaw at room temperature or toast straight from frozen in a dry pan for a minute or two. They keep well frozen for up to three months.
Conclusion
If you have never made them before, start with the plain six-muffin recipe above and get that first batch right before trying sourdough, whole wheat, or a cinnamon raisin version. Weigh the flour, warm the milk to about 110 F, and let the dough tell you when it is ready instead of the timer.
Once you learn to read the dough, this becomes one of the most forgiving breads in the kitchen. A little extra rise, a slightly pale bake, or an uneven split all still make a very good breakfast muffin, and that is how you learn to make English muffins from scratch with confidence rather than guesswork.