
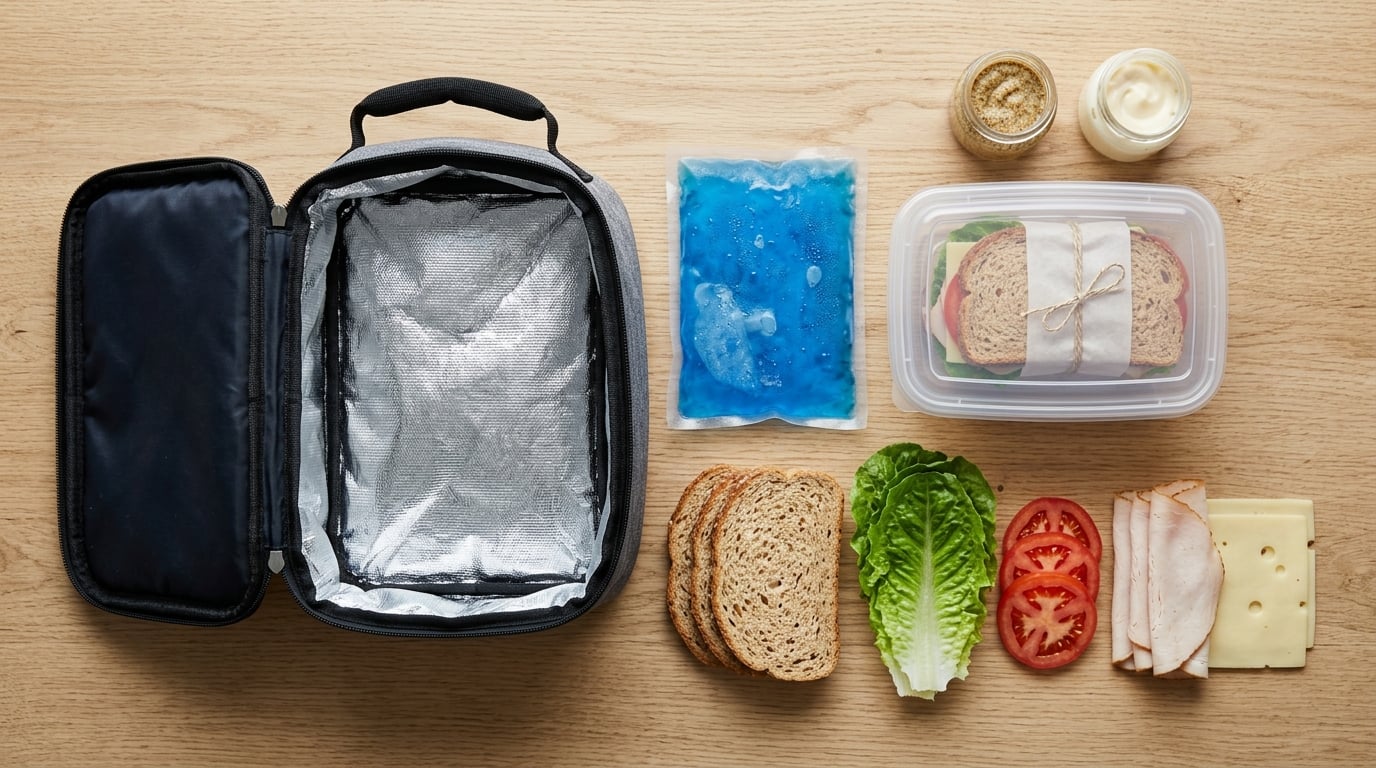
A sandwich made in the morning tastes fresh at lunch when you block moisture from the bread: spread mayo or butter on lightly toasted slices, stack wet ingredients in the centre behind a lettuce barrier, wrap it tightly, and keep it cold in an insulated bag. That is the whole system, and it adds about five minutes to your morning.
The reason most packed sandwiches disappoint by noon is not the filling. Bread is porous, so moisture from tomatoes, cucumbers and pickles migrates straight into it, and a closed container traps the condensation that makes it worse. Once you understand that, the fixes get simple: dry the wet ingredients, seal the bread, layer the sandwich dry-to-wet, and manage the temperature.
What You Need
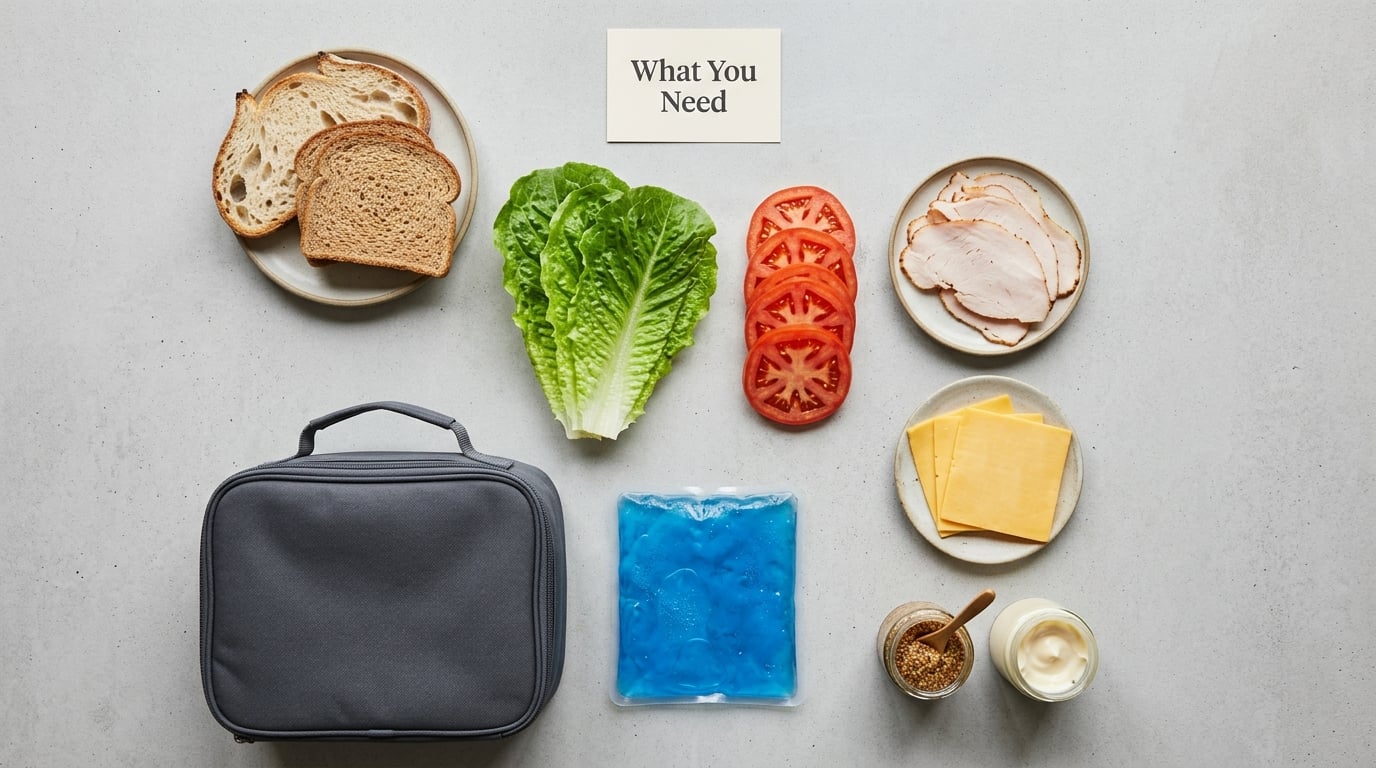
You do not need special gear. A lunch bag that holds its temperature, one frozen gel pack, and a hard-sided container with a lid will carry you through most weeks of packed lunches.
- A reusable insulated lunch bag. A soft-sided tote is fine if it zips or cinches shut. The seal matters more than the brand.
- At least one frozen gel pack for any sandwich with deli meat, poultry, egg salad, tuna, soft cheese or cut fruit.
- A rigid container with a lid, ideally one with a small compartment for wet items or the lettuce.
- Parchment or wax paper to wrap the sandwich before it goes in the container.
- A paper towel for the container lid. It catches condensation that would otherwise settle on the bread overnight in a fridge.
- A sharp knife and a cutting board so you can prep without crushing the bread on the counter.
- Optional: a small lidded pot or cup for dressing, olives, or a lettuce leaf you want to add at lunchtime.
Ingredients fall into three useful groups. Travels well: hard cheese, salami and other cured meats, peanut or almond butter, hummus, roasted red peppers, quick-pickled onions, apples tossed with a squeeze of lemon. Needs moisture control: ripe tomato, cucumber, avocado, spinach, deli turkey, chicken salad, tuna salad, egg salad. Needs a cold chain: anything with mayo, poultry, cooked egg, tuna, soft cheese, or cut fruit.
Step-by-Step
The routine below takes about five minutes on a normal morning. Most of the work is deciding what goes in and keeping moisture where it belongs.
Choose Fresh-Lasting Ingredients
Sturdy bread is the first decision. Sourdough, ciabatta, focaccia, a wheat pita, an English muffin or a crusty roll all hold their structure for hours; soft white sandwich bread compresses and goes flat in a bag. If you like white bread, toast it first and skip the top slice in the lunchbox, since that slice takes the most abuse.
Vegetables matter next. Store lettuce and spinach in a paper towel inside the crisper and wash them the night before so they drain dry. Roma tomatoes drain better than slicers, and salt pulls water out of them, so season them just before they go in, not at breakfast. Cucumbers can sit in paper towels for ten minutes to shed surface water.
For protein, sliced deli turkey and ham travel well if you pat off any surface liquid. Rotisserie chicken, tuna salad, chicken salad and egg salad are all usable, but they are mayo-heavy and they need the cold chain covered later in this guide. Apples hold up all day if you toss the slices in lemon juice to slow browning.
Prevent Soggy Bread and Wilting Lettuce
A moisture barrier is a fat-based spread that water cannot pass through, and it is the single highest-impact thing you can do. Mayo works best because it is full of oil. Butter, cream cheese, hummus and nut butter also work. Put it on the inner face of both slices before anything wet touches the bread.
Toast the bread first. Toasting drives off surface moisture and leaves the crumb more open, so it absorbs a stray drop instead of turning to mush. Home cooks pack lunch every day reach for this trick constantly, and it costs you about three minutes.
Lettuce does two jobs when it is placed directly against the bread: it forms a barrier, and it keeps its crispness only if it stays dry and cold. Separate it into a small container with a lid if crispness matters most, and add it at lunchtime. Never put it on top of a hot filling, and never pack it next to a warm fruit like an apple you have not chilled.
Assemble in the Right Order
Build dry-to-wet so nothing wet ever sits against a slice that has no protection. The order that works:
- Bottom slice of bread, spread with mayo or butter.
- A full leaf of lettuce or romaine as the moisture barrier.
- Drier vegetables first, then the wetter ones. Cucumber and tomato go after the crisp cabbage or lettuce.
- Protein and cheese, which are the structural layers that keep the sandwich from collapsing.
- Condiments, spread or drizzled on the protein rather than pooled underneath.
- Lettuce or pickle, if you want a second barrier between the filling and the top slice.
- Top slice of bread, spread on its inner face too.
The tell that you layered it right: lift the top slice and the filling stays put. If the tomato is sitting on the bread with no lettuce between them, you skipped the barrier. Cut the sandwich in half with a serrated knife just before packing, and the layers lock together instead of sliding out when someone takes the first bite at a desk.
Wrap the Sandwich for Less Crushing
Compare the options and the difference is obvious. Parchment or wax paper is breathable, so condensation escapes and the crust stays drier. Plastic wrap seals tighter and holds shape better, but traps moisture, so use it when the sandwich is stable and mostly dry. A hard-sided container alone without wrapping lets the bread breathe but lets tall sandwiches slide and deform. A soft bag with no container is the worst option; it squashes everything.
The practical answer: wrap in parchment for bread-forward sandwiches like a pressed or panini-style sandwich, wrap in plastic for stuffed sandwiches that need to hold together, then place either one in a rigid container inside the insulated bag. A paper towel in the container lid catches the condensation that builds as the temperature drops.
To keep condiments from leaking, put them on the protein inside the sandwich rather than drizzling along the cut edge, and pack any dressing or olives in a separate cup with a snap lid. If you are packing a tall layered sandwich, cut off the top crust so the stack fits under the lid, and set it cut-side down.
Keep Perishable Fillings Cold Until Lunch
USDA guidance is the baseline here. Refrigerate perishable food within two hours, and within one hour when the outside temperature is above 90°F (32°C). That applies to a sandwich sitting in a parked car exactly as much as one sitting on a counter, which is why the gel pack matters.
Freeze the gel pack solid the night before and put it on top of the sandwich inside the bag, wrapped in a towel so it does not wet the container. A single frozen pack is enough for a lunch bag that is opened once at noon. If your sandwich has to survive a commute plus a lunch hour plus a long afternoon, use two packs or a small frozen water bottle.
For hot sandwiches, the same insulation works in reverse. A sandwich wrapped in foil, tucked into a pre-warmed insulated bag, and held at 140°F (60°C) or above stays safely hot for the length of a school or workday. Fillings that go into a sandwich should be cooked to safe internal temperatures first: poultry to 165°F (74°C), ground meat to 160°F (71°C), whole cuts and fish to 145°F (63°C).
When reheating a chilled deli-meat or cooked-egg sandwich at lunch, microwave it until the filling is steaming hot throughout, which means about 165°F (74°C) for deli meat and 160°F (71°C) for egg-based fillings. A thirty-second blast on high usually does it if the filling is spread thin.
Common Mistakes
Almost every disappointing packed lunch comes down to one of a handful of fixable errors.
- Soggy bottom slice. The cause is wet filling against unprotected bread. Fix it with a mayo or butter layer plus a lettuce or parchment barrier directly on the slice.
- Wilted or rubbery lettuce. The cause is moisture plus warmth. Fix it by storing lettuce dry, packing it separately, and keeping the bag cold.
- Leaking brine or tomato juice in the bag. The cause is undressed wet vegetables and no compartment. Fix it by draining produce in a paper towel, seasoning at the last second, and using a separate cup.
- Dry, cracker-like bread. The cause is an unsealed container sitting in a warm car or a heated office. Fix it with a tight lid and a cold pack; a dry sandwich beats a soggy one every time.
- Condiments soaking through. The cause is thick spreads applied to the outside faces or generous pours on the cut edge. Fix it by spreading mayo only on inner faces and using a thinner drizzle on the protein.
- A squashed sandwich. The cause is a soft bag or an overfilled container. Fix it with a rigid container, trimming the top crust, and packing it cut-side down.
- A sandwich that falls apart when eaten. The cause is a lack of structural filling and a cutting problem. Fix it by adding cheese or protein layers and cutting with a serrated knife just before packing.
- Unsafe perishable filling. The cause is time out of refrigeration with no cold source. Fix it with a frozen pack in an insulated bag and a two-hour limit, one hour above 90°F.
Two small extras help more than people expect. A paper towel under the sandwich absorbs the condensation that forms as warm food cools, and a heavy book or a pan on top of the sandwich in the fridge for 15 to 20 minutes sets the layers so it stays intact through lunch.
Frequently Asked Questions
Can I make a sandwich the night before and eat it for lunch?
Yes, with a few adjustments. Assemble it fully, wrap it tightly in plastic or parchment, and refrigerate it right away rather than leaving it on the counter overnight. Skip fresh lettuce or pack it separately, since it goes limp within hours, and use bread that will not go stale overnight. It re-crisps in a toaster or a dry pan in a couple of minutes at lunchtime.
What is the best container for a sandwich that stays fresh?
A hard-sided container with a snap lid, sized so the sandwich sits without being pressed against the top. Add a compartment for lettuce, tomato, or dressing so wet items do not sit on the bread. Wrap the sandwich in parchment first for a drier crust, and place a paper towel in the lid to catch condensation. Put the whole thing inside an insulated bag with a frozen pack.
How do I keep lettuce crisp in a packed lunch?
Wash and dry it thoroughly, then store it wrapped in a paper towel in the crisper so it does not sit in water. For a lunchbox, the most reliable method is to pack the leaves separately in a small lidded container and add them at lunchtime. If you are layering them in, place them directly against the bread as a moisture barrier and keep the bag cold with a frozen pack.
Will an insulated lunch bag keep a sandwich safe without refrigeration?
It can, but only with frozen packs. USDA guidance says perishable food should be refrigerated within two hours, or one hour when the temperature is above 90°F (32°C). An insulated bag with one or two frozen gel packs keeps meat, poultry, egg salad, tuna, mayo-based fillings, and cut fruit safely cold for a workday, especially if you open the bag only once at lunch.
What ingredients stay fresh the longest in a packed sandwich?
Hard cheeses, salami and other cured meats, nut butters, hummus, roasted red peppers, quick-pickled onions, and apples tossed with a squeeze of lemon all hold their texture and flavour for five hours or more. They rarely release liquid, so they are the safest base for a packed lunch. Fresh greens, avocado, and ripe tomato go at the end of the list because they soften and release water fastest.
Conclusion
Start tomorrow with three changes. Pat your vegetables dry, spread mayo or butter on toasted bread and put a lettuce leaf on top of it, and pack the sandwich cold in a rigid container inside an insulated bag with a frozen pack. Pick a sturdy filling like cheese, deli meat, or hummus over a wet one, and those five minutes in the morning are the difference between a lunch you look forward to and one you eat because it is there.