
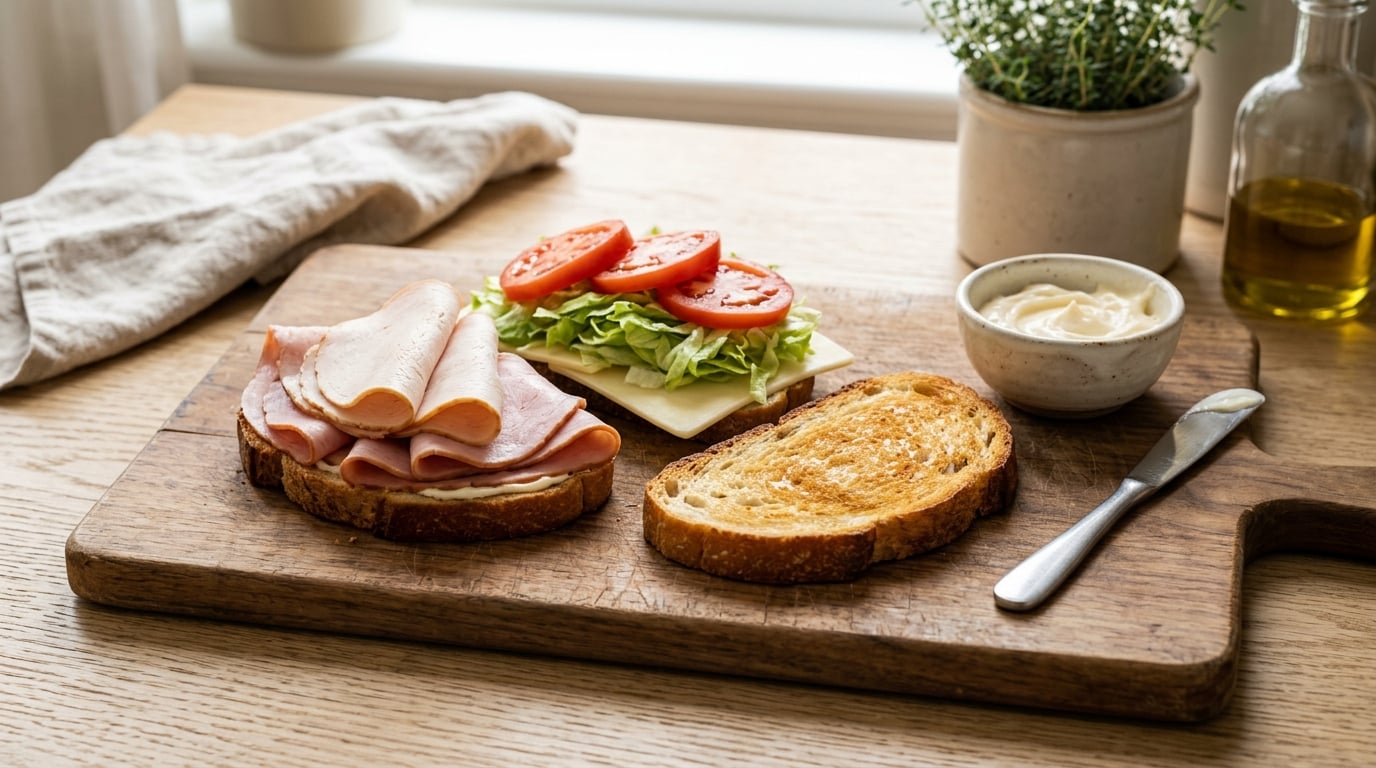
To layer a sandwich like a deli pro, build it from the bottom up in this order: spread, sturdy protein, cheese, a dry lettuce barrier, wet vegetables, a top spread, then the top slice. That order decides whether the stack stays upright, whether the bread goes soggy, and whether every bite tastes the same. It takes about 10 minutes once your ingredients are ready.
Most homemade sandwiches fail in boring ways. A too-thick slice of turkey buckles, tomato juice soaks through by the second hour, and the last bite is all lettuce and no filling. None of that is a skill problem, though. It is an order problem, and the fix is the same order the counter uses.
Here is the short version before the details. Wide and flat goes low and tight. Delicate and tall goes high. Anything wet gets a dry layer on both sides of it. That is the whole system, and every step below is a version of those three sentences.
- Spread — mayo, mustard, or dressing on the cut face of the bottom slice, applied edge to edge.
- Sturdy protein — folded deli meat, sliced cheese, or the densest filling, laid flat and slightly inside the edges.
- Cheese or dry barrier — a slice of cheese or a leaf of romaine directly on the protein.
- Dry greens — shredded lettuce, tightly packed, forming a mat that stops moisture moving.
- Wet ingredients — tomato, cucumber, pickles, avocado, onions, blotted and laid toward the center.
- Soft or seasoned layer — olives, peppers, bacon, or a second protein, if the sandwich needs the height.
- Top spread and top bread — a thin spread on the last slice, then close and press once.
| Layer | Ingredient | Why it goes there |
|---|---|---|
| 1 | Spread (mayo, mustard, dressing) | Seals the cut face, holds seasoning, adds moisture without soaking |
| 2 | Sturdy protein, folded | Creates a flat base so nothing above it can slide |
| 3 | Sliced cheese | Traps moisture inside the sandwich and gives the stack a second flat plane |
| 4 | Dry lettuce or shredded greens | The moisture barrier: wet ingredients sit on lettuce, not on bread |
| 5 | Wet vegetables and pickles | Placed above the barrier and pulled in from the edge so they do not drip |
| 6 | Soft or seasoned extras | Sits high where it stays visible and does not crush what is underneath |
| 7 | Top spread and top slice | Closes the stack, adds a second barrier face, finishes the seal |
Table of Contents
- What You Need
- Step-by-Step: How to Layer a Sandwich Like a Deli Pro
- 1. Choose a sturdy bread and prepare it
- 2. Spread the barrier ingredient first
- 3. Add the firm filling first to layer a sandwich that holds
- 4. Layer the remaining fillings in order
- 5. Add the top spread and close the sandwich
- 6. Cut cleanly and check the balance
- Layer order changes for subs, clubs and melts
- Common Mistakes
- Frequently Asked Questions
- Final Tips for a Deli-Style Sandwich
What You Need
You need less than you think. The ingredients are ordinary, but the specs matter more than the shopping list, because a deli sandwich is a structure built out of specific thicknesses.
Bread that holds weight
| Bread | Best for | Toasting guidance |
|---|---|---|
| Sourdough | Deli stacks, pressed melts | Toast 4 to 5 minutes at 400°F until the cut face is firm |
| Rye | Reubens, pastrami, anything with sauerkraut | Toast lightly; rye scorches quickly |
| Ciabatta | Subs and hoagies | Split and toast cut face down, 3 minutes, to close the crumb |
| Hoagie or sub roll | Long cold-cut sandwiches | Toast the whole roll, then assemble while warm |
| White sandwich bread | Soft deli sandwiches, kid lunches | Light toast only, or leave soft for a true cold-cut texture |
Sturdy does not mean thick and dense. A slice of white bread that is 3/4 inch thick cuts cleaner and holds a filling better than a thin slice that tears when you spread it. If your deli sandwich keeps collapsing, thin bread is usually the reason, not too much filling.
Spreads, measured
Two tablespoons of mayo per slice is the working number for a standard sandwich. Enough to coat with no bare patches, not enough to squeeze out. Mustard is stronger, so a tablespoon is plenty. Dressings like Italian or Thousand Island carry acid and sugar, so go lighter: about 1 tablespoon, and put it on only one face if the sandwich also has fresh tomato.
Fillings at deli quantities
Budget 3 to 4 ounces of deli meat per sandwich. That is 8 to 10 slices of thin cold cuts, or 3 slices of a thicker cut. Ask for it sliced thin, and resist the urge to fold every slice flat — folding two or three slices into a shallow wave makes the protein layer wider and more stable than laying them flat.
For cheese, one slice per 2 to 3 ounces of meat. Shredded cheese is better than sliced in a tall sandwich because it fills gaps between meat slices instead of creating air pockets.
Vegetables: iceberg or romaine for the barrier layer, thick-sliced tomato blotted on a paper towel, and cucumbers sliced thin. Salt the tomato only after it is in place, so you can see how it seasons the layers above it.
Two tools worth having
A wide offset spatula handles the spread, because a butter knife leaves streaks that dry unevenly. A sharp serrated knife or a long serrated knife for a tall stack is the difference between a clean cross-section and a crushed one. A paper towel is the third thing you need, and it is free.
Step-by-Step: How to Layer a Sandwich Like a Deli Pro
Set everything out before you touch the bread. A sandwich built in a rush gets assembled in a random order, and random order is the exact problem this guide fixes. Working in order takes 10 minutes; improvising takes 15 and produces worse results.
1. Choose a sturdy bread and prepare it
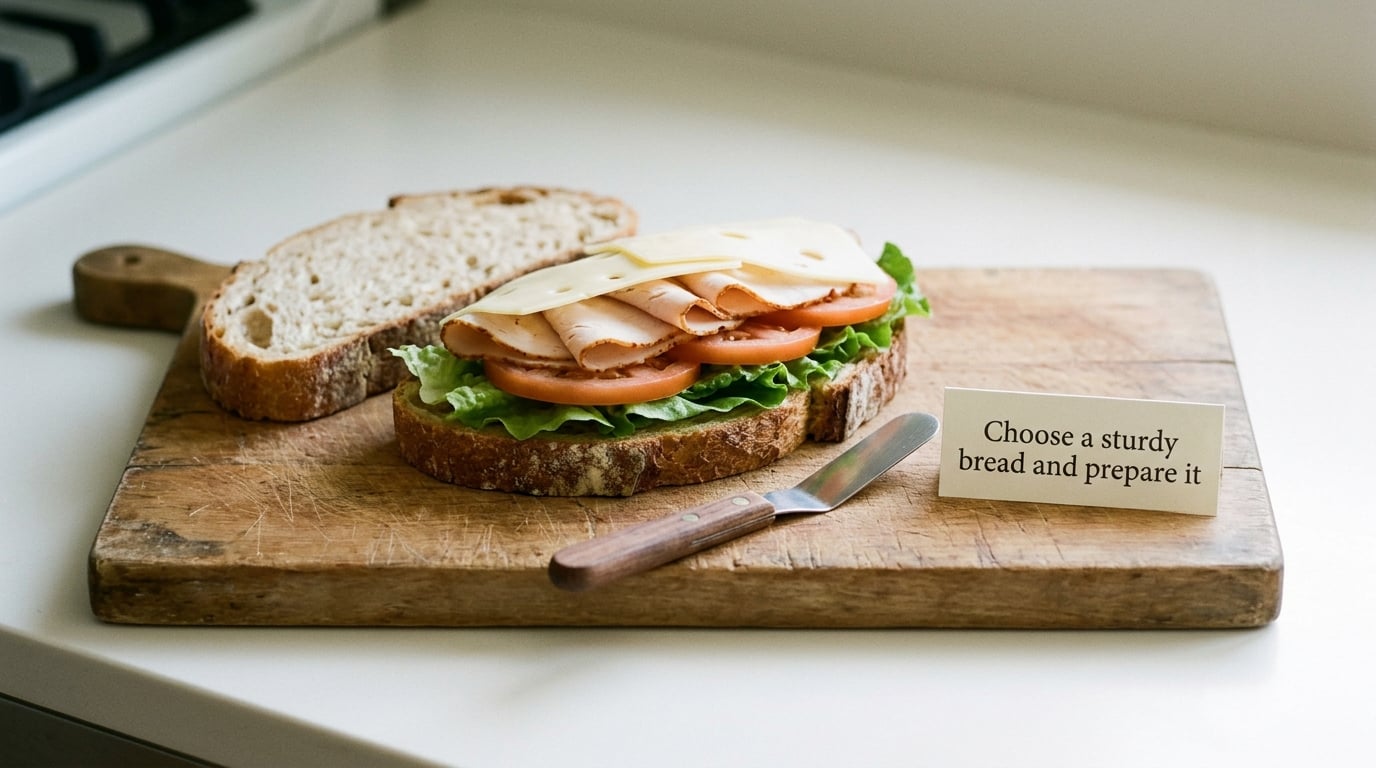
Pick a slice that is at least 3/4 inch thick and slightly larger than the fillings you plan to use. Trim the crust if the sandwich is going to be wrapped or packed, but leave it on for a sandwich you will eat right away — the crust is part of the structure.
Toast the cut faces for 4 to 5 minutes in a 400°F oven, or a couple of minutes in a dry skillet with a little butter. You want the surface firm, not browned. A toasted face absorbs less moisture from the spread and from a tomato, and it does the structural work of a firm base.
Warm bread is the one exception to the cold-cut rule. If you are pressing a melt, warm both slices for 3 minutes so they are flexible, then fill. You will know the toast worked when the slice bends slightly without cracking at the edge.
2. Spread the barrier ingredient first
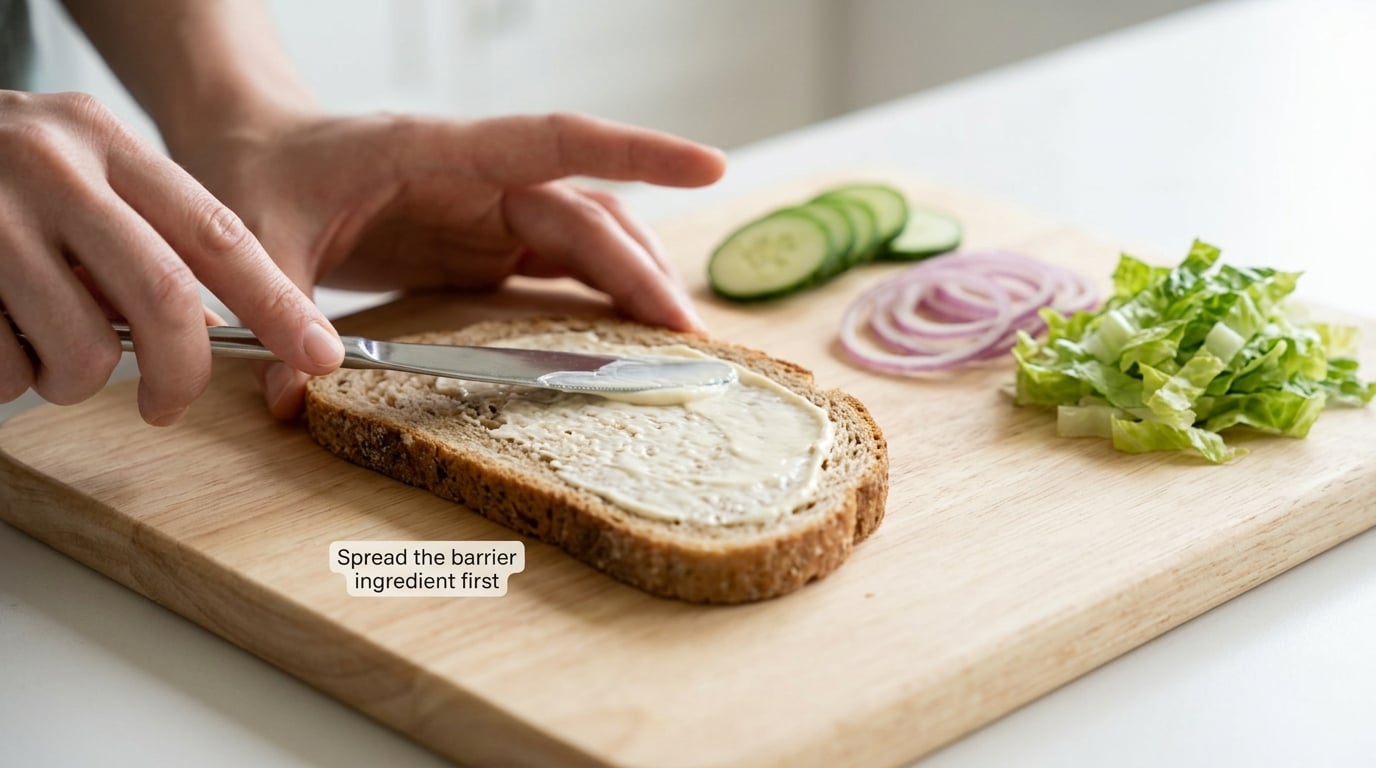
Spread the cut face of the bottom slice edge to edge, about 2 tablespoons of mayo or 1 tablespoon of mustard. Use the back of the spatula and go in one direction so the layer is the same thickness across the whole slice.
Coating every inch is what makes this a barrier. A bare strip of bread, even a quarter inch wide, becomes a dry line that the rest of the slice tears along when you cut. Season the spread now with salt and pepper while it is still wet, and any seasoning you add now will not fall off later.
Do not add a second layer of spread on top of this one. Two spreads slide against each other and create a gap the filling can sink into.
3. Add the firm filling first to layer a sandwich that holds
The first solid layer sets the geometry of everything above it. Lay the folded deli meat or the sliced cheese flat on the bottom slice, leaving a 1/2 inch margin all the way around. That margin is what keeps the stack from sliding off the bread when you pick it up.
Fold cold cuts into a loose wave rather than stacking them flat, and overlap the slices so no two edges line up. Straight edges stacked at the same angle create a weak seam and the whole column tilts.
Then put a slice of cheese or a leaf of romaine directly on top. This is the layer that matters most for moisture, because it is the last dry surface before anything wet arrives. Cheese on the bottom and another slice on top of the vegetables means moisture is sealed inside the filling instead of migrating into the bread.
4. Layer the remaining fillings in order
Pack shredded lettuce in as a tight, even mat, roughly 1/4 inch deep. Use your hands to gather it into the corners, because loose lettuce is what lets wet ingredients drop to the bottom of the bag.
Now the wet ingredients. Blot thick tomato slices, drain pickles, and lay them from the center outward rather than end to end, so the pieces overlap instead of forming a channel that juice runs down. Keep them at least 1 inch from the edges. This is the one rule that most reliably stops a soggy sandwich.
Onions and pickles go above the tomato, not below. Raw onion is sharper when it sits near the top of the stack and the aroma stays in the sandwich instead of escaping through the bread.
Add the soft or seasoned layer last if the sandwich needs height: bacon, olives, roasted peppers, avocado, or a second protein. Anything fragile belongs up here, where the top slice presses it into place rather than crushing it. If you are assembling a very tall stack, build it top-down instead — start with the top slice on the board, add the fragile ingredient to it, and work your way down. The fragile item then ends up where the pressure is lightest.
5. Add the top spread and close the sandwich
Season each layer as it lands: pepper on the meat, salt on the tomato, a pinch of garlic or onion powder on the cheese. Deli meat already carries a lot of salt, so taste before you add more. Over-seasoning is the most common reason a home sandwich is louder than the shop version.
Spread the top slice lightly if the ingredients above were dry, or skip the spread entirely if you already used a lot on the bottom. Too much spread on both faces is why fillings squirt out during transport.
Set the top slice down, then nudge it so all four edges align. Press once, firmly but briefly, with the palm of your hand. A single press knocks the air pockets out and lets the layers touch. Then stop, and leave it alone. Repeated pressing compresses the bread and pushes the filling toward the edges, which is the opposite of what you want.
6. Cut cleanly and check the balance
Use a long serrated knife and saw in one direction with light pressure rather than pushing straight down. Sawing heats the blade less and keeps the bread from compressing. Cut on a board with a damp towel underneath to stop the whole sandwich from sliding as you cut.
Cut diagonally on a long sub, straight down the middle on a round or small square sandwich. A diagonal cut gives a bigger face per bite and makes a tall stack less likely to tip.
Open one half and check the cross-section. Every layer should reach close to the edge, with no gaps and nothing hanging out. If a layer stops an inch short of the edge, your next sandwich is over- or under-filled at that point, and you can fix it by trimming that ingredient to fit. If the top slice is domed, you have too much filling or too soft a bread — the next one should be spread thinner or use a sturdier slice.
Layer order changes for subs, clubs and melts
The canonical order holds, but sandwich type moves a few layers. Sub sandwiches need the protein arranged in overlapping rows along the length rather than in one thick slab. Clubs use three slices of bread, and the middle slice has to be sturdy enough to carry the filling on its own. Pressed melts reverse the logic: sturdy protein and cheese go on the bottom where the heat reaches them, the cheese touches the bread directly so it melts into the surface, and the moist toppings go on after pressing.
| Sandwich type | Order variation | Note |
|---|---|---|
| Sub or hoagie | Spread, meat rows, cheese, shredded lettuce, tomato, olives and peppers, top spread, top half | Overlap meat 2 inches; do not chop it into a pile |
| Club | Toast bottom, spread, turkey, bacon, lettuce, tomato, middle slice, more spread, ham and cheese, top slice | Toast the middle slice too; it carries the weight |
| Chopped Italian | Spread, chopped cold cuts, cheese, shredded lettuce, peppers, sliced olives, top spread, top slice | Chopped meat is the tallest layer, so keep it inside the edges |
| BLT | Spread, bacon, lettuce, tomato, top spread, top slice | Layer bacon directly on the spread, the reverse of most rules |
| Reuben | Spread, Swiss cheese, corned beef, sauerkraut, second slice of cheese, top slice | Cheese on both sides of the meat traps the sauerkraut brine |
| Pressed melt | Cheese on bread, protein, then press; add moist toppings afterward | Wet fillings steam and soften the bread if they go in before pressing |
Common Mistakes
Every one of these has a specific fix, and none of them are about technique so much as restraint.
1. Uneven spreading
The fix: spread on the first slice before you start, and hold the knife or spatula at one consistent angle for the whole surface. Streaks dry out faster than flat areas, and the dry streaks tear when the sandwich is cut.
2. Portions that are too thick
The fix: 3 to 4 ounces of meat, one slice of cheese per 2 to 3 ounces, and a 1/4 inch bed of lettuce. A sandwich that needs a knife and fork to eat is a sandwich that will not survive the walk to work.
3. Wet ingredients placed directly on bread
The fix: put a lettuce leaf or slice of cheese under every wet ingredient, and keep wet items 1 inch from the edge. Blot tomatoes on a paper towel before they go in, and drain pickles rather than pouring off the brine.
4. Random ingredient order
The fix: work bottom to top in the seven-layer order and do not jump ahead. The single most common deviation is putting lettuce directly on the bottom bread instead of above the protein, which is exactly the layer the lettuce is supposed to protect.
5. Overstuffing
The fix: build it, press it once, then look at the cross-section. If the top slice sits above the filling by more than its own thickness, take one layer out. A slightly short sandwich is a better sandwich than one that sheds filling onto the shirt.
6. Cutting too early
The fix: let the sandwich rest for two minutes after pressing. The spread and the bread finish settling into each other in that time, so a cut sandwich holds its layers instead of spreading them out on the board.
7. Skipping the seasoning pass
The fix: season as you stack, lightly, and taste before you add. Salt on the tomato, pepper on the meat, a pinch of garlic or onion powder on the cheese. This is also the main difference between a sandwich that is good on the first bite and one that is still good on the last.
Frequently Asked Questions
What is the best order to layer sandwich ingredients?
Build from the bottom up: spread first, then a sturdy protein, then cheese, then a dry lettuce barrier, then wet vegetables, then soft or seasoned extras, and the top slice with a light spread last. Wide flat items go low so the stack stays stable, and anything wet sits above a dry layer so it never touches the bread directly. This order also spreads flavor evenly from the first bite to the last.
Should I toast bread before adding sandwich fillings?
Yes, for most deli-style sandwiches. Toast the cut faces for 4 to 5 minutes at 400°F, or until the surface is firm and barely colored. Toasted bread absorbs less moisture from the spread and from wet fillings, and it holds a tall stack without bending. Leave the bread soft only for a cold-cut sandwich where a soft interior is the point, and warm rather than toast it for a pressed melt so it stays flexible.
How do I keep a sandwich from getting soggy?
Create a dry barrier between the wet ingredients and the bread. Put a lettuce leaf or a slice of cheese under every wet item, and add a second cheese slice above the fillings so moisture is trapped inside the sandwich. Blot thick tomato slices on a paper towel, drain pickles, keep wet ingredients at least 1 inch from the edges, and spread the cut face edge to edge so there are no bare strips for liquid to track along.
What goes on first when making a deli-style sandwich?
The spread goes on first, applied to the cut face of the bottom slice all the way to the edges. Mayo, mustard or dressing seals the bread, gives the dry seasoning something to stick to, and keeps the first bite from tasting like plain toast. A thin layer is better than a thick one: about 2 tablespoons of mayo or 1 tablespoon of mustard per slice.
How much filling should I put in one sandwich?
Use 3 to 4 ounces of deli meat per sandwich, which is 8 to 10 thin slices or about 3 slices of a thicker cut. Add one slice of cheese for every 2 to 3 ounces of meat, and keep the lettuce bed to about 1/4 inch. Leave a 1/2 inch margin of bread around all four sides. If the top slice domes up when you close it, the filling is too generous and one layer needs to come out.
Can I layer a sandwich ahead of time for lunch?
You can, but build it no more than a few hours ahead and keep it cold. Assemble the stack without cutting it, wrap it in parchment or a paper wrapper rather than plastic, and refrigerate it at or below 40°F until you leave. Perishable sandwiches should not sit out longer than two hours, or one hour in hot weather. For longer storage, pack the wet ingredients separately and assemble in the morning so the bread stays dry.
Final Tips for a Deli-Style Sandwich
Start with step one: toast the bread and spread the bottom slice edge to edge before anything else goes near it. That first layer is the one that decides whether the rest of the sandwich holds together, and skipping it is the shortcut that produces soggy bread by lunch.
After that, work strictly bottom to top and keep a half-inch margin of bread around every layer. Season as you go, lightly, and press exactly once. Two minutes of rest, a long serrated knife, and a diagonal cut on a long sandwich will finish it off.
Once you have the order down, it takes about 10 minutes and no special equipment, and it works the same way whether you are making a quick sub on a Tuesday or packing a deli-style sandwich to take to work. You can practice on a simple turkey and cheese, then apply the same order to whatever you have in the fridge.