
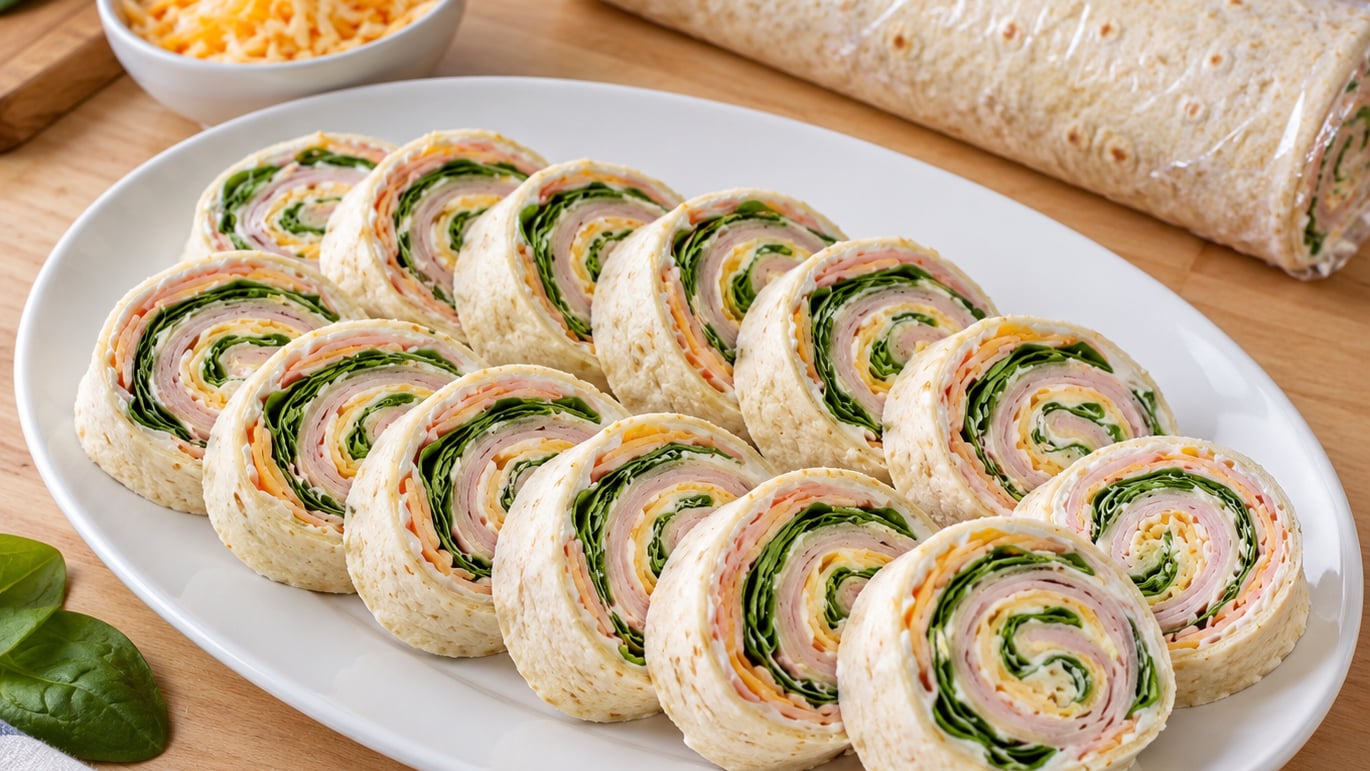
Pinwheel sandwiches are a soft flatbread spread with a creamy binder, layered with meat, cheese and vegetables, rolled into a tight log, chilled until firm, then sliced into one-bite rounds. Active time is about 20 minutes, plus 1 to 2 hours in the refrigerator, and most of that waiting happens while you do something else.
They go by a few names — pinwheel wraps, party wraps, tortilla roll-ups — and they are the reason deli counters sell those spiral things in plastic domes. A homemade version costs a fraction of that and actually looks better sliced on a platter. If you have never rolled one, the whole trick comes down to four things: a flexible base, a thin spread, an even filling layer, and a real chill before the knife comes out.
Here is how to make pinwheel sandwiches the way I do it, with the small cues that tell you the roll is going to hold. It also covers the six ways they usually go wrong, which is where most first attempts fall apart.
Table of Contents
What You Need
The good news is that pinwheels ask for deli-counter basics and nothing special. Everything on this list is either optional or has a substitute sitting in the same aisle.
The Base
A 10-inch burrito-size tortilla is the sweet spot. Eight-inch tortillas work in a pinch, but you get fewer rounds per roll and the filling-to-wrap ratio tips toward soggy. Flour tortillas are the easiest to roll because they bend without cracking. Corn tortillas are fine once warmed, and they should be warmed — cold corn cracks at the first fold, which is the single most common reason a roll tears.
Two other bases work well. Lavash flatbread is thin, pliable and naturally flexible, so it barely needs coaxing. Flattened sandwich bread is the soft, bakery-style option, and you press each slice flat under a rolling pin with a clean kitchen towel on top so it does not stick to the pin.
The Binder
This is the glue. Softened cream cheese works better than almost anything else because it seals the seam and holds moisture away from the wrap. Other good binders: mayonnaise, hummus, softened butter, pesto, almond butter for sweet versions, or a block of cream cheese blended with ranch seasoning for the classic party flavor. Let the cream cheese sit out 20 minutes first; cold cream cheese drags across the tortilla and tears it.
The Fillings
About 1/3 cup of filling per 10-inch tortilla is the right amount. More than that and the log bulges and springs open when you cut it. Good choices include sliced deli meat, sliced cheese, shredded cheese, roasted peppers, olives, banana peppers, shredded lettuce (dry), spinach leaves, and cucumbers patted very dry.
Skip raw tomato and fresh cucumber if you are making them the night before. Those two release water faster than anything else you will put in a wrap, and you will wake up to a soft, leaky log.
The Tools
A sharp non-serrated knife, a cutting board, plastic wrap or parchment, and a shallow dish or sheet pan. A rolling pin is only needed for the flattened-bread method. Set aside about 30 minutes of quiet counter space; the rolls do best when they chill somewhere flat.
Step-by-Step: How to Make Pinwheel Sandwiches
Step 1: Choose and soften the flatbread
Lay your tortillas out and check each one for cracks or dry spots. If it resists when you lift the corner, warm it for 10 to 15 seconds in a dry skillet or a 350°F oven, then let it cool just enough to handle. You want it flexible, not hot — warm tortilla bends, cold tortilla splits.
Step 2: Spread a thin, even layer
Stir the softened cream cheese so it spreads without lumps, then lay it on the tortilla with the back of a spoon in long strokes. Go about an eighth of an inch thick and cover the surface right out to the edges, leaving only a one-inch bare strip along the far edge. That bare strip is where you start the roll, and dry tortilla folds cleanly instead of tearing. Too much spread is the number-one cause of squashed, soggy pinwheels.
Step 3: Arrange the fillings in bands
Build overlapping horizontal bands across the middle two-thirds of the tortilla. Think stripes, not a pile: meat in one band, cheese in the next, vegetables in a third. Overlap each band by about a quarter inch so there are no bare channels for the cream cheese to grab. Spinach and shredded lettuce go in first, meat next, cheese on top.
Pat any fresh vegetable dry with a paper towel before it goes on. That one extra step is the difference between crisp pinwheels at hour six and a damp log at hour two.
Step 4: Roll the sandwich tightly
Start at the bare edge nearest the fillings. Press down first with the flat of your hand, then roll forward, tucking the tortilla against itself as you go so the filling stays in a tight cylinder instead of riding along loose. Keep even pressure with both hands and keep the seam lined up with the last wrap.
If you feel a bulge, stop and redistribute before continuing rather than tightening harder. A tight roll that is even all the way around gives you a clean spiral in every slice; a roll that is tight at one end and slack at the other gives you a pinwheel that unravels halfway through the tray.
Step 5: Chill before slicing
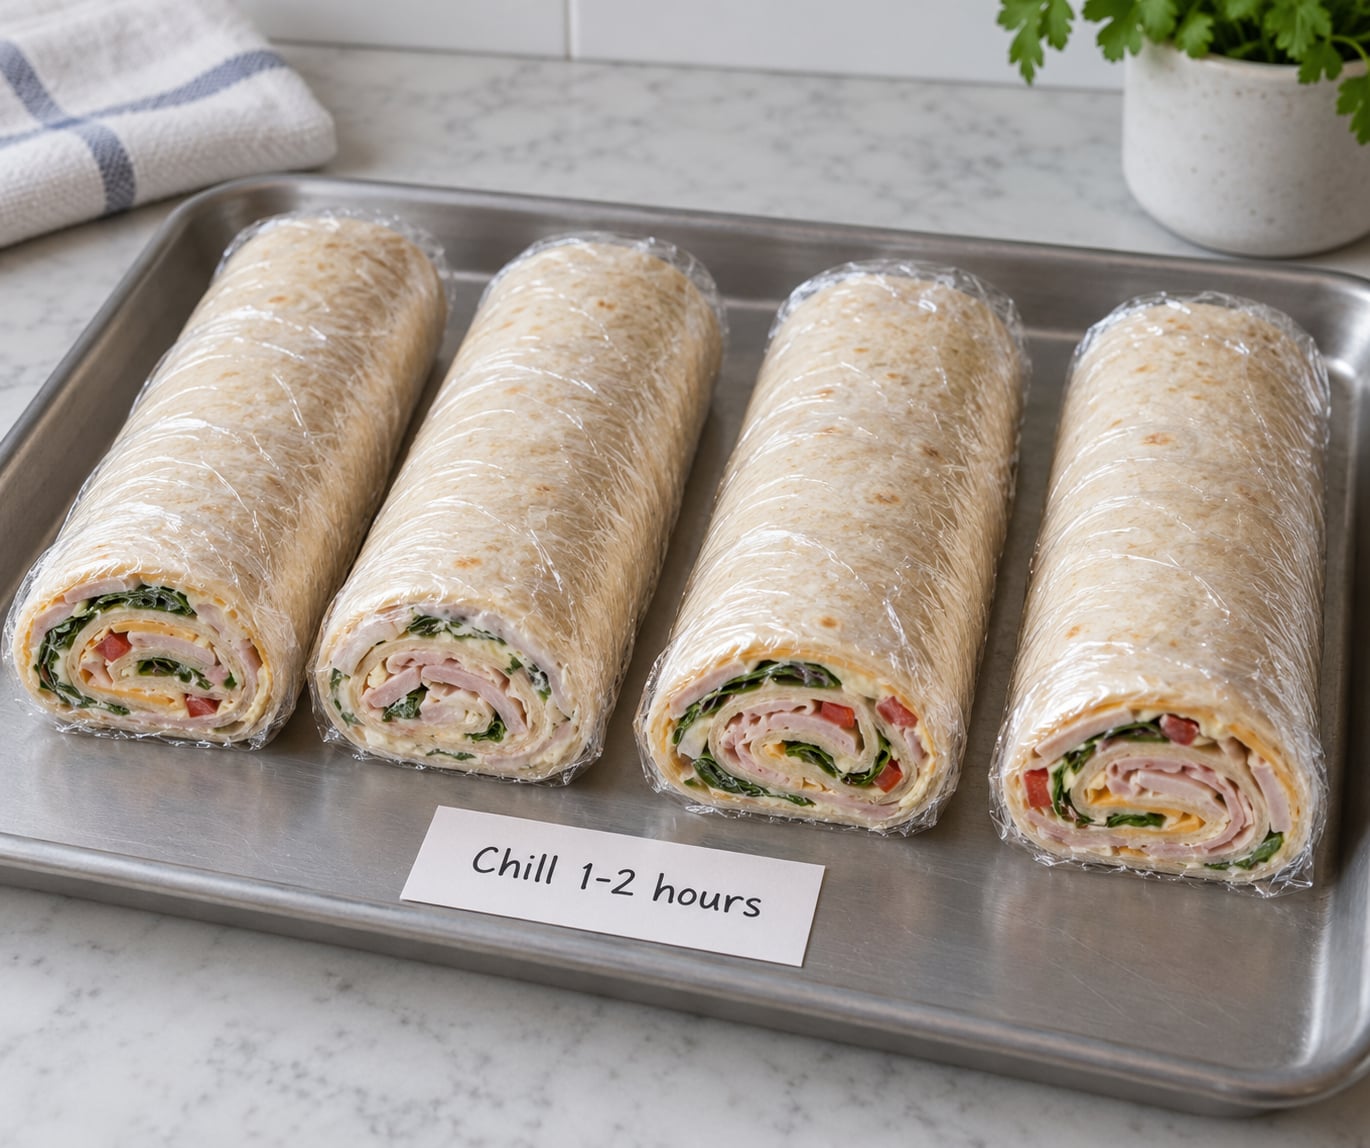
Wrap each finished log tightly in plastic wrap and refrigerate for 1 to 2 hours. Two hours is better if you have the time. Chilling firms the filling so it stops shifting under the knife, and it takes moisture out of the tortilla so the slice holds its shape instead of compressing.
Keep the logs seam-side down while they chill, on a flat tray or in the shallow dish, and do not stack them on top of each other. If you need them for a road trip or a picnic, wrap them uncut and carry the whole log — sliced pinwheels are the first thing to dry out in transit. For ideas on sandwich food that holds up on the move, have a look at our picks for pressed picnic sandwiches that travel well.
Step 6: Slice and serve
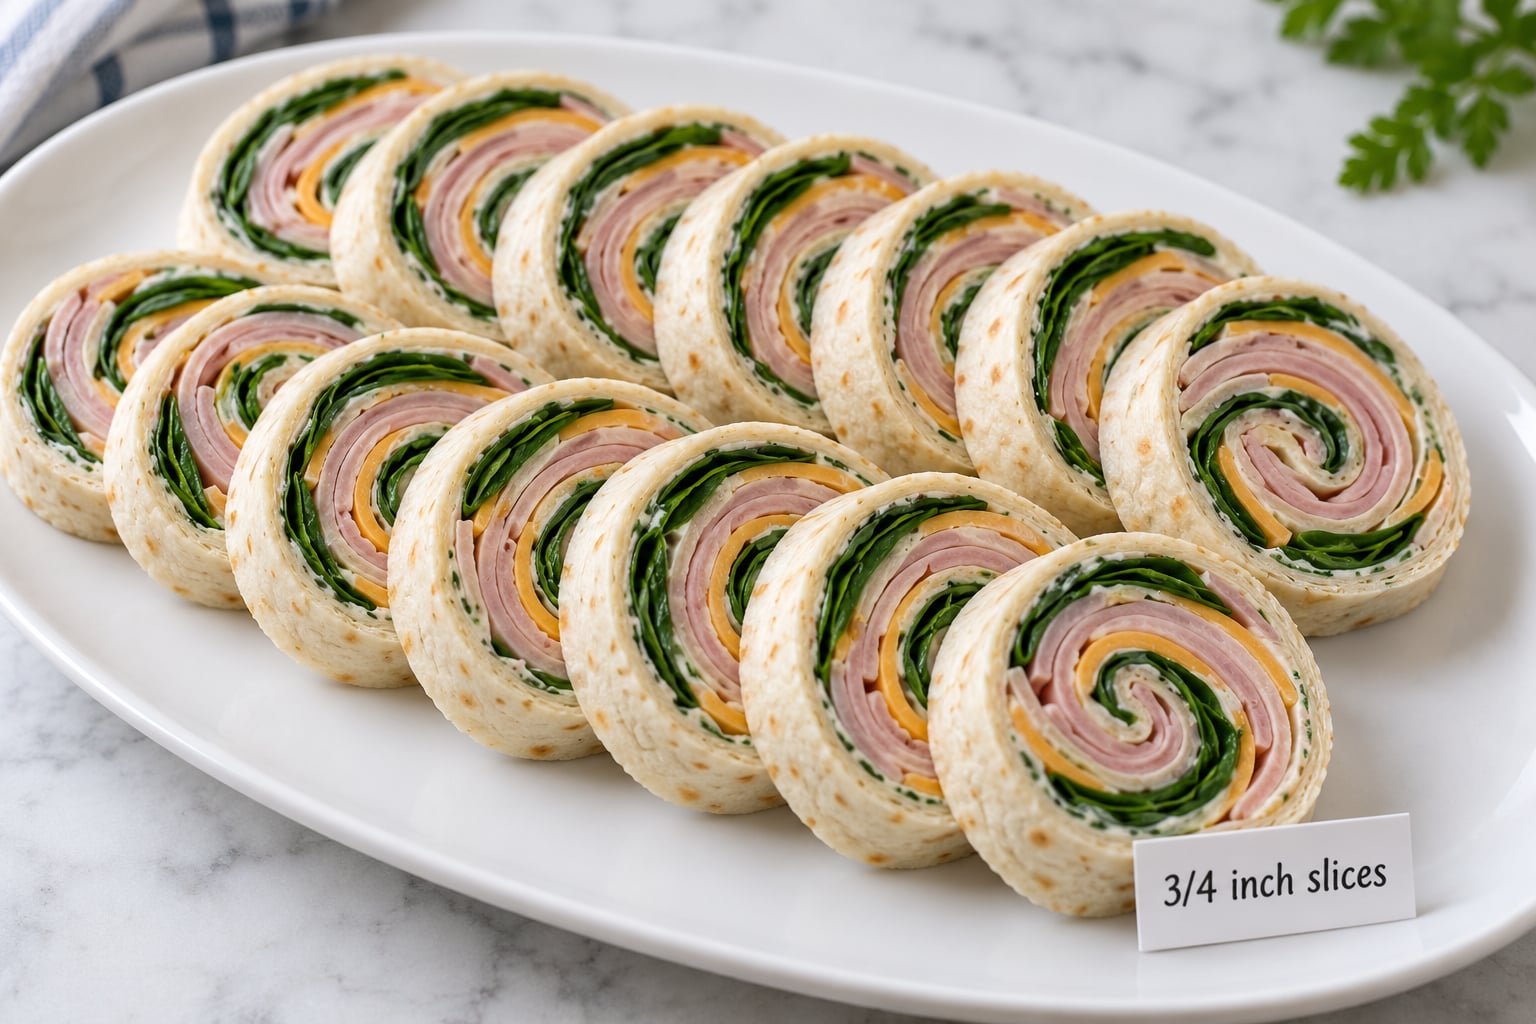
Put the chilled log seam-side down on your board and cut straight across, crosswise, in 3/4- to 1-inch rounds. A sharp knife warmed under hot water and wiped dry gives you the cleanest cut, but do not worry about the fancy stuff — a dull knife crushes the tortilla, and that is what produces pinwheels with ragged, torn edges.
Stand them cut-side up on a platter rather than stacking them. Cut-side up shows off the spiral, which is the whole point, and it keeps the top slice from smudging the one under it. Leave them out of direct sun for longer than an hour; a plain damp towel over the tray buys you another hour or so on a counter.
For a school lunch, two fillings maximum is the rule. Soft flatbread, cream cheese, turkey, and mild cheddar roll up cleanly for a seven-year-old, and I would skip the olives. If your kid is at the stage where sandwich-shaped foods are a hard sell, our list of sandwiches for kids who don’t like sandwiches has some other shapes that get eaten.
How to Make Pinwheel Sandwiches That Stay Neat
If your pinwheels unroll, the cause is almost always air. People roll too fast and too loose, so pockets of air sit inside the log and push the spiral apart when the knife goes through. Press along the length of the roll with your palm after each turn, and squeeze the finished log gently along its whole length before you wrap it.
If you get a hole in the middle, the tortilla cracked at the start of the roll while it was still cold. Warm it first and start the roll from a well-spread edge. A thin strip of cream cheese along that starting edge also helps, which is the trick people on r/Cooking and r/foodhacks describe as glue.
If the slices fall apart when you lift them, they were not chilled long enough or the filling was too loose. Chilling longer fixes it; a thinner layer of filling fixes it permanently.
And if you are seeing sogginess after a night in the fridge, add a barrier. Meal preppers on r/MealPrepSunday put a slice of cheese between the wrap and the moist ingredients, which buys you a full extra day before the tortilla softens.
Common Mistakes
Almost every disappointing pinwheel traces back to one of six things. Here is what went wrong and the fix.
The spread is too thick. A quarter-inch layer of cream cheese is plenty. Thick spread plus a full 1/3 cup of filling gives you a log with no structure, and it squashes flat under its own weight in the fridge.
The vegetables were not dried. Wet cucumber and tomato leak into the tortilla within hours. Pat them dry, or use shredded carrot, roasted pepper, or jarred banana peppers instead.
The filling bands were uneven. A thick band in the middle and nothing at the ends gives you a spiral that pinches. Keep every band the same depth and overlap them slightly so the filling travels the full width.
The roll was skipped. This is the big one. Chilling is not a nice-to-have; it is what turns loose ingredients into a slice that holds its shape. Even 45 minutes helps, but give it the full 1 to 2 hours.
You cut along the roll instead of across it. Slicing lengthwise gives you a long open sandwich with the fillings spilling out. Cut crosswise, straight down, in rounds.
The bread was too rigid. Day-old sandwich bread, cold corn tortillas, and untoasted pita all crack under the first fold. Warm any of them briefly, or switch to a flour tortilla.
For serving, put out the platter about 15 minutes before guests arrive so the slices lose their fridge chill. Keep them out of direct sun, and if they sit out uncovered in the heat for more than 2 hours, throw them away. If the party runs long, refill in small batches from the fridge instead of setting out the whole tray.
On the storage side, sliced pinwheels keep about 24 hours in an airtight container in the refrigerator, and an uncut wrapped log keeps 3 to 4 days. Freezing is not a good idea — the tortilla goes limp and chewy when it thaws. If you are building a week of lunches, our guide to meal prepping sandwiches for the week without soggy bread covers the same moisture problem from a different angle.
Frequently Asked Questions
What bread is best for pinwheel sandwiches?
A 10-inch burrito-size flour tortilla is the most reliable choice, because it bends without cracking and gives you roughly 10 rounds per roll. Lavash flatbread is even more flexible and needs almost no warming. Sandwich bread works too, but press each slice flat under a rolling pin first. Avoid day-old bread and skip cold corn tortillas, since both crack at the first fold.
What fillings work best in pinwheel sandwiches?
The best fillings are dry, sliced thin and layered in even bands: deli meat, sliced or shredded cheese, spinach, shredded lettuce, roasted peppers, olives and banana peppers. Aim for about 1/3 cup per 10-inch tortilla. Raw tomato, fresh cucumber and pickle spears release too much water and turn the wrap soft within hours, so pat them dry or leave them out.
How do you keep pinwheel sandwiches from getting soggy?
Use a thin layer of spread, about an eighth of an inch, and no more than 1/3 cup of filling. Pat every fresh vegetable dry before it goes on the tortilla, and put a slice of cheese between the wrap and wet ingredients as a moisture barrier. Chill for a full 2 hours, store sliced pinwheels airtight, and try not to stack them in the container on the way to the fridge.
How long should pinwheel sandwiches chill before slicing?
Refrigerate the wrapped logs for 1 to 2 hours, with 2 hours giving the cleanest slices. Chilling firms the filling so it stays put under the knife and draws moisture out of the tortilla so the rounds hold their spiral. For a party the next day, chill overnight. Never freeze them; thawed tortillas turn limp and chewy.
Can pinwheel sandwiches be made ahead?
Yes, and they are one of the better make-ahead appetizers. Build the logs up to 24 hours ahead, wrap each one tightly in plastic wrap, and refrigerate seam-side down on a flat tray. Slice as close to serving as you can. For transport, carry the logs uncut and slice on site — sliced rounds dry out and pick up lint from the container.
How long do pinwheel sandwiches last in the refrigerator?
Sliced pinwheels stay good for about 24 hours in an airtight container. Uncut, tightly wrapped logs keep 3 to 4 days, though the tortilla softens toward the end of that window. Beyond that, the base gets chewy and the spread turns sour. If serving at a party, do not leave them at room temperature for more than 2 hours.
Conclusion
Start tonight with the simplest version: one 10-inch tortilla, softened cream cheese spread thin to the edges, about 1/3 cup of turkey and cheese in overlapping bands, rolled tight from a bare edge, chilled 2 hours, and sliced into 3/4-inch rounds.
That formula — flexible flatbread, light spread, evenly distributed filling, real chilling time — is the whole method. Once you can make pinwheel sandwiches this way, swapping the fillings is a two-minute change, and you will never buy the deli version again.