
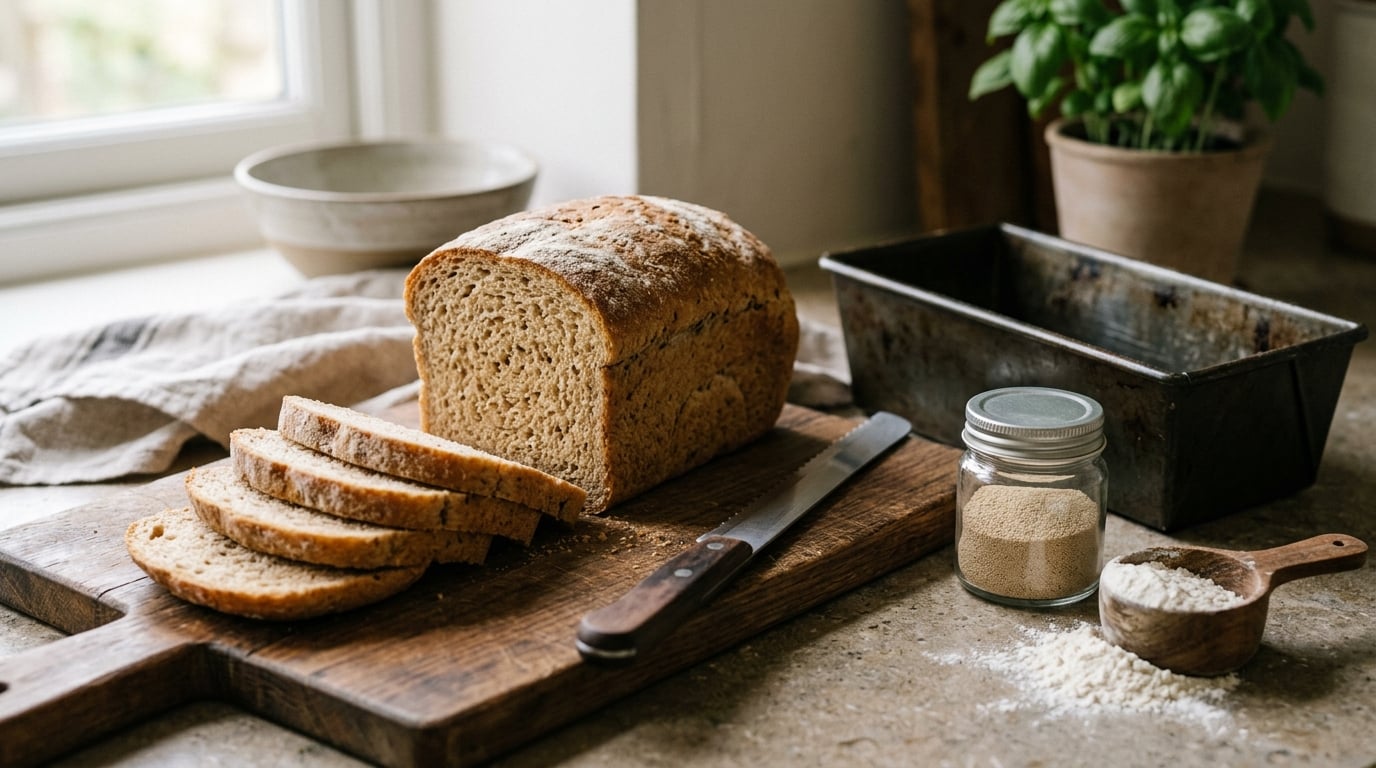
If you have never baked bread before, the best beginner homemade sandwich loaf recipes share three things: a short ingredient list, forgiving dough, and a loaf pan that does the shaping for you. Start with a classic white loaf, learn the rise, then move to milk, honey, oats, and whole grains once you trust your timing. Most of these bake in under an hour once the dough is mixed, and every one of them freezes well for lunchboxes.
There is no point in picking the fanciest loaf for a first attempt. You want soft crumb, straight sides, and slices that hold together around a filling. That is what a sandwich loaf is: a pan-baked yeast bread with enough fat and sugar to stay tender for a few days.
Below I break down ten of the most approachable versions, with gram weights instead of volume cups, separate hands-on and total times, and the specific failure mode to watch in each one. Updated for 2026, and written for a 9×5 inch metal loaf pan unless I say otherwise.
Table of Contents
- Best Beginner Homemade Sandwich Loaf Recipes at a Glance
- 1. Classic White Sandwich Loaf
- 2. Beginner Milk-and-Butter Loaf
- 3. Whole-Wheat Sandwich Loaf
- 4. Honey Whole-Grain Sandwich Loaf
- 5. Soft Potato Dinner Rolls
- 6. Simple Oatmeal Sandwich Loaf
- 7. Basic Sourdough Sandwich Loaf
- 8. Whole-Grain Seeded Sandwich Bread
- 9. Cinnamon Raisin Sandwich Loaf
- 10. Soft Multigrain Loaf
- Frequently Asked Questions
- Which homemade sandwich loaf is easiest for beginners?
- How do I know when sandwich bread dough has proofed enough?
- Can I freeze homemade sandwich loaf slices?
- Should I let homemade bread cool before slicing it?
- Can I turn a sandwich loaf recipe into dinner rolls?
- How can I make sandwich bread softer and easier to slice?
- Conclusion: Start with the Classic White Loaf
Best Beginner Homemade Sandwich Loaf Recipes at a Glance
The table below compares all ten loaves on the things that actually decide whether a recipe suits you: how hard the dough is to handle, the texture you get, and where the loaf earns its keep.
| Loaf | Dough difficulty | Texture | Best for | Bake time | Beginner fit |
|---|---|---|---|---|---|
| Classic White Sandwich Loaf | Easy | Soft, sliceable | Everyday sandwiches and toast | 40-45 min | High |
| Milk-and-Butter Loaf | Easy | Very tender, mild | Children’s lunchboxes | 30-35 min | High |
| Whole-Wheat Sandwich Loaf | Moderate | Firm but not heavy | Adult sandwiches, grilled cheese | 38-42 min | Medium |
| Honey Whole-Grain Loaf | Moderate | Slightly sweet, nutty | Breakfast toast, PB sandwiches | 40-45 min | Medium |
| Soft Potato Dinner Rolls | Easy | Pull-apart, moist | Sliders, lunchboxes, party trays | 12-15 min | High |
| Simple Oatmeal Loaf | Easy | Tender, mild nuttiness | Slicing thin for wraps | 35-40 min | High |
| Basic Sourdough Sandwich Loaf | Challenging | Tangy, chewy | Adults who want real chew | 40-45 min | Lower |
| Whole-Grain Seeded Bread | Moderate | Hearty, soft inside | Open-faced and vegetarian sandwiches | 40-45 min | Medium |
| Cinnamon Raisin Sandwich Loaf | Easy | Sweet, light crumb | Kid’s lunches, French toast | 35-40 min | High |
| Soft Multigrain Loaf | Moderate | Soft with grain texture | Meal prep, mixed-grain households | 38-42 min | Medium |
Bake times assume a preheated oven and a loaf that has actually finished its second rise. An under-proofed dough bakes faster than the clock suggests, which is one reason first loaves come out pale and dense.
1. Classic White Sandwich Loaf
This is the one to bake first, and it is the version most people mean when they say homemade Wonder Bread. A long-running community thread on thefreshloaf.com called it the perfect bread recipe for the beginning baker, and the comment section is where the most useful version of the formula lives: a home baker converted it to grams, added a little vital wheat gluten, and brushed the top with egg wash for color. That is the loaf below.
Ingredients for one 9×5 inch loaf
- 765g bread flour, or 510g all-purpose flour plus 255g bread flour
- 472g water, warmed to about 110F / 43C
- 15g instant yeast (about 1.5 teaspoons)
- 15g sugar
- 50g oil or melted butter
- 14g salt (about 2.5 teaspoons)
- Optional: 8g vital wheat gluten, 1 beaten egg for brushing
Method
- Whisk the flour, yeast, sugar, and salt in a large bowl. Instant yeast does not need waking up in warm water, so it goes in dry.
- Add the warm water and oil. Stir with a sturdy spoon until no dry flour is left, about 1 minute.
- Cover and rest 10 minutes. This autolyse step hydrates the flour and starts gluten forming on its own, which means less kneading for you.
- Knead on a lightly floured surface for 8 to 10 minutes until the dough feels smooth and slightly tacky. If you own a stand mixer, use the dough hook at speed 2 for 8 minutes instead.
- Put it in a lightly oiled bowl, cover, and leave in a warm spot for 1.5 to 2 hours, until the dough has roughly doubled and pokes back slowly when you press a floured finger into it.
- Punch down, then shape into a tight log and place seam-side down in a greased 9×5 inch loaf pan.
- Cover and proof 45 to 60 minutes, until the dough crowns just above the rim of the pan.
- Bake at 350F / 177C for 40 to 45 minutes, until the internal temperature reaches 195F / 90C.
- Cool on a wire rack for 2 hours before slicing. Cutting it warm gives you a gummy crumb.
Why beginners like it
Nothing about this dough punishes impatience during the first rise. Bakers on r/Breadit describe it as forgiving, reporting that dough that felt too sticky still improved after the first rise. One first-timer summed it up plainly: “First time making sandwich bread. I will never go back to store bought.” The sticky-dough moment is where most beginners quit, and this recipe is the best place to learn to push through it.
Use a scale. A scooped cup of flour can carry half again the weight of a spooned one, and that single error is the most common reason a beginner loaf comes out short and dense.
2. Beginner Milk-and-Butter Loaf
Milk and butter replace most of the water and add fat, and the result is the mildest, softest crumb of any loaf on this list. It is the recipe I would hand to a parent who is packing lunches for a picky six-year-old, because there is nothing in the crumb to argue with.
Ingredients
- 510g bread flour
- 397g whole milk, warmed to 100F / 38C
- 85g unsalted butter, softened
- 51g sugar
- 7g salt
- 4g instant yeast (about 1 teaspoon)
- 1 egg for brushing, plus a tablespoon of milk
Method
- Mix the flour, sugar, salt, and yeast, then add the warm milk and stir to a shaggy dough.
- Rest 10 minutes, then work in the softened butter in three or four additions. Enriched dough tears if you rush it, so knead gently for 6 to 8 minutes only.
- Rise 1 to 1.5 hours until doubled.
- Punch down, shape, and place in a greased pan.
- Proof 45 minutes, brush with egg and milk, and bake at 350F / 177C for 30 to 35 minutes, until 195F / 90C inside.
- Cool fully, at least 2 hours.
Keeping the bottom from going dense
Three things cause a heavy bottom in an enriched loaf: under-baking, a pan that was not hot enough, and slicing while the crumb is still setting. Brush the loaf with egg for both browning and a crisper base, and if your oven runs cool, add 5 minutes rather than cutting the bake short. Line the base with parchment if your pans have a rough seam that catches the dough as it spreads.
3. Whole-Wheat Sandwich Loaf
Whole-wheat sandwich bread only goes wrong when it is treated like a white loaf with the flour swapped. Bran is sharp and thirsty, so it needs more water than the same volume of white flour, plus a little help from extra gluten to build structure. Half whole wheat, half bread flour is the honest starting point for a crumb that is firm but not heavy.
Ingredients
- 255g whole-wheat flour
- 255g bread flour
- 397g water, plus 1 to 2 tablespoons more if the dough looks tight
- 51g honey
- 15g oil
- 8g vital wheat gluten
- 7g salt
- 4g instant yeast
Method
- Mix dry ingredients, add water, honey, and oil, and knead 8 to 10 minutes.
- Bulk rise 1.5 to 2 hours.
- Shape and pan, then proof 50 to 70 minutes. Whole wheat proofed dough is hard to read visually, so use the knuckle test: press firmly, and if the dent springs back only halfway, it is ready.
- Bake at 350F / 177C for 38 to 42 minutes, until 195F / 90C internal.
The beginner trap
People blame whole wheat for making bread dense when the real culprit is hydration. A 50/50 blend at roughly 68 percent hydration behaves like a soft dough. If yours feels like stiff modeling clay, add water a tablespoon at a time and knead it in. The first rise should take longer than a white loaf, so judge by the doubling, not the clock.
4. Honey Whole-Grain Sandwich Loaf
Honey replaces sugar and gives this loaf a mild, floral sweetness that plays well with peanut butter and fruit. The whole-grain side needs a second look at moisture, because honey holds water in the dough and bran drinks it up at the same time.
Ingredients
- 280g whole-wheat flour
- 120g bread flour
- 397g water
- 85g honey
- 30g oil
- 12g salt
- 4g instant yeast
Method
- Dissolve the honey in warm water before adding it, so it distributes instead of sitting in streaks.
- Mix, knead 8 minutes, and bulk rise 1.5 to 2 hours.
- Shape, pan, and proof 50 to 70 minutes.
- Bake at 350F / 177C for 40 to 45 minutes, until 195F / 90C inside.
Grain substitutions that keep it light
Swap in rye, barley, or oat flour for up to a third of the total flour and the loaf stays workable. Push past a third and the crumb turns dense and tight, which is the difference between a whole-grain sandwich loaf and a brick. Also keep salt near 12g. Forum bakers often find that amount high until they compare it to commercial bread, which carries roughly 1.5 percent salt by weight for the same reason.
5. Soft Potato Dinner Rolls
Mashed potato is the quiet reason restaurant rolls stay soft for a day. The starch feeds the yeast, the moisture stays locked in the crumb, and the rolls keep longer than a plain flour dough. This is a loaf formula turned into rolls, so it is also the easiest way to make one batch feed a whole week of lunches.
Ingredients
- 450g mashed potato, cooled to room temperature (about 1 large russet)
- 340g water
- 500g all-purpose flour
- 30g butter, softened
- 15g sugar
- 10g salt
- 4g instant yeast
- 1 egg plus 1 tablespoon of milk for brushing
Method
- Combine everything except the egg wash and knead 8 to 10 minutes. Potato replaces some of the water, so this dough is stickier than a standard white dough. Oil your hands instead of adding more flour.
- Rise 1 to 1.25 hours until doubled.
- Punch down and divide into 16 pieces of 65g each. Roll each into a tight ball, tuck the seam down, and arrange seam-side up in a buttered 9×13 pan.
- Cover and proof 30 to 40 minutes until puffy.
- Brush with egg and milk and bake at 375F / 190C for 12 to 15 minutes until golden.
Scaling and shaping
Commenters on that same Fresh Loaf thread divided the base dough into 75g pieces and made hot dog buns and knotted rolls that way, and it worked. A 75g piece is the sweet spot for a slider; go above 100g and you get dinner rolls rather than sandwich buns. For a hamburger-style shape, flatten each ball slightly before the second rise so it spreads instead of doming.
6. Simple Oatmeal Sandwich Loaf
Oats add soluble fiber and a mild, nutty flavor without the weight of bran-heavy flours. The crumb is tender enough to slice paper thin, which makes this the loaf I reach for when the sandwich is something like a wrap filling.
Ingredients
- 100g rolled oats
- 400g all-purpose flour
- 340g water, warmed
- 60g honey or 85g molasses
- 30g oil
- 10g salt
- 4g instant yeast
Method
- Mix and knead 7 to 8 minutes. Oats soften during the first rise, so stop before you think the dough needs more work.
- Rise 1 to 1.5 hours, shape, pan, and proof 45 to 60 minutes.
- Bake at 350F / 177C for 35 to 40 minutes, until 195F / 90C internal.
Rolled, quick, and adding seeds
Rolled oats keep visible texture and are what I use. Quick oats hydrate faster and make a slightly denser loaf, so if you swap, use 60g of quick oats and drop the all-purpose flour by 60g. Seeds and nuts are safe up to about 50g per loaf, and above that the dough cannot hold the extra weight and goes dense. Cut the honey by 15g when you add them, since nuts already bring sweetness.
7. Basic Sourdough Sandwich Loaf
Sourdough is the hardest of the ten and I want to be straight about that. It takes an active starter, a longer schedule, and judgment calls that white bread does not. What makes this version worth attempting is that it uses stretch and fold instead of kneading, and it ferments cold overnight, so the active work is short and spread out. If you do not already keep a starter, make this your third or fourth loaf, not your first.
Ingredients
- 150g active sourdough starter at peak
- 397g water, plus 1 tablespoon held back
- 450g bread flour
- 15g honey
- 10g salt
Method
- Mix flour, water, and honey. Rest 30 minutes, then add the starter and salt with the reserved water and mix until no streaks remain.
- Do four sets of stretch and fold, 30 minutes apart, working in a wet dough. Each set is 30 seconds per side.
- Bulk ferment 4 to 6 hours at room temperature until the dough has risen about 50 percent and shows bubbles at the edges. This is the step to watch, not time.
- Pre-shape into a round, rest 20 minutes, then shape tightly into a loaf tin.
- Cold proof in the refrigerator 8 to 14 hours.
- Bake at 375F / 190C in a covered pot or with a lid on for 20 minutes, then uncovered for 25 minutes, until 200F / 93C internal.
Why it still counts as beginner-friendly
No kneading means no gluten windowpane test to pass, and the overnight proof lets you sleep through the hardest part. There is also a useful hardware trick: some readers run a stretch-and-fold dough in a bread machine on repeated short dough cycles to simulate the folds and get a similar texture, and they report it works. It also produces a noticeably chewier crumb than every other loaf here, so it answers a different need.
8. Whole-Grain Seeded Sandwich Bread
Seeded loaves look impressive and forgive a lot, because seeds add flavor and texture while carrying their own fat. The one thing to control is quantity, since every gram of seed beyond a certain point makes the dough heavier than the structure can support.
Ingredients
- 200g whole-wheat flour
- 200g all-purpose flour
- 85g mixed seeds (sunflower, pumpkin, and flax work well)
- 425g water
- 30g oil
- 15g honey
- 12g salt
- 4g instant yeast
Method
- Mix seeds into the dry ingredients first so they distribute evenly.
- Add water, oil, and honey and knead 8 minutes. Expect a slightly sticky dough and resist adding flour.
- Rise 1.5 to 2 hours, shape, pan, and proof 50 to 70 minutes.
- Brush with egg and bake at 350F / 177C for 40 to 45 minutes, until 195F / 90C inside.
Seed quantity and storage
Eighty-five grams is roughly 12 percent of the flour weight and produces a loaf that still slices cleanly. Push to 150g and expect a dense, seed-studded brick. Because seeds pull oil out of the dough, this loaf stales a little faster than a plain white loaf, so freeze slices you are not using within two days. Thaw a slice straight in the toaster for three or four minutes and it behaves like day-one bread.
9. Cinnamon Raisin Sandwich Loaf
A sweet loaf is not an obvious choice for sandwiches, but this one works well for a kid’s lunchbox and for French toast. The dough is a standard enriched loaf with fruit and spice folded in, so the technique is nothing new to learn.
Ingredients
- 500g all-purpose flour
- 340g whole milk, warmed
- 85g sugar
- 85g butter, softened
- 2 eggs
- 150g golden raisins
- 120g hot water for soaking the raisins
- 10g ground cinnamon
- 6g salt
- 4g instant yeast
Method
- Soak the raisins in hot water for 15 minutes, then drain well and pat dry. Skipping the soak leaves hard little pockets in the crumb.
- Mix all ingredients except the raisins, kneading 8 minutes, then fold in the raisins and cinnamon for the final minute.
- Rise 1.5 hours, then roll into a rectangle, fold into thirds like a letter, shape into a log, and pan.
- Proof 45 to 60 minutes and bake at 350F / 177C for 35 to 40 minutes, until 195F / 90C inside.
Keeping the spice in check
Ten grams of cinnamon is the ceiling for a sandwich loaf. Double it and the flavor turns bitter and dark because cinnamon browns faster than the rest of the loaf, which is why many bakers simply leave it out and add the spice to the filling instead. If you want more warmth, use 10g of cinnamon plus 5g of cardamom and drop the sugar to 70g.
10. Soft Multigrain Loaf
True multigrain bread, the kind that is 100 percent whole grain, has a reputation for being dense and hard to slice. That is not a problem with multigrain, it is a problem with a formula that has no light flour and too much hydration. This version blends three grains with all-purpose flour so the crumb stays soft while still tasting like whole grain.
Ingredients
- 200g whole-wheat flour
- 100g rye flour
- 200g all-purpose flour
- 400g water
- 50g honey
- 30g oil
- 12g salt
- 7g instant yeast
Method
- Mix and knead 9 to 10 minutes. Rye dough develops faster than white, so stop as soon as it feels smooth.
- Rise 1.5 to 2 hours, shape, pan, and proof 50 to 70 minutes.
- Bake at 350F / 177C for 38 to 42 minutes, until 195F / 90C inside.
Slicing and freezing this one
Rye stays elastic longer than wheat, so a partly cool loaf feels gummy when you cut it. Give it the full 2 hours on a wire rack, and use a serrated knife rather than a straight edge. This is also the best loaf for freezing in slices: wrap individual slices in plastic, freeze flat on a tray, then bag them so nothing crushes the crumb. They keep up to 3 months and reheat at 350F / 177C for 8 minutes.
Frequently Asked Questions
Which homemade sandwich loaf is easiest for beginners?
The classic white sandwich loaf is the easiest, because its flavor hides small timing errors and a short ingredient list gives you fewer ways to go wrong. It also teaches the one skill every other recipe depends on: reading dough rise instead of following the clock. Milk-and-butter and potato rolls are equally forgiving if you want something softer or a different shape. Save the sourdough loaf for later.
How do I know when sandwich bread dough has proofed enough?
Use the knuckle test. Press a floured finger about half an inch into the dough. If the dent springs back quickly, the dough needs more time. If it springs back slowly and leaves a slight dent, it is ready. During the first rise, the other signal is volume, roughly a doubling. Kitchen temperature matters more than the written time, so watch the dough and not the clock.
Can I freeze homemade sandwich loaf slices?
Yes, and it is the best way to keep bread fresh. Let the loaf cool completely, slice it, and lay the slices flat on a tray to freeze before bagging them so they do not stick. Keep them in a freezer bag or wrap for up to 3 months. Reheat single slices in a toaster or in a 350F / 177C oven for 5 to 10 minutes, and thaw unopened at room temperature for sandwiches.
Should I let homemade bread cool before slicing it?
Yes, and this is the most common last-step mistake. The crumb is still setting and releasing steam as it cools, so cutting a warm loaf gives you a gummy, compressed slice. A standard sandwich loaf needs at least 2 hours on a wire rack, and enriched or sourdough loaves benefit from 3. Cooling on the rack, not a board, keeps the base from going soggy.
Can I turn a sandwich loaf recipe into dinner rolls?
Yes, and it is the easiest way to scale up. Divide the finished dough after the first rise into equal pieces, roughly 65g for sliders or 75g for dinner rolls, shape each into a tight ball or a short log, and place them in a buttered pan. Proof 30 to 40 minutes until puffy, brush with egg, and bake at 375F / 190C for 12 to 15 minutes. The same dough makes hot dog buns and cinnamon rolls.
How can I make sandwich bread softer and easier to slice?
Add fat and sugar rather than more flour, and watch your kneading. Milk, butter, or oil plus a spoonful of honey or sugar tenderizes the crumb, and an egg or two helps further. Over-kneading develops gluten that makes bread chewy and tear-prone, so stop once the dough feels smooth. For slicing, add 8g of vital wheat gluten and bake until the inside reaches 195F / 90C so the crumb sets fully.
Conclusion: Start with the Classic White Loaf
For a first bake, the classic white sandwich loaf on this list is the right call: seven ingredients, a two-hour window, and enough forgiveness that a slow rise will not ruin it. The milk-and-butter loaf is the runner-up if your priority is the softest possible crumb for a child’s lunchbox. Everything from whole wheat onward makes more sense once you trust the knuckle test.
Before you start, weigh your flour, use a warm spot for the rise, and let the loaf cool for a full two hours before the first slice. That is really the whole checklist: measure, watch the dough rise, pan, proof until it crowns the rim, bake to 195F / 90C inside, cool completely, then slice. Master one loaf this month and the other nine stop being recipes and start being small adjustments.